Category: Monitoring & Automation

Monitoring, alerts, controllers and habitat automation.

  • Zoo Med Environmental Control Center review: capable, but wiring-heavy

    Zoo Med Environmental Control Center review: capable, but wiring-heavy

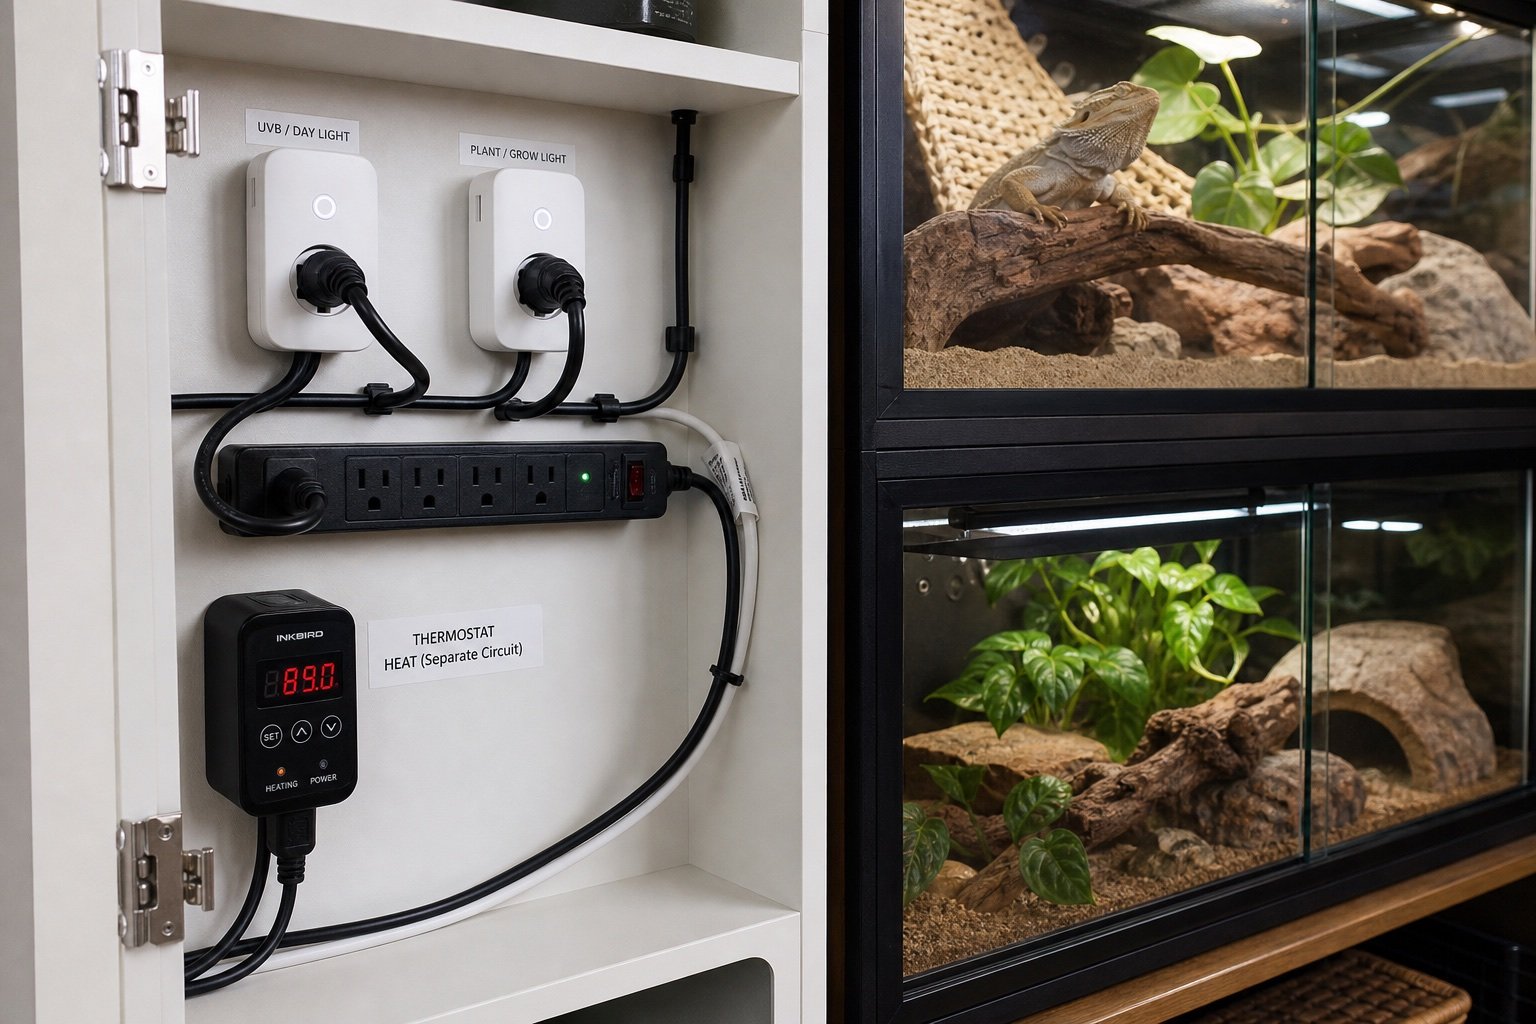
    Quick verdict: Zoo Med’s Environmental Control Center can consolidate heat, lighting and humidity automation around one enclosure. It rewards a patient setup. The number of sockets and probes makes clear labels and staged testing more important than the headline 1000-watt capacity.

    This guide is built around commissioning, not box-opening. Compare it with our thermostat guide and misting system guide before changing a live enclosure.

    Point What to know
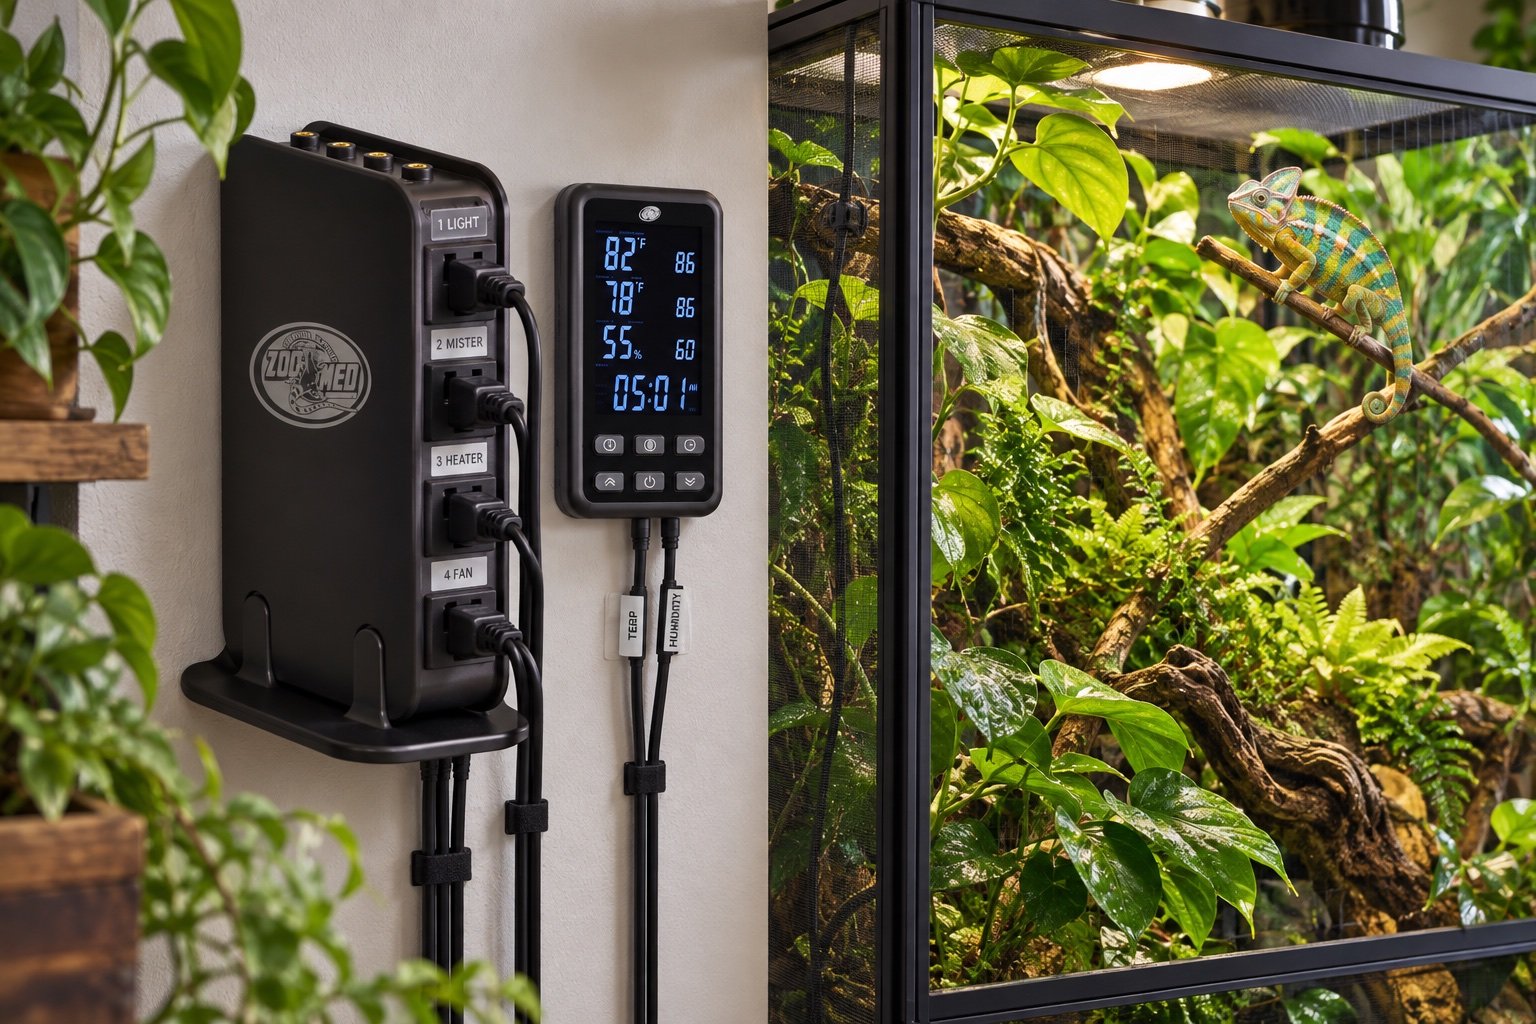
    Sensors 2 temperature probes and 1 humidity probe
    Capacity Controls up to 1000 W total
    Functions Temperature, humidity and timed equipment
    Handset Wired LCD remote, not wireless

    One box can still contain several separate systems

    Heat control, misting and lighting do not share the same safe test. Commission them separately. Start with lights, then temperature, then humidity equipment. Run the complete sequence only after each part behaves on its own. This order makes a crossed socket or poorly placed sensor much easier to identify.

    The handset is wired

    The remote-looking LCD unit connects by cable. That is not a flaw, but it changes mounting. Put it where settings can be read without pulling on the cable and where spray cannot reach it. A keeper expecting phone alerts or cloud history needs a separate monitor. The Control Center is an automation hub, not a remote data logger.

    Humidity control needs a drying plan

    A humidity target does not decide how long surfaces remain wet. Aim the sensor away from the direct mist cone, then watch the recovery curve after each cycle. If the enclosure never dries, adding more automation only hides a ventilation or drainage problem. Pair this setup with the misting drainage guide before increasing run time.

    Treat 1000 watts as a ceiling

    Add the rated loads of every connected device and account for the rules in the manual. Do not route a high-wattage lamp, fogger and heater through an unknown extension lead simply because the controller rating appears large enough. Socket condition, regional voltage and startup behavior matter. The electrical safety checklist covers drip loops, inspection and cable separation.

    The right buyer

    This unit fits a display enclosure with several coordinated devices and a keeper who wants local control in one place. A small habitat with one heater and one light timer will be easier to diagnose with separate, simpler controls. Consolidation is useful only when it reduces a real tangle, not when it turns every failure into a whole-system troubleshooting session.

    What a good installation looks like after one week

    The equipment should be boring. Cables remain where they were fixed, schedules occur at the expected local time and the animal can use the enclosure without touching a probe or blocking a sensor. Charts show ordinary cycles rather than unexplained steps. Alerts are rare enough that someone will act on them.

    Repeat the acceptance check after major cleaning, seasonal room changes or firmware updates. If the system cannot recover cleanly from a routine interruption, it is not ready to become invisible infrastructure.

    Think about the next person who will touch it

    A clear label and one-page record are better than a clever setup that only its builder understands. Name every channel by enclosure and job. Put the normal reading range, emergency shutoff and last test date where a carer can find them without opening an account or searching old messages.

    Keep spare batteries, compatible probes and a basic manual near the room, but outside humid air. Do not store an unknown spare heater and assume it can be connected to the same controller. Record wattage, control type and the settings that were actually tested.

    Review cost as part of the system

    The purchase price is only the beginning. Include replacement sensors, lamps, batteries, cloud plans and the time needed to export or inspect data. A cheaper product that creates weekly false alarms can cost more attention than a simpler, stable device.

    That does not mean the most expensive option wins. Buy the least complex system that safely performs the required job and leaves a readable record. Extra channels and connected features are worthwhile when they remove a real task, not when they merely make the dashboard look complete.

    Keep the system easy to reverse

    During early testing, use mounts and routing that can be adjusted without damaging the habitat. Mark the successful positions before making them permanent. Change one part at a time and keep the previous setting in the record. If the result gets worse, you should be able to return to the proven baseline.

    Reversibility also applies to software. Export settings or photograph every screen before a reset. Avoid experimental automation on the same day that lamps, probes or enclosure furniture change.

    Use the animal’s routine as a final check

    Numbers describe the environment, while behavior shows how the animal uses the available choices. Note basking, hiding and movement at the same times for several days. A new device may be working electrically while its light, sound, airflow or placement alters normal use of the habitat.

    Behavior cannot diagnose a technical fault by itself. Treat an unexpected change as a reason to inspect the enclosure, verify measurements and consider health, not as permission to keep adjusting settings until the chart looks pleasing.

    Common mistakes

    • Trusting the first stable-looking number without mapping the surrounding zone
    • Changing several settings at once and losing the cause of the result
    • Leaving probes, cables or mounts where normal animal movement can shift them
    • Treating an app or remote alert as the primary safety control
    • Skipping a power-recovery test because the device retained settings once

    Related Reptile Tech Lab guides

    Frequently asked questions

    Is the LCD handset wireless?

    No. Zoo Med states that it connects to the plug center by cable.

    How many probes are included?

    Two temperature probes and one humidity probe.

    Can it control misting equipment?

    Yes, within the supported configuration and load limits. Test drainage and drying separately.

    Does it provide app alerts?

    It is not a substitute for a networked environmental logger.
  • SensorPush G1 WiFi Gateway review for reptile rooms

    SensorPush G1 WiFi Gateway review for reptile rooms

    Quick verdict: The G1 Gateway turns local SensorPush loggers into a remote monitoring system without a monthly fee. It is a good fit for a reptile room with several sensors, provided the building has reliable power and the gateway sits where Bluetooth can reach the collection.

    This guide is built around commissioning, not box-opening. Compare it with our SensorPush HT.w review and Govee vs SensorPush before changing a live enclosure.

    Point What to know
    Network 2.4 GHz Wi-Fi or Ethernet with DHCP
    Updates Remote updates about once per minute
    Fees No monthly gateway fee
    Power 5 V, 2 A adapter or supported USB power

    The gateway sits between two radio problems

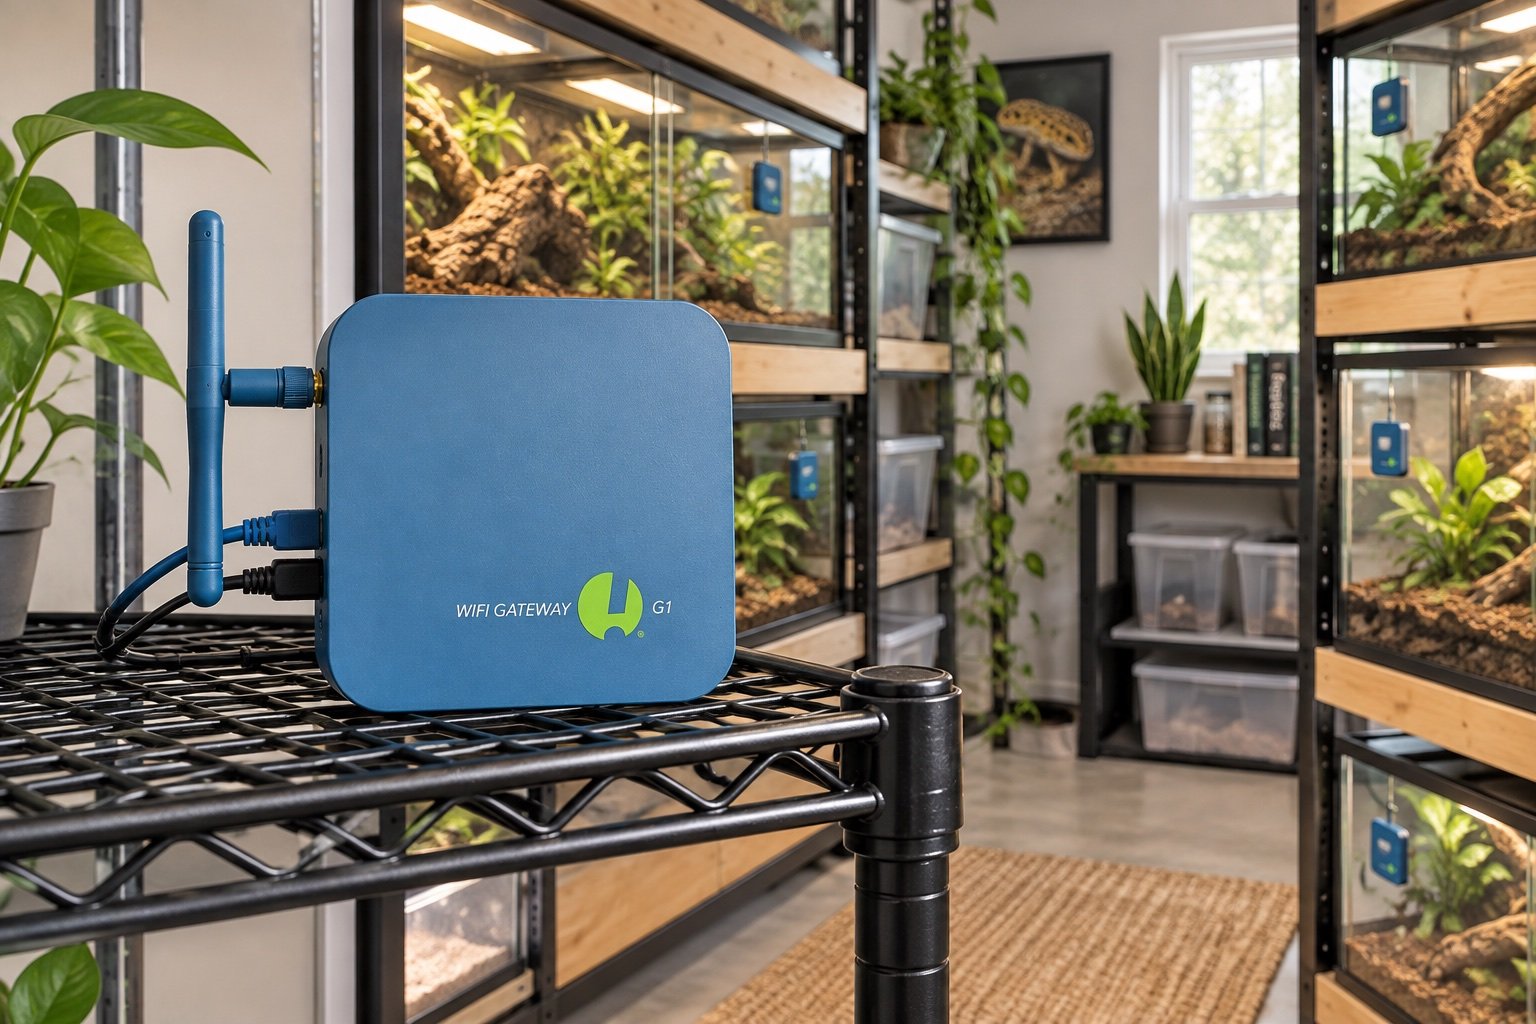
    Sensors talk to the gateway over Bluetooth, while the gateway reaches the internet over Wi-Fi or Ethernet. A strong router signal does not fix a weak sensor path. Put the gateway near the collection first, then solve its network connection. Metal racks and water-heavy enclosures can create dead spots that only appear after doors are closed.

    Ethernet is the quieter choice

    If a cable can reach the reptile room, Ethernet removes one wireless link. The network still needs DHCP because the G1 does not offer a normal static-address setup. No inbound port forwarding is required; SensorPush lists outbound web traffic and time synchronization. Keep the gateway on an isolated device network if that matches the household security plan.

    Remote alerts still depend on power and internet

    The gateway cannot report a blackout if the router and gateway lose power at the same time. A small UPS for the gateway and network may extend visibility, though it does not heat an enclosure. Test an actual router reboot and a gateway power cycle. Our UPS vs surge protector guide separates monitoring runtime from heater backup.

    One-minute updates are enough for trends

    Reptile enclosure temperatures usually change slowly enough that a one-minute remote interval captures the useful curve. It will not turn a SensorPush device into a thermostat. Alerts tell you something crossed a boundary; they do not remove power from a failed heater. Keep control and monitoring on independent hardware.

    Who should buy it

    A single sensor that is checked from the next room may not justify a gateway. Several enclosures, travel, shared care or an outbuilding make the value clearer. Read our SensorPush HT.w review first, because the gateway cannot improve a poor sensor location or an unsuitable humidity rating.

    A seven-day field check

    Run the finished setup for a week before treating it as settled. On day one, photograph every position and record the room conditions. Watch the first warm-up and the final hour of the schedule. Midweek, compare the main reading with an independent instrument placed beside it long enough to stabilize. Near the end of the week, test a safe interruption such as a network loss or short power cut.

    Do not tune settings every time a single reading looks odd. Look for a repeated pattern and change one variable. A clear notebook entry is more useful than a folder of screenshots with no explanation.

    Separate a useful alert from ordinary noise

    Set warnings far enough from normal cycling that they mean something, but early enough to allow a response. Review a full week of data before tightening limits. Misting peaks, nighttime drops and door-open care periods may be expected. Label those events in the record so they are not mistaken for hardware faults.

    Every alarm needs a person, a time window and an action. If nobody can reach the enclosure, a remote notification mainly documents the problem. Keep contact details and the safe immediate steps with the care instructions, then test the alert on another network.

    Use independent evidence for the important claim

    If a thermostat says the basking zone is safe, confirm the surface with the correct instrument. If a logger claims the room stayed stable, compare it with a second sensor during commissioning. If an app says a schedule ran, observe the actual lamp, fan or pump. Independent checks should use a different device and, where possible, a different power path.

    Agreement once is not proof forever. Recheck after moving decor, replacing a bulb, changing substrate depth or altering room heating. Those changes can affect the habitat more than a small adjustment inside the app.

    Check the setup at two room temperatures

    A controller that behaves well on a mild afternoon may struggle during the coldest night or hottest sunny day. Repeat the map when the room changes naturally. Do not create dangerous conditions for a test, but use seasonal weather to confirm that the system has enough capacity and still leaves a cool retreat.

    Room data helps explain enclosure data. Place a temporary logger outside the habitat while commissioning and note HVAC cycles, open windows and direct sun. Remove it later if it adds no actionable information.

    Know which number deserves action

    Small consumer-sensor differences are normal. Focus on repeated drift, missed cycles and values that cross a husbandry or equipment limit. Write the action beside the threshold: inspect a probe, disable one heater, call the local carer or move the animal to the prepared backup.

    An alarm with no response rule becomes background noise. Test delivery, acknowledge it and record how long the response took. Then adjust the threshold only if the normal data shows that it is poorly placed.

    Common mistakes

    • Trusting the first stable-looking number without mapping the surrounding zone
    • Changing several settings at once and losing the cause of the result
    • Leaving probes, cables or mounts where normal animal movement can shift them
    • Treating an app or remote alert as the primary safety control
    • Skipping a power-recovery test because the device retained settings once

    Related Reptile Tech Lab guides

    Frequently asked questions

    Does the gateway require a subscription?

    SensorPush states that there is no monthly gateway fee.

    Can it use 5 GHz Wi-Fi?

    The published Wi-Fi band is 2.4 GHz.

    Does it control heaters?

    No. It monitors compatible SensorPush sensors.

    Will it work through a power outage?

    Only while the gateway, network and internet path remain powered.

  • Thermostat probe placement in a reptile enclosure: a practical method

    Thermostat probe placement in a reptile enclosure: a practical method

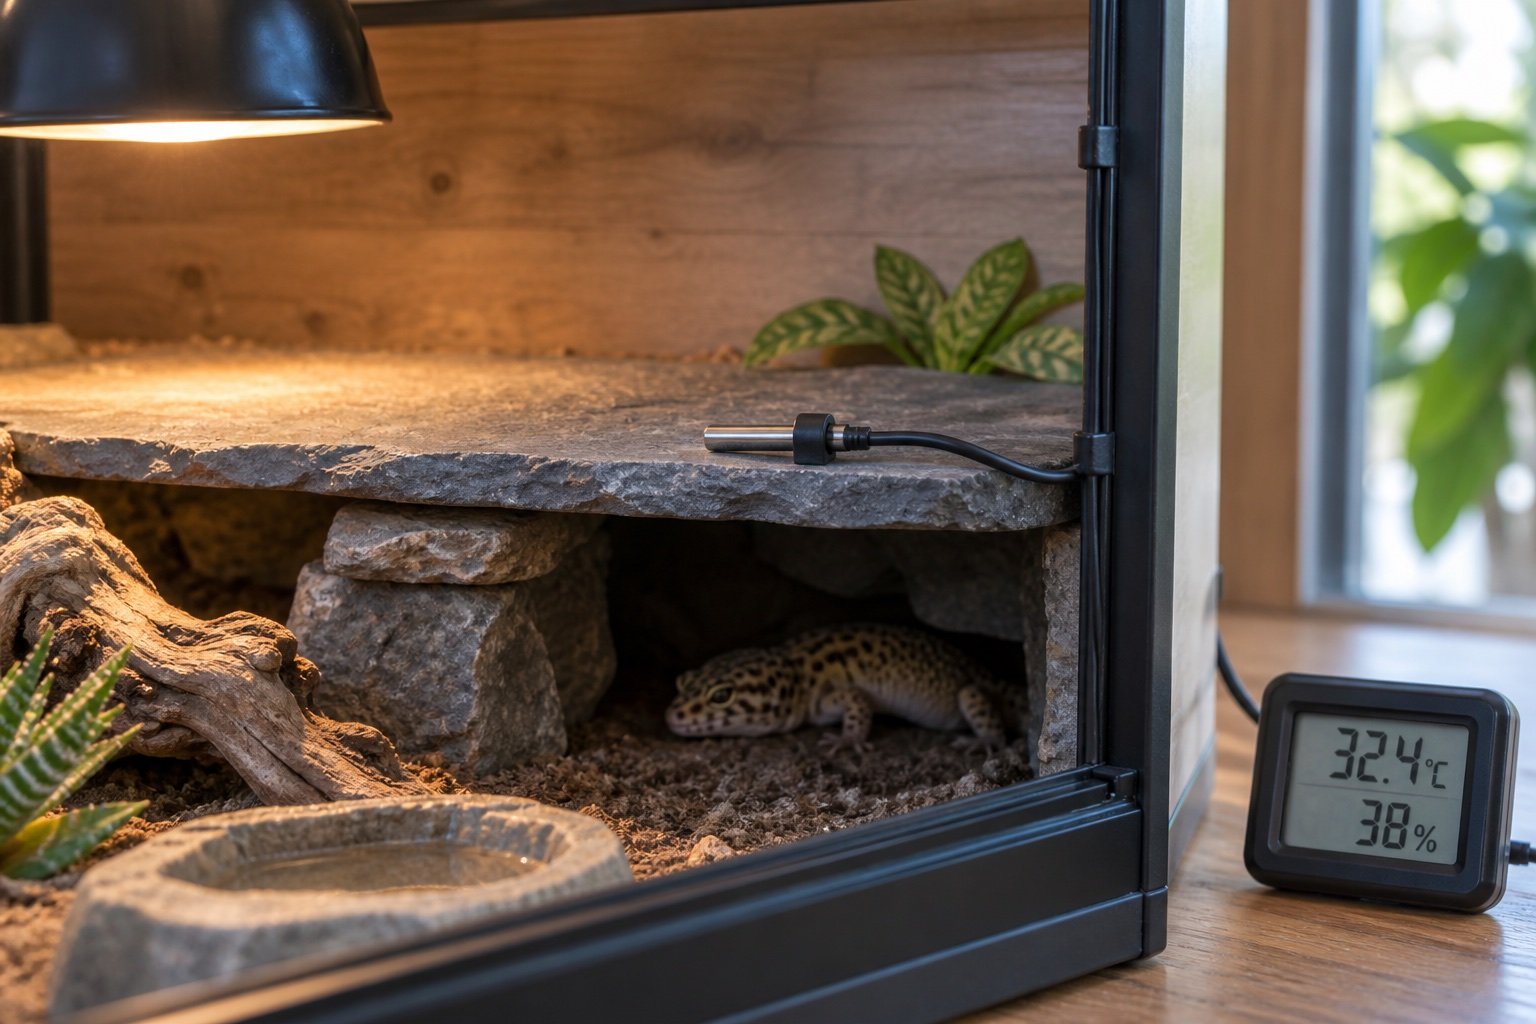
    Quick verdict: Place the probe where it controls the hazard created by the heater, then use separate instruments to judge the rest of the habitat. A thermostat probe is not a general weather station. Its job is to keep one heat source inside a tested limit.

    The useful comparison is the complete enclosure, not the number on the display. Our best reptile thermostats and IR thermometer vs probe provide the surrounding checks.

    Point What to know
    Basking lamp Secure near the controlled basking surface
    Heat mat Fix at the warmed contact zone per system design
    Air heater Place in representative heated airflow
    Verification Use a separate sensor and surface checks

    Control the heater’s effect, not the prettiest number

    A probe placed in the cool end produces a calm-looking reading while the basking zone overheats. A probe touching the lamp guard reacts too quickly and may leave the useful surface cold. Start by naming the surface or air mass the heater is meant to create. Place and restrain the probe there, then map nearby areas with the methods in our temperature gradient guide.

    Restraint must survive the animal

    Suction cups harden, tape lifts in humidity and curious reptiles move loose probes. Use a restraint appropriate to the enclosure material, keep adhesives inaccessible and protect cable runs from chewing or entanglement. A probe that can slide under substrate is not a fixed control point. Photograph the final position so cleaning staff can restore it.

    Surface heat and air heat need different placement

    A basking lamp creates a warm surface and a surrounding air gradient. Put the control probe according to the thermostat and heater design, then check surface temperature separately with an infrared tool. For a radiant panel or guarded ceramic emitter used as background heat, an air-oriented control point may be more useful. One location cannot describe both jobs.

    Avoid a false cold reading

    Direct mist, strong airflow or a probe pressed against cold glass can cause the thermostat to drive the heater harder. Watch the probe during a full misting and lighting cycle. If the reading drops sharply while the basking surface does not, move the sensor or change the system layout rather than compensating with a higher target.

    Recheck after every physical change

    A new hide, deeper substrate or moved branch changes the distance between the animal, probe and heater. Repeat warm-up tests with the habitat empty after major cleaning. Mark the cable and mounting point. This small record prevents a safe setup from drifting into a different one over several months.

    A seven-day field check

    Run the finished setup for a week before treating it as settled. On day one, photograph every position and record the room conditions. Watch the first warm-up and the final hour of the schedule. Midweek, compare the main reading with an independent instrument placed beside it long enough to stabilize. Near the end of the week, test a safe interruption such as a network loss or short power cut.

    Do not tune settings every time a single reading looks odd. Look for a repeated pattern and change one variable. A clear notebook entry is more useful than a folder of screenshots with no explanation.

    Separate a useful alert from ordinary noise

    Set warnings far enough from normal cycling that they mean something, but early enough to allow a response. Review a full week of data before tightening limits. Misting peaks, nighttime drops and door-open care periods may be expected. Label those events in the record so they are not mistaken for hardware faults.

    Every alarm needs a person, a time window and an action. If nobody can reach the enclosure, a remote notification mainly documents the problem. Keep contact details and the safe immediate steps with the care instructions, then test the alert on another network.

    Use independent evidence for the important claim

    If a thermostat says the basking zone is safe, confirm the surface with the correct instrument. If a logger claims the room stayed stable, compare it with a second sensor during commissioning. If an app says a schedule ran, observe the actual lamp, fan or pump. Independent checks should use a different device and, where possible, a different power path.

    Agreement once is not proof forever. Recheck after moving decor, replacing a bulb, changing substrate depth or altering room heating. Those changes can affect the habitat more than a small adjustment inside the app.

    Check the setup at two room temperatures

    A controller that behaves well on a mild afternoon may struggle during the coldest night or hottest sunny day. Repeat the map when the room changes naturally. Do not create dangerous conditions for a test, but use seasonal weather to confirm that the system has enough capacity and still leaves a cool retreat.

    Room data helps explain enclosure data. Place a temporary logger outside the habitat while commissioning and note HVAC cycles, open windows and direct sun. Remove it later if it adds no actionable information.

    Know which number deserves action

    Small consumer-sensor differences are normal. Focus on repeated drift, missed cycles and values that cross a husbandry or equipment limit. Write the action beside the threshold: inspect a probe, disable one heater, call the local carer or move the animal to the prepared backup.

    An alarm with no response rule becomes background noise. Test delivery, acknowledge it and record how long the response took. Then adjust the threshold only if the normal data shows that it is poorly placed.

    Common mistakes

    • Trusting the first stable-looking number without mapping the surrounding zone
    • Changing several settings at once and losing the cause of the result
    • Leaving probes, cables or mounts where normal animal movement can shift them
    • Treating an app or remote alert as the primary safety control
    • Skipping a power-recovery test because the device retained settings once

    Related Reptile Tech Lab guides

    Frequently asked questions

    Should a thermostat probe be inside the enclosure?

    Usually the sensing end must measure the controlled zone, while the controller and mains parts remain safely outside.

    Can it hang loose in the air?

    A loose probe can move and change control behavior. Secure it.

    Should it touch the basking surface?

    Follow the heater and thermostat instructions, then verify both probe reading and actual surface temperature.

    Do I still need another thermometer?

    Yes. Independent monitoring can reveal a displaced probe or controller fault.

  • SensorPush HT.w reptile review: accurate logging without a screen

    SensorPush HT.w reptile review: accurate logging without a screen

    Quick verdict: SensorPush HT.w is a strong logger for keepers who value sensor accuracy, long battery life and exportable history more than an enclosure display. Remote access needs the separate G1 gateway, and direct misting is still a poor placement choice despite splash resistance.

    SensorPush HT.w reptile review: accurate logging without a screen is a narrow buying and setup question, so this guide stays focused on that job. It does not repeat our broader category pages. The aim is to help you choose, install and verify the equipment without turning one convenient device into a single point of failure.

    What matters in this comparison

    Factor Option or result Why it matters
    Typical accuracy ±0.2 C and ±2% RH Strong for husbandry trends
    Sampling Once per minute Useful event detail
    Local storage About 45 days Sync before long gaps
    Battery CR2477, typical over two years Conditions affect life

    Specifications are useful for screening products, but enclosure performance depends on placement. Room temperature, ventilation, mesh, substrate moisture and animal access can move the result far from a brochure figure. Work from a measured baseline and change one variable at a time.

    How to set it up

    1. Place in representative air

    Not against glass, substrate or a heat source. Test the result under normal enclosure conditions and write down what you observed. A setting that works on an empty bench can behave differently after decor, ventilation and daily room changes are added.

    2. Pair before installation

    Name the enclosure clearly. Test the result under normal enclosure conditions and write down what you observed. A setting that works on an empty bench can behave differently after decor, ventilation and daily room changes are added.

    3. Compare with a reference

    Check offset at stable room conditions. Test the result under normal enclosure conditions and write down what you observed. A setting that works on an empty bench can behave differently after decor, ventilation and daily room changes are added.

    4. Test Bluetooth range

    Closed cabinets and masonry reduce it. Test the result under normal enclosure conditions and write down what you observed. A setting that works on an empty bench can behave differently after decor, ventilation and daily room changes are added.

    5. Set alert bands thoughtfully

    Avoid constant alarms from normal cycles. Test the result under normal enclosure conditions and write down what you observed. A setting that works on an empty bench can behave differently after decor, ventilation and daily room changes are added.

    What ownership looks like after the first week

    The first week should be treated as commissioning, not proof that the system will remain stable. Check the morning minimum, daytime peak and the transition between them. Look for loose probes, wet connectors, drifting clocks, blocked vents and any behavior that suggests the animal cannot use the intended zone.

    After the setup settles, use a short written routine. A glance at the device is not enough. Compare it with an independent instrument, inspect cables and mounts, and review stored history when available. Replace consumable parts based on condition and verified performance rather than memory.

    Common mistakes

    • Putting the sensor in the spray cone
    • Expecting remote alerts without a gateway
    • Using one sensor to describe a tall enclosure
    • Ignoring prolonged high-humidity offset
    • Failing to export before changing phones or accounts

    Who this approach suits

    This approach suits keepers who want a system that another person can understand during a holiday or emergency. It also scales better across several enclosures because labels, baseline readings and failure tests remove guesswork. If a device requires constant manual correction, the installation needs work even when its feature list looks impressive.

    How to verify the result in a real enclosure

    A logger earns its place by showing patterns that a spot check misses. Review at least a week that includes misting, heating transitions and a normal room-temperature swing. Look for repeatable timing, not isolated spikes. A brief peak immediately after spray may be expected; a rising overnight baseline can point to restricted ventilation or wet substrate.

    Before trusting alerts, force a harmless test. Warm the sensor in your hand, move it briefly to a drier room and confirm the notification arrives when the phone is locked. Then document Bluetooth or gateway coverage at the actual enclosure. Thick cabinets, foil insulation and distant rooms can shorten the advertised ideal range substantially.

    A practical seven-day check

    1. Day one: photograph positions, record room conditions and capture baseline readings.
    2. Day two: review the full day-night transition and check that schedules occurred at the intended local time.
    3. Day three: inspect mounts, probe restraints, plugs, tubing and any area exposed to moisture.
    4. Day four: compare the main reading with an independent instrument placed beside it long enough to stabilize.
    5. Day five: review animal access and behavior. Confirm that equipment does not block hides, climbing routes or the cool zone.
    6. Day six: simulate one safe failure, such as a short internet loss or power interruption, then check recovery.
    7. Day seven: save the final settings and observations in the enclosure record.

    Repeat the short version of this audit after major cleaning, seasonal room changes or equipment replacement. The point is not constant tinkering. It is catching the few changes that can quietly alter a previously stable habitat.

    Related Reptile Tech Lab guides

    Frequently asked questions

    Should I rely on the built-in display?

    No. Use a separate thermometer, hygrometer, light meter or logger appropriate to the job. Independent verification catches probe movement and controller errors.

    How long should I test before animals or eggs depend on it?

    At least one complete day-night cycle, and longer for equipment affected by room weather or water use. Incubation and emergency systems deserve several days plus a power-loss test.

    Can an app replace local control?

    An app is useful for history and alerts. Critical regulation should continue safely when the phone, router or cloud service is unavailable.

    What should I record?

    Record device model, installation date, set points, probe location, baseline readings and the result of outage or disconnection tests. Those notes make later troubleshooting much faster.

  • SwitchBot Meter Plus reptile review: readable display and useful history

    SwitchBot Meter Plus reptile review: readable display and useful history

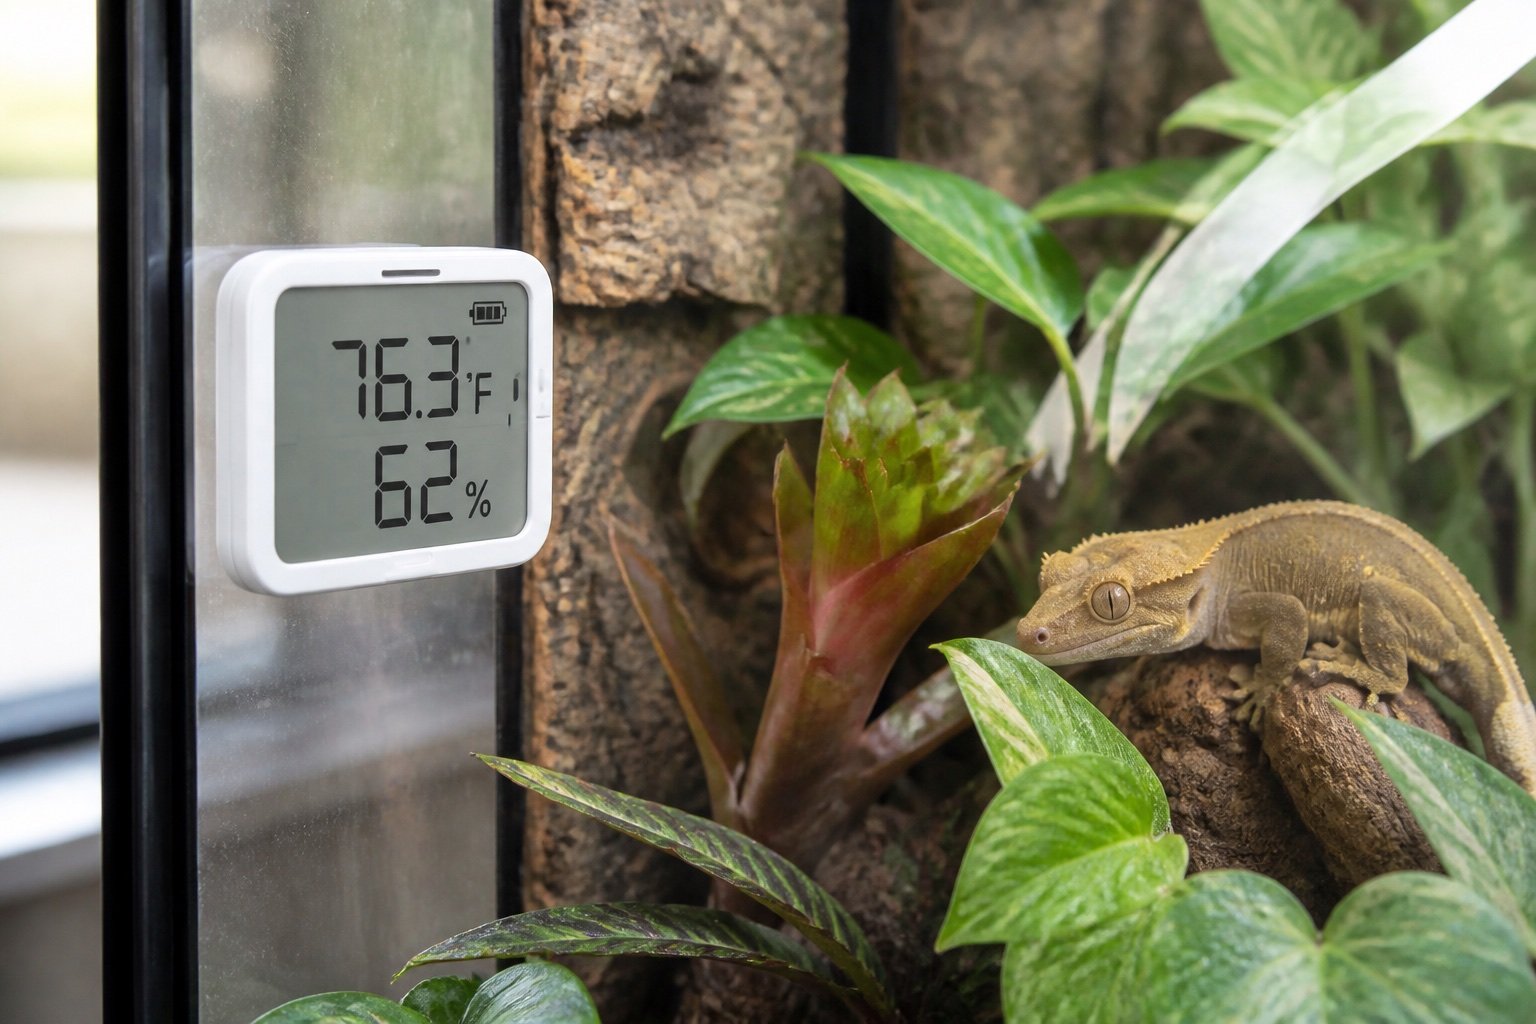
    Quick verdict: SwitchBot Meter Plus is a practical choice when a large local display and downloadable history matter. It offers good stated accuracy and CSV export, but remote notifications require a SwitchBot hub and the case should stay away from direct spray.

    SwitchBot Meter Plus reptile review: readable display and useful history is a narrow buying and setup question, so this guide stays focused on that job. It does not repeat our broader category pages. The aim is to help you choose, install and verify the equipment without turning one convenient device into a single point of failure.

    What matters in this comparison

    Factor Option or result Why it matters
    Display 3 inch Readable during rounds
    Typical accuracy ±0.2 C, ±2% RH in core range Suitable for trend monitoring
    Bluetooth range Up to 120 m in ideal conditions Walls reduce it
    Battery Two AAA, about one year Easy to replace

    Specifications are useful for screening products, but enclosure performance depends on placement. Room temperature, ventilation, mesh, substrate moisture and animal access can move the result far from a brochure figure. Work from a measured baseline and change one variable at a time.

    How to set it up

    1. Pair and label first

    Use enclosure and zone in the name. Test the result under normal enclosure conditions and write down what you observed. A setting that works on an empty bench can behave differently after decor, ventilation and daily room changes are added.

    2. Mount in free air

    Leave space around vents. Test the result under normal enclosure conditions and write down what you observed. A setting that works on an empty bench can behave differently after decor, ventilation and daily room changes are added.

    3. Compare two positions

    A single wall reading may miss the basking gradient. Test the result under normal enclosure conditions and write down what you observed. A setting that works on an empty bench can behave differently after decor, ventilation and daily room changes are added.

    4. Check app history

    Confirm the phone actually syncs. Test the result under normal enclosure conditions and write down what you observed. A setting that works on an empty bench can behave differently after decor, ventilation and daily room changes are added.

    5. Export a trial CSV

    Do it before relying on long records. Test the result under normal enclosure conditions and write down what you observed. A setting that works on an empty bench can behave differently after decor, ventilation and daily room changes are added.

    What ownership looks like after the first week

    The first week should be treated as commissioning, not proof that the system will remain stable. Check the morning minimum, daytime peak and the transition between them. Look for loose probes, wet connectors, drifting clocks, blocked vents and any behavior that suggests the animal cannot use the intended zone.

    After the setup settles, use a short written routine. A glance at the device is not enough. Compare it with an independent instrument, inspect cables and mounts, and review stored history when available. Replace consumable parts based on condition and verified performance rather than memory.

    Common mistakes

    • Mounting next to a mist nozzle
    • Reading the screen but never checking history
    • Expecting hub features without buying a hub
    • Using adhesive that releases in humidity
    • Treating humidity accuracy as constant at extremes

    Who this approach suits

    This approach suits keepers who want a system that another person can understand during a holiday or emergency. It also scales better across several enclosures because labels, baseline readings and failure tests remove guesswork. If a device requires constant manual correction, the installation needs work even when its feature list looks impressive.

    How to verify the result in a real enclosure

    A logger earns its place by showing patterns that a spot check misses. Review at least a week that includes misting, heating transitions and a normal room-temperature swing. Look for repeatable timing, not isolated spikes. A brief peak immediately after spray may be expected; a rising overnight baseline can point to restricted ventilation or wet substrate.

    Before trusting alerts, force a harmless test. Warm the sensor in your hand, move it briefly to a drier room and confirm the notification arrives when the phone is locked. Then document Bluetooth or gateway coverage at the actual enclosure. Thick cabinets, foil insulation and distant rooms can shorten the advertised ideal range substantially.

    A practical seven-day check

    1. Day one: photograph positions, record room conditions and capture baseline readings.
    2. Day two: review the full day-night transition and check that schedules occurred at the intended local time.
    3. Day three: inspect mounts, probe restraints, plugs, tubing and any area exposed to moisture.
    4. Day four: compare the main reading with an independent instrument placed beside it long enough to stabilize.
    5. Day five: review animal access and behavior. Confirm that equipment does not block hides, climbing routes or the cool zone.
    6. Day six: simulate one safe failure, such as a short internet loss or power interruption, then check recovery.
    7. Day seven: save the final settings and observations in the enclosure record.

    Repeat the short version of this audit after major cleaning, seasonal room changes or equipment replacement. The point is not constant tinkering. It is catching the few changes that can quietly alter a previously stable habitat.

    Related Reptile Tech Lab guides

    Frequently asked questions

    Should I rely on the built-in display?

    No. Use a separate thermometer, hygrometer, light meter or logger appropriate to the job. Independent verification catches probe movement and controller errors.

    How long should I test before animals or eggs depend on it?

    At least one complete day-night cycle, and longer for equipment affected by room weather or water use. Incubation and emergency systems deserve several days plus a power-loss test.

    Can an app replace local control?

    An app is useful for history and alerts. Critical regulation should continue safely when the phone, router or cloud service is unavailable.

    What should I record?

    Record device model, installation date, set points, probe location, baseline readings and the result of outage or disconnection tests. Those notes make later troubleshooting much faster.

  • Reptile misting system drainage: build it before adding more nozzles

    Reptile misting system drainage: build it before adding more nozzles

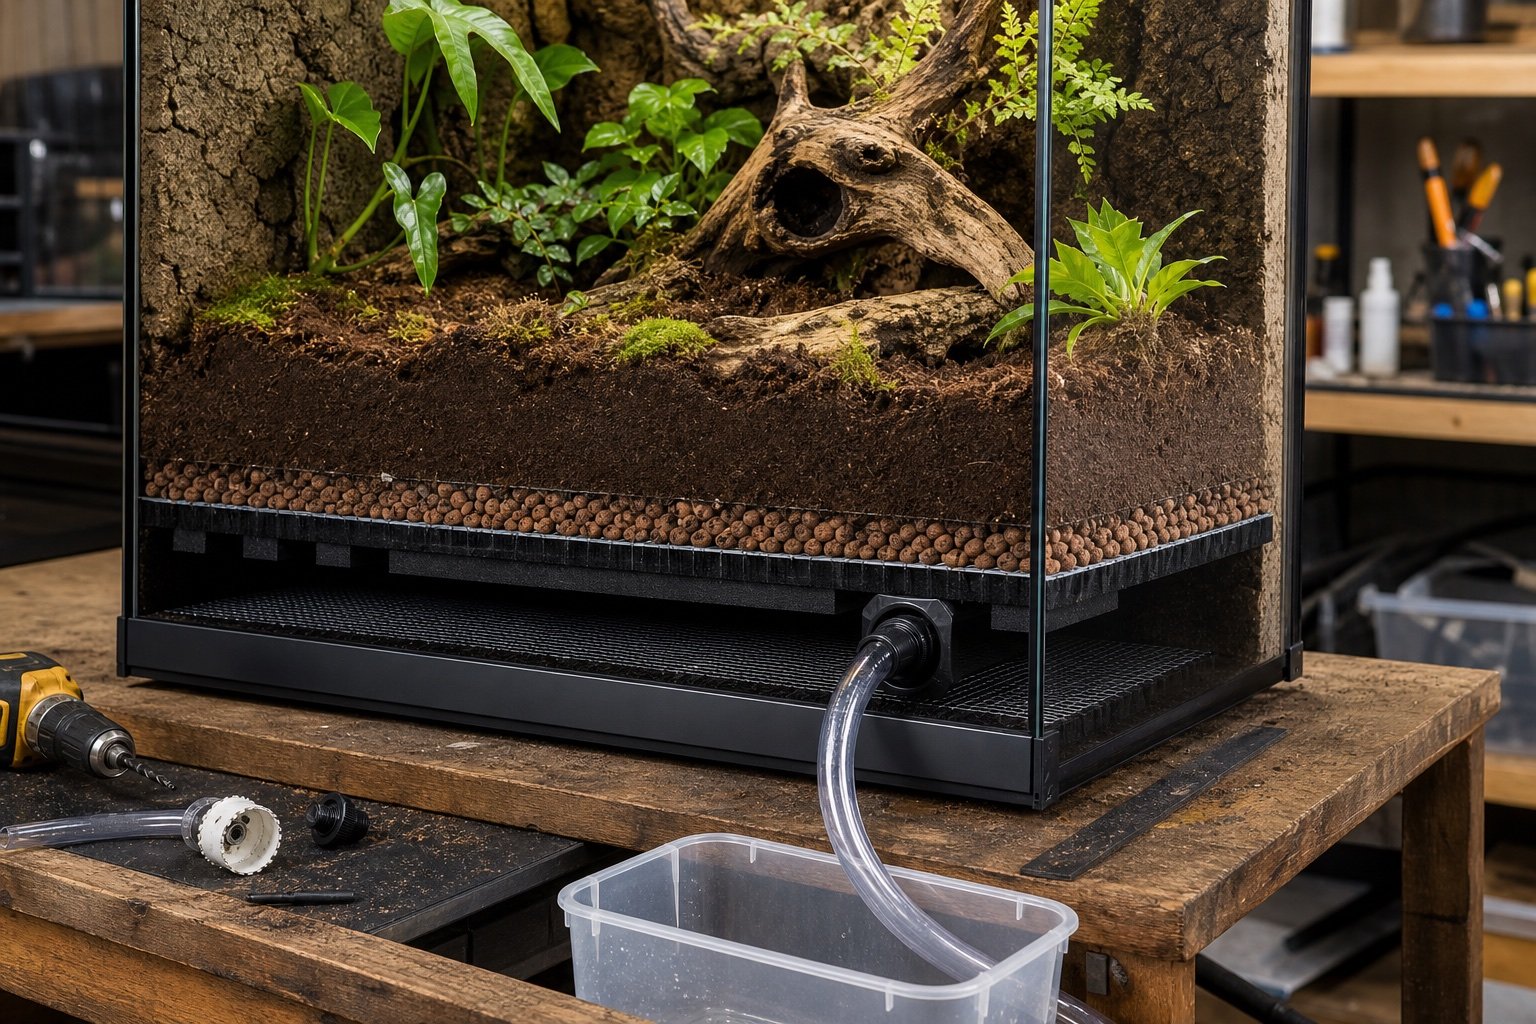
    Quick verdict: Drainage should be designed before the pump and nozzles. A safe system gives excess water a predictable route, keeps substrate out of plumbing, allows inspection and holds more than the worst plausible daily volume.

    Reptile misting system drainage: build it before adding more nozzles is a narrow buying and setup question, so this guide stays focused on that job. It does not repeat our broader category pages. The aim is to help you choose, install and verify the equipment without turning one convenient device into a single point of failure.

    What matters in this comparison

    Factor Option or result Why it matters
    False bottom Creates storage space Needs access and overflow plan
    Bulkhead drain Moves water out continuously Requires careful drilling and seal
    Removable catch tray Easy to inspect Limited capacity
    Planted substrate Buffers small cycles Not a substitute for drainage

    Specifications are useful for screening products, but enclosure performance depends on placement. Room temperature, ventilation, mesh, substrate moisture and animal access can move the result far from a brochure figure. Work from a measured baseline and change one variable at a time.

    How to set it up

    1. Measure daily input

    Catch nozzle output for a timed cycle. Test the result under normal enclosure conditions and write down what you observed. A setting that works on an empty bench can behave differently after decor, ventilation and daily room changes are added.

    2. Add failure margin

    Size for a stuck cycle or missed emptying. Test the result under normal enclosure conditions and write down what you observed. A setting that works on an empty bench can behave differently after decor, ventilation and daily room changes are added.

    3. Protect the drain

    Use mesh and a serviceable prefilter. Test the result under normal enclosure conditions and write down what you observed. A setting that works on an empty bench can behave differently after decor, ventilation and daily room changes are added.

    4. Leak test with plain water

    Run longer than the normal schedule. Test the result under normal enclosure conditions and write down what you observed. A setting that works on an empty bench can behave differently after decor, ventilation and daily room changes are added.

    5. Mark a maximum level

    Make inspection part of daily rounds. Test the result under normal enclosure conditions and write down what you observed. A setting that works on an empty bench can behave differently after decor, ventilation and daily room changes are added.

    What ownership looks like after the first week

    The first week should be treated as commissioning, not proof that the system will remain stable. Check the morning minimum, daytime peak and the transition between them. Look for loose probes, wet connectors, drifting clocks, blocked vents and any behavior that suggests the animal cannot use the intended zone.

    After the setup settles, use a short written routine. A glance at the device is not enough. Compare it with an independent instrument, inspect cables and mounts, and review stored history when available. Replace consumable parts based on condition and verified performance rather than memory.

    Common mistakes

    • Sealing a false bottom with no access
    • Letting roots block the only outlet
    • Running tubing uphill without checking siphon behavior
    • Putting the catch container above electrical strips
    • Assuming evaporation will remove all added water

    Who this approach suits

    This approach suits keepers who want a system that another person can understand during a holiday or emergency. It also scales better across several enclosures because labels, baseline readings and failure tests remove guesswork. If a device requires constant manual correction, the installation needs work even when its feature list looks impressive.

    How to verify the result in a real enclosure

    Water automation must be checked as a complete loop: clean reservoir, pump, tubing, nozzle, enclosure surfaces and drainage. Time one cycle into a measuring jug before installation. Multiply that volume by daily cycles and nozzle count, then compare it with drainage capacity. This simple calculation exposes undersized catch containers before they overflow.

    Observe how fast leaves and walls dry after spraying. The useful wet period depends on species and ventilation, but standing water that never clears is a maintenance warning. Adjust nozzle direction and cycle length before increasing frequency. Shorter cycles are not automatically safer if they occur so often that the habitat never dries.

    A practical seven-day check

    1. Day one: photograph positions, record room conditions and capture baseline readings.
    2. Day two: review the full day-night transition and check that schedules occurred at the intended local time.
    3. Day three: inspect mounts, probe restraints, plugs, tubing and any area exposed to moisture.
    4. Day four: compare the main reading with an independent instrument placed beside it long enough to stabilize.
    5. Day five: review animal access and behavior. Confirm that equipment does not block hides, climbing routes or the cool zone.
    6. Day six: simulate one safe failure, such as a short internet loss or power interruption, then check recovery.
    7. Day seven: save the final settings and observations in the enclosure record.

    Repeat the short version of this audit after major cleaning, seasonal room changes or equipment replacement. The point is not constant tinkering. It is catching the few changes that can quietly alter a previously stable habitat.

    Related Reptile Tech Lab guides

    Frequently asked questions

    Should I rely on the built-in display?

    No. Use a separate thermometer, hygrometer, light meter or logger appropriate to the job. Independent verification catches probe movement and controller errors.

    How long should I test before animals or eggs depend on it?

    At least one complete day-night cycle, and longer for equipment affected by room weather or water use. Incubation and emergency systems deserve several days plus a power-loss test.

    Can an app replace local control?

    An app is useful for history and alerts. Critical regulation should continue safely when the phone, router or cloud service is unavailable.

    What should I record?

    Record device model, installation date, set points, probe location, baseline readings and the result of outage or disconnection tests. Those notes make later troubleshooting much faster.

  • Smart plugs for reptile enclosures: safe uses, limits and failure tests

    Smart plugs for reptile enclosures: safe uses, limits and failure tests

    Quick verdict: Smart plugs are useful for lights, noncritical circulation fans and monitoring energy use. They should not replace a thermostat, high-temperature safety device or purpose-built life-support controller. Local schedules and predictable recovery matter more than voice control.

    Smart plugs for reptile enclosures: safe uses, limits and failure tests is a narrow buying and setup question, so this guide stays focused on that job. It does not repeat our broader category pages. The aim is to help you choose, install and verify the equipment without turning one convenient device into a single point of failure.

    What matters in this comparison

    Factor Option or result Why it matters
    Good use UVB and visible-light schedules Low consequence if app is unavailable
    Conditional use Fans or pumps Only after safe failure testing
    Poor use Primary heat regulation Use a thermostat
    Useful feature Energy history Can reveal a failed lamp or pump

    Specifications are useful for screening products, but enclosure performance depends on placement. Room temperature, ventilation, mesh, substrate moisture and animal access can move the result far from a brochure figure. Work from a measured baseline and change one variable at a time.

    How to set it up

    1. Check the load type

    Motors and lamps can have startup current. Test the result under normal enclosure conditions and write down what you observed. A setting that works on an empty bench can behave differently after decor, ventilation and daily room changes are added.

    2. Prefer local schedules

    A router outage should not alter the cycle. Test the result under normal enclosure conditions and write down what you observed. A setting that works on an empty bench can behave differently after decor, ventilation and daily room changes are added.

    3. Disable accidental voice control

    Avoid casual switching of critical circuits. Test the result under normal enclosure conditions and write down what you observed. A setting that works on an empty bench can behave differently after decor, ventilation and daily room changes are added.

    4. Label every plug

    Include normal state and device name. Test the result under normal enclosure conditions and write down what you observed. A setting that works on an empty bench can behave differently after decor, ventilation and daily room changes are added.

    5. Test internet and power loss

    Confirm recovery before enclosure use. Test the result under normal enclosure conditions and write down what you observed. A setting that works on an empty bench can behave differently after decor, ventilation and daily room changes are added.

    What ownership looks like after the first week

    The first week should be treated as commissioning, not proof that the system will remain stable. Check the morning minimum, daytime peak and the transition between them. Look for loose probes, wet connectors, drifting clocks, blocked vents and any behavior that suggests the animal cannot use the intended zone.

    After the setup settles, use a short written routine. A glance at the device is not enough. Compare it with an independent instrument, inspect cables and mounts, and review stored history when available. Replace consumable parts based on condition and verified performance rather than memory.

    Common mistakes

    • Putting a heat lamp directly on a smart plug
    • Using a household plug in a wet location
    • Relying on push alerts as the only alarm
    • Sharing one plug across unrelated devices
    • Installing firmware updates without rechecking schedules

    Who this approach suits

    This approach suits keepers who want a system that another person can understand during a holiday or emergency. It also scales better across several enclosures because labels, baseline readings and failure tests remove guesswork. If a device requires constant manual correction, the installation needs work even when its feature list looks impressive.

    How to verify the result in a real enclosure

    Write the failure order before buying backup equipment. Decide what happens if power disappears, Wi-Fi drops, a relay sticks on or a caregiver presses the wrong control. Critical devices should fail into a state that gives you time to respond, and their normal state should be visible without opening several apps.

    Run the plan with real labels and real cables. Disconnect one item at a time, confirm the expected alert, and record how quickly conditions move. That rate of change is more useful than a generic emergency number because it reflects the enclosure, room and season you actually have.

    A practical seven-day check

    1. Day one: photograph positions, record room conditions and capture baseline readings.
    2. Day two: review the full day-night transition and check that schedules occurred at the intended local time.
    3. Day three: inspect mounts, probe restraints, plugs, tubing and any area exposed to moisture.
    4. Day four: compare the main reading with an independent instrument placed beside it long enough to stabilize.
    5. Day five: review animal access and behavior. Confirm that equipment does not block hides, climbing routes or the cool zone.
    6. Day six: simulate one safe failure, such as a short internet loss or power interruption, then check recovery.
    7. Day seven: save the final settings and observations in the enclosure record.

    Repeat the short version of this audit after major cleaning, seasonal room changes or equipment replacement. The point is not constant tinkering. It is catching the few changes that can quietly alter a previously stable habitat.

    Related Reptile Tech Lab guides

    Frequently asked questions

    Should I rely on the built-in display?

    No. Use a separate thermometer, hygrometer, light meter or logger appropriate to the job. Independent verification catches probe movement and controller errors.

    How long should I test before animals or eggs depend on it?

    At least one complete day-night cycle, and longer for equipment affected by room weather or water use. Incubation and emergency systems deserve several days plus a power-loss test.

    Can an app replace local control?

    An app is useful for history and alerts. Critical regulation should continue safely when the phone, router or cloud service is unavailable.

    What should I record?

    Record device model, installation date, set points, probe location, baseline readings and the result of outage or disconnection tests. Those notes make later troubleshooting much faster.

  • Reptile power outage plan: protect heat, airflow and records

    Reptile power outage plan: protect heat, airflow and records

    Quick verdict: A useful outage plan protects animals from the rate of temperature change, not from a single scary room reading. Prioritize vulnerable species and incubators, conserve enclosure heat safely, keep ventilation adequate and record what happened during recovery.

    Reptile power outage plan: protect heat, airflow and records is a narrow buying and setup question, so this guide stays focused on that job. It does not repeat our broader category pages. The aim is to help you choose, install and verify the equipment without turning one convenient device into a single point of failure.

    What matters in this comparison

    Factor Option or result Why it matters
    First priority Incubators and medically fragile animals Small thermal margin
    Second priority Tropical or very young animals Monitor cooling rate
    Later priority Stable adults in mild rooms Avoid unnecessary handling
    Never use indoors Fuel-burning outdoor heaters Carbon monoxide risk

    Specifications are useful for screening products, but enclosure performance depends on placement. Room temperature, ventilation, mesh, substrate moisture and animal access can move the result far from a brochure figure. Work from a measured baseline and change one variable at a time.

    How to set it up

    1. Write normal ranges

    Include each enclosure and incubator. Test the result under normal enclosure conditions and write down what you observed. A setting that works on an empty bench can behave differently after decor, ventilation and daily room changes are added.

    2. Stage independent thermometers

    Battery devices still work when mains power fails. Test the result under normal enclosure conditions and write down what you observed. A setting that works on an empty bench can behave differently after decor, ventilation and daily room changes are added.

    3. Choose safe backup heat

    Follow product indoor-use rules. Test the result under normal enclosure conditions and write down what you observed. A setting that works on an empty bench can behave differently after decor, ventilation and daily room changes are added.

    4. Store contact details

    Vet, utility and alternate location. Test the result under normal enclosure conditions and write down what you observed. A setting that works on an empty bench can behave differently after decor, ventilation and daily room changes are added.

    5. Run a tabletop drill

    Practice decisions before winter. Test the result under normal enclosure conditions and write down what you observed. A setting that works on an empty bench can behave differently after decor, ventilation and daily room changes are added.

    What ownership looks like after the first week

    The first week should be treated as commissioning, not proof that the system will remain stable. Check the morning minimum, daytime peak and the transition between them. Look for loose probes, wet connectors, drifting clocks, blocked vents and any behavior that suggests the animal cannot use the intended zone.

    After the setup settles, use a short written routine. A glance at the device is not enough. Compare it with an independent instrument, inspect cables and mounts, and review stored history when available. Replace consumable parts based on condition and verified performance rather than memory.

    Common mistakes

    • Opening enclosures repeatedly
    • Using candles or combustion heaters near animals
    • Feeding during a prolonged cold event
    • Heating one spot without monitoring the rest
    • Restoring every heater at once without checking controls

    Who this approach suits

    This approach suits keepers who want a system that another person can understand during a holiday or emergency. It also scales better across several enclosures because labels, baseline readings and failure tests remove guesswork. If a device requires constant manual correction, the installation needs work even when its feature list looks impressive.

    How to verify the result in a real enclosure

    Write the failure order before buying backup equipment. Decide what happens if power disappears, Wi-Fi drops, a relay sticks on or a caregiver presses the wrong control. Critical devices should fail into a state that gives you time to respond, and their normal state should be visible without opening several apps.

    Run the plan with real labels and real cables. Disconnect one item at a time, confirm the expected alert, and record how quickly conditions move. That rate of change is more useful than a generic emergency number because it reflects the enclosure, room and season you actually have.

    A practical seven-day check

    1. Day one: photograph positions, record room conditions and capture baseline readings.
    2. Day two: review the full day-night transition and check that schedules occurred at the intended local time.
    3. Day three: inspect mounts, probe restraints, plugs, tubing and any area exposed to moisture.
    4. Day four: compare the main reading with an independent instrument placed beside it long enough to stabilize.
    5. Day five: review animal access and behavior. Confirm that equipment does not block hides, climbing routes or the cool zone.
    6. Day six: simulate one safe failure, such as a short internet loss or power interruption, then check recovery.
    7. Day seven: save the final settings and observations in the enclosure record.

    Repeat the short version of this audit after major cleaning, seasonal room changes or equipment replacement. The point is not constant tinkering. It is catching the few changes that can quietly alter a previously stable habitat.

    Related Reptile Tech Lab guides

    Frequently asked questions

    Should I rely on the built-in display?

    No. Use a separate thermometer, hygrometer, light meter or logger appropriate to the job. Independent verification catches probe movement and controller errors.

    How long should I test before animals or eggs depend on it?

    At least one complete day-night cycle, and longer for equipment affected by room weather or water use. Incubation and emergency systems deserve several days plus a power-loss test.

    Can an app replace local control?

    An app is useful for history and alerts. Critical regulation should continue safely when the phone, router or cloud service is unavailable.

    What should I record?

    Record device model, installation date, set points, probe location, baseline readings and the result of outage or disconnection tests. Those notes make later troubleshooting much faster.

  • MistKing Starter review: what the v5 kit includes and what it leaves out

    Editorial note: this review covers the current fifth-generation Starter kit and published parts list. Exact bundles vary by retailer and region, so compare the cart contents before ordering.

    Verdict: MistKing Starter v5 is a strong foundation for one to several tropical enclosures. The pump, fine check-valved nozzle, standard tubing and seconds timer are built like a small system rather than a disposable appliance. It costs more work at installation because the reservoir is not included and the kit ships with only one nozzle.

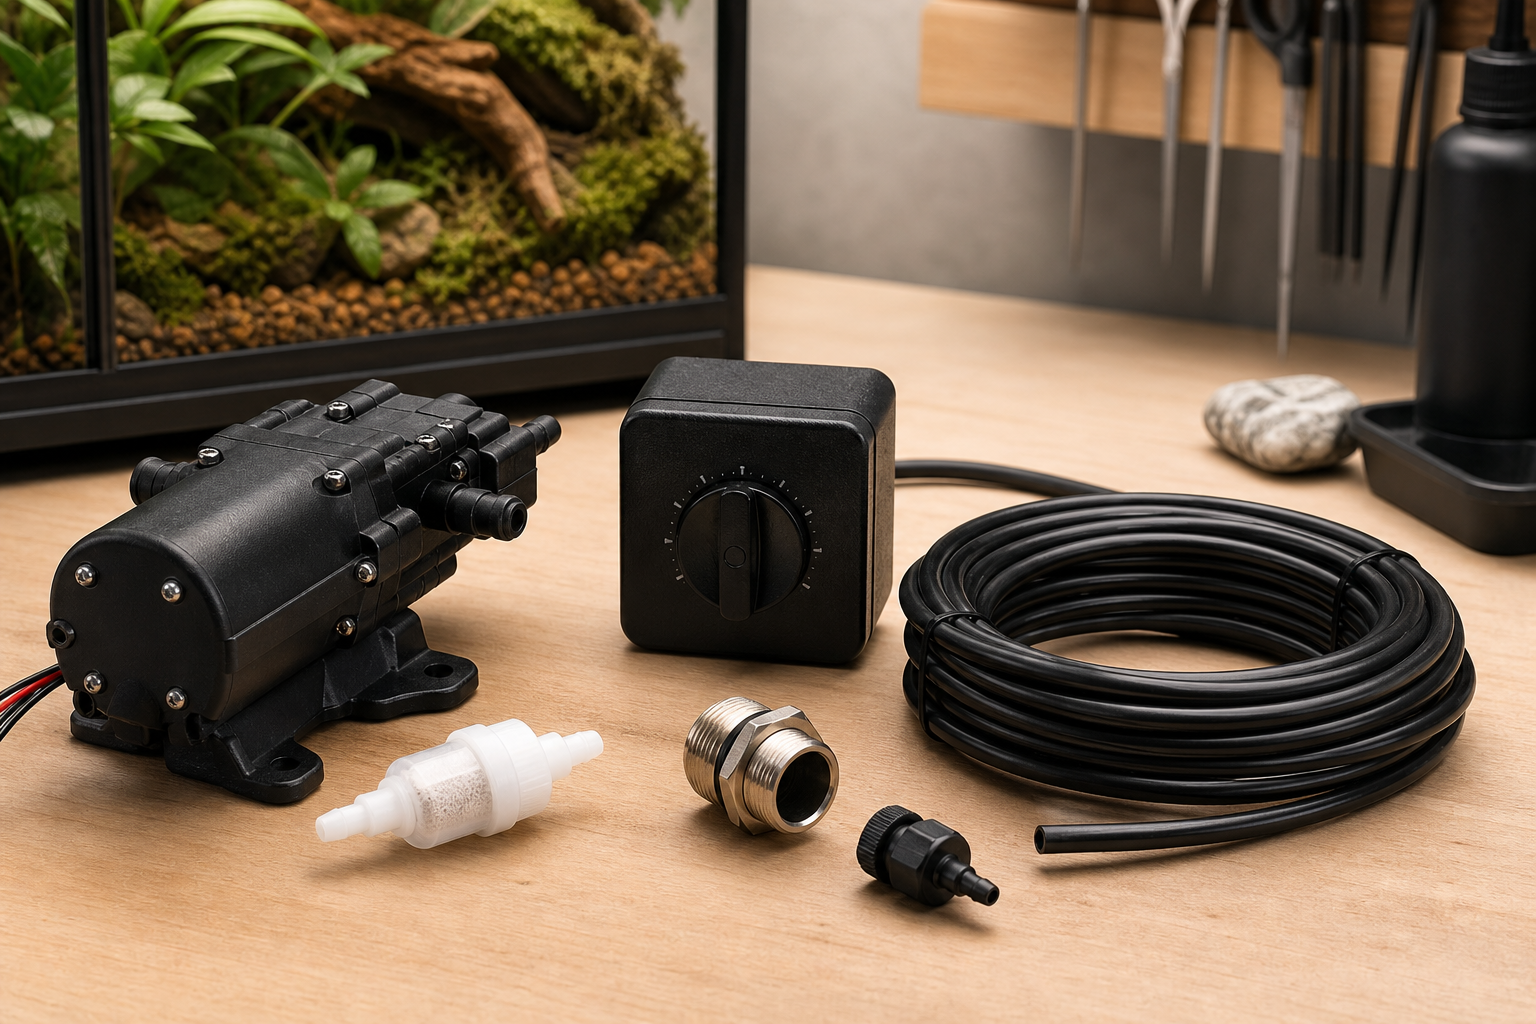
    Terrarium misting starter kit with pump timer tubing and nozzle

    What the v5 kit includes

    Part Current package
    Pump 24V DC pump, rated by MistKing for up to ten nozzles
    Nozzle One Value L assembly with check valve and about 50-micron mist
    Tubing 15 feet of quarter-inch black opaque line
    Reservoir hardware Metal-thread bulkhead, O-ring, plug and white filter
    Control ST-24 digital seconds timer
    Mounting Five clips with screws
    Not included Water reservoir and common optional parts such as ZipDrip or screen wedges

    The pump is the reason to buy the system

    MistKing describes the low-voltage pump as capable of running dry without damage and supports up to ten standard nozzles. Vibration-damping feet help, but mounting surface matters. A hollow cabinet can amplify a quiet pump into a noticeable buzz.

    Place it on a firm pad, keep airflow clear and avoid fastening it directly to resonant furniture. Test noise at night from the nearest bedroom before finalizing the location.

    One nozzle is enough to test, not always to finish

    The included Value L nozzle uses a check-valved tip to reduce dripping. The fine mist can wet leaves without producing the coarse spray common to low-pressure kits. One nozzle may cover a compact vivarium; a tall planted enclosure often benefits from a second angle.

    Add heads after watching the empty enclosure. The pump’s ten-nozzle rating is a ceiling, not a target. Long runs, elevation and fittings influence the pattern. The broader reptile misting systems comparison explains how to evaluate coverage and pressure.

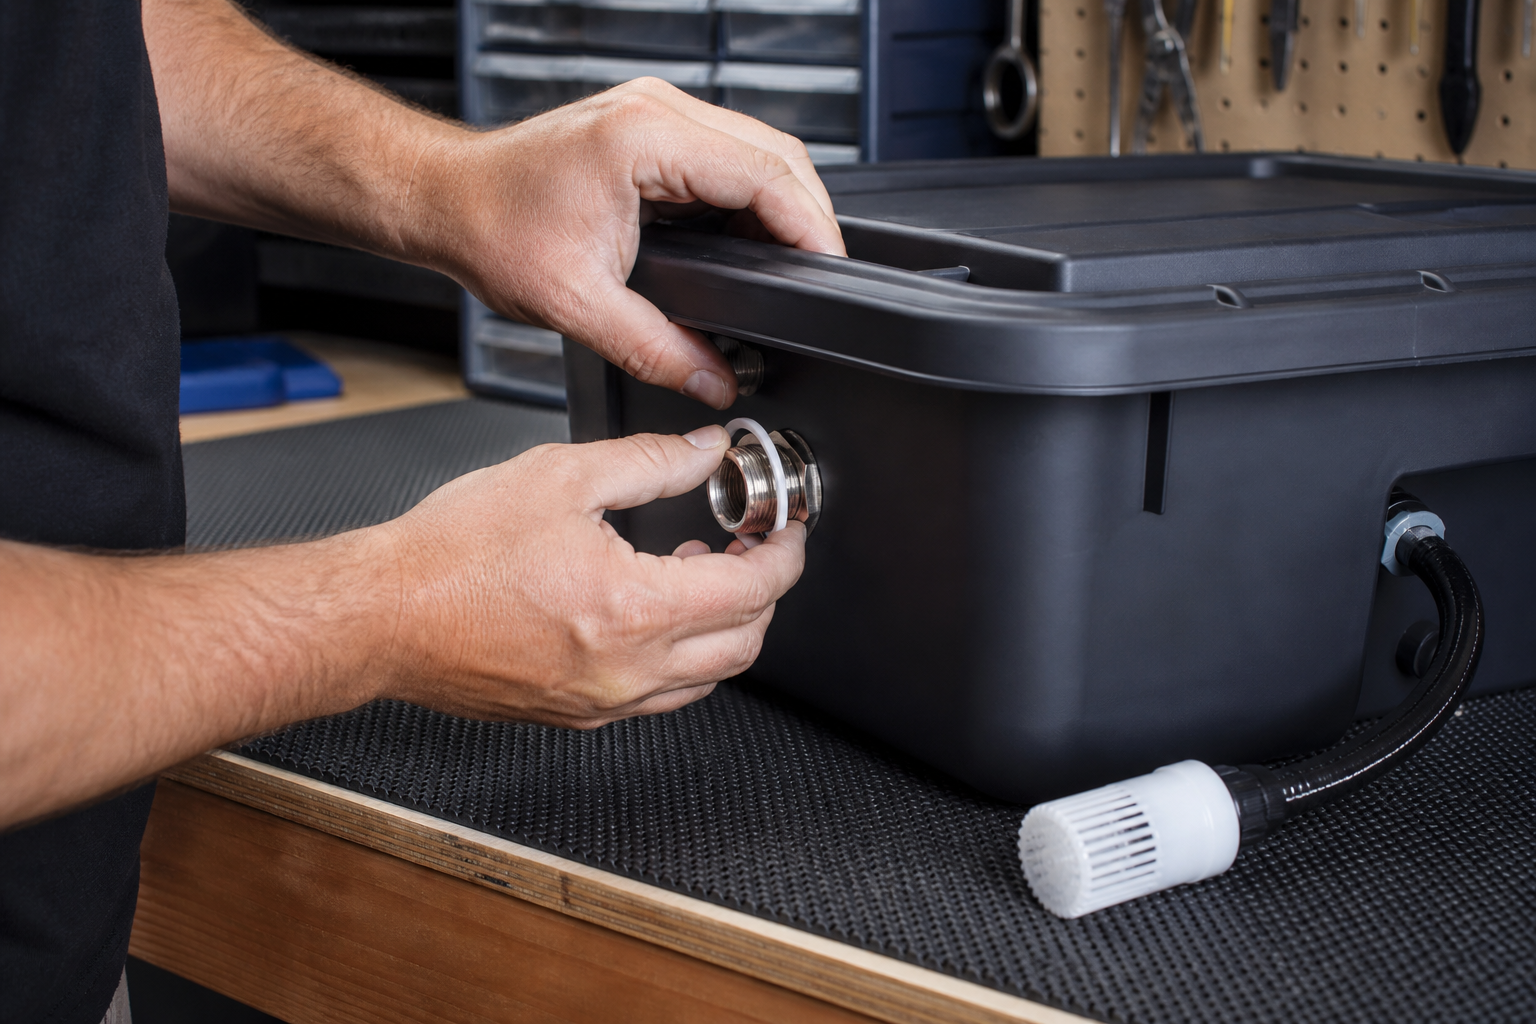
    Installing a sealed bulkhead into an opaque misting reservoir

    The missing reservoir is both flaw and advantage

    You supply a bucket or container and install the included bulkhead. This adds drilling, cleaning and leak testing. It also lets a keeper choose a sealed reservoir large enough for the schedule.

    Use a sturdy opaque food-safe container with a lid. Drill the hole at the size and height in the instructions, remove plastic debris, seat the O-ring correctly and fill the container somewhere a leak cannot cause damage. Mark the minimum operating level.

    Do not use an open decorative tub. Light and debris encourage growth and clogging. A lid also prevents animals, children and household contaminants from reaching the water.

    ST-24 timer

    The seconds timer is a good match for misting because useful cycles may be shorter than a normal wall timer can schedule. MistKing says the fifth-generation electronics have a higher power rating than the earlier timer. That does not remove the need to test outage recovery.

    Begin with short cycles and watch wetting and drainage. Set different events only when they reflect a reason, such as a morning drinking opportunity and a lighter evening cycle. Avoid programming complexity for its own sake.

    Optional controllers

    MistKing offers a repeat-cycle timer and hygrostat as alternatives. A repeat timer suits frequent intervals. A hygrostat switches by measured humidity, which sounds precise but depends heavily on sensor location and response.

    For most keepers, the ST-24 is the easier starting point. Use independent logging to understand peaks and drying. Only then decide whether closed-loop humidity control would improve anything.

    Neatly routed misting lines serving several planted reptile enclosures

    Installation sequence

    1. Choose pump and reservoir locations away from mains connections.
    2. Install and leak-test the reservoir bulkhead.
    3. Cut tubing square and push every connection fully home.
    4. Mount the nozzle and check the spray path with no animal present.
    5. Secure tubing away from heat, doors and sharp edges.
    6. Prime the system using the manual’s procedure.
    7. Program a short test cycle and inspect every fitting.
    8. Run the final schedule for several days while logging humidity.

    Drips and ZipDrip

    Check-valved tips reduce post-cycle dripping, but water under pressure still needs somewhere to go. MistKing sells ZipDrip to release line pressure and stop residual drops. It is optional on the Starter package.

    Before buying it, observe where the included nozzle drips and whether that water matters. A drop onto soil may be harmless. A drop onto a lamp guard, electrical opening or permanent sleeping spot needs correction.

    Water quality

    Fine nozzle openings punish hard water. Use the water type recommended by MistKing, keep the reservoir covered and inspect the white filter. Its light color makes debris easier to see.

    Never add supplements or cleaner to the reservoir casually. Aerosol exposure and material compatibility change when a liquid passes through a high-pressure misting system.

    Expansion planning

    The stock pump is intended for up to ten nozzles. MistKing recommends the larger MKP-100 for up to twenty. Plan the room on paper before adding branches. Keep each run serviceable and label the line by enclosure.

    For several enclosures, add isolation valves only if supported and document their normal position. A closed branch can change pressure elsewhere. After every expansion, repeat the coverage and leak test.

    Monitoring the result

    Humidity peaks immediately after misting are less informative than the full recovery curve. Place a splash-resistant logger outside the direct cone and record how long the enclosure remains wet. The thermometer and hygrometer guide covers sensor saturation and placement.

    Also watch temperature. Evaporation and wet surfaces can cool the enclosure, and a nozzle aimed near the thermostat probe can affect heat control. Review the temperature monitoring guide when the two systems interact.

    Maintenance routine

    • Check reservoir level and clarity at every refill.
    • Inspect bulkhead, filter and pump-side fittings weekly at first.
    • Watch each nozzle pattern and clean by the official method.
    • Wipe spilled water before it reaches cables.
    • Record timer changes and nozzle replacements.
    • Keep one spare nozzle tip and enough tubing for a repair.

    Who should buy it?

    Choose MistKing Starter when fine mist, quiet operation, replaceable parts and later expansion justify a little plumbing. It suits chameleon, gecko, frog and planted-vivarium rooms where a repeatable wetting cycle matters.

    Choose a self-contained system for one small enclosure when you value a built-in reservoir more than expansion. Skip automatic misting when hand spraying already produces consistent care and the extra water near electricity would add needless risk.

    Commission the system before animals depend on it

    Run a new installation with the enclosure empty or while the animal is safely housed elsewhere. Check every push-fit connection with dry tissue, because a slow leak may travel along tubing before it drips. Trigger several short cycles, then one longer cycle. Watch the reservoir level, pump sound, spray cone and drainage instead of judging the system from humidity alone.

    Leave the setup for a full day and inspect again. Tubing can relax after installation, and a nozzle aimed correctly when dry may move after repeated starts. Confirm that water does not pool near electrical equipment, block ventilation or saturate the substrate beneath one corner. Only then should the normal schedule begin.

    Designing for power cuts and empty reservoirs

    The pump may tolerate running dry, but the enclosure still loses its water cycle. Mark a refill line on the reservoir and calculate how many normal days it covers. A transparent or externally readable container makes the daily check fast. In a large room, a low-level alarm is more valuable than a bigger opaque reservoir that hides consumption.

    After a power interruption, verify what the timer does with its clock and saved programs. Test this deliberately by unplugging the system for a few minutes. Keep a manual spray bottle ready for the gap between a fault and a repair, and store a spare union, nozzle and short length of tubing with the system.

    Noise, placement and service access

    The pump should sit on a stable surface where vibration cannot resonate through a cabinet. Soft isolation feet can reduce transmitted noise, but the pump still needs ventilation and easy access. Avoid burying it behind enclosures or routing tubing so tightly that the unit cannot be removed without dismantling the rack.

    Plan the reservoir in the same way. It needs enough clearance to remove the lid, clean the container and reach the bulkhead. A tidy installation that cannot be serviced will eventually be neglected. Photograph the original tubing route and label each branch if one pump serves several enclosures.

    Frequently asked questions

    Does the MistKing Starter include a reservoir?

    No. It includes the bulkhead and filter used to convert a suitable container.

    How many nozzles can the stock pump run?

    MistKing rates the current Starter pump for up to ten nozzles. Layout and fittings still need testing.

    Is ZipDrip included?

    No. It is an optional accessory. The included nozzle has a check valve that reduces dripping.

    Can the pump run dry?

    MistKing says the current low-voltage pump can run dry without damage. A dry reservoir still interrupts care, so monitor water level.