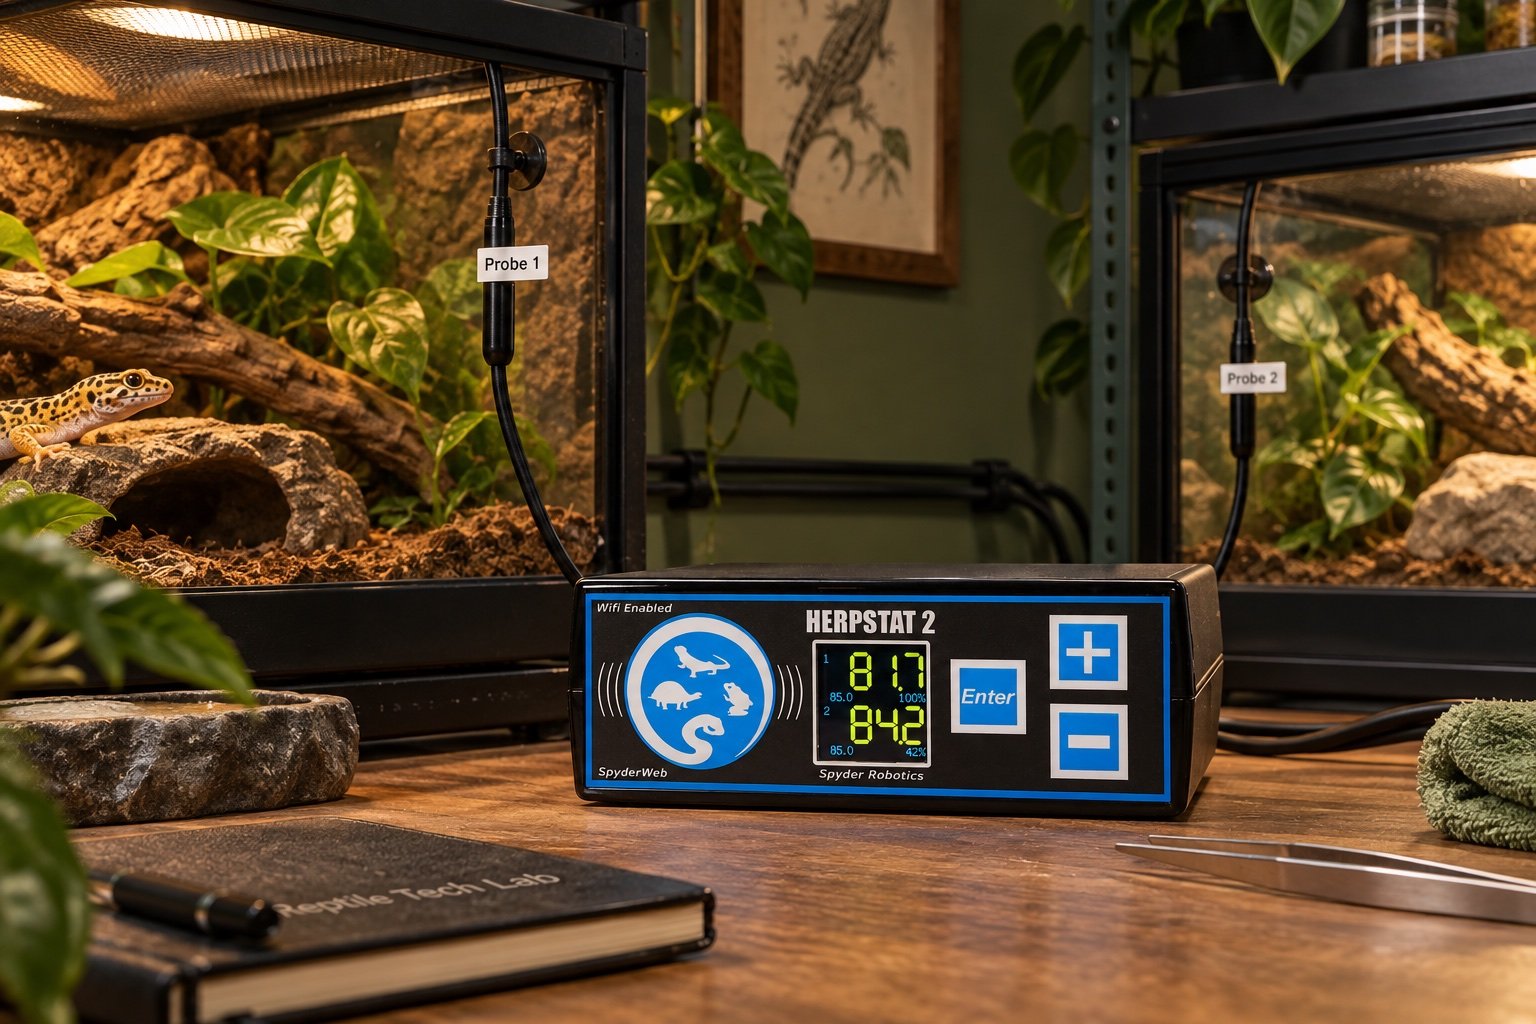
Quick verdict: The Herpstat 2 SpyderWeb is most convincing when two heat zones need independent probes, schedules and alarms. It is overkill for one simple heat mat, but the extra output is genuinely useful in a two-enclosure rack or a habitat with separate daytime and background heat.
This guide is built around commissioning, not box-opening. Compare it with our best reptile thermostats and Herpstat 1 review before changing a live enclosure.
| Point | What to know |
|---|---|
| Outputs | 2 independently configured outlets |
| Control | Dimming, pulse proportional or on/off by setup |
| Connection | Wi-Fi with SpyderWeb interface |
| Best fit | Two zones that need separate probes and limits |
What changes when you move from one output to two
A second socket sounds like a small upgrade until the probes are installed. Each output can solve a different problem: two enclosures, a basking lamp plus non-light heat, or warm-side control in a divided system. The useful part is independence. Copying one set point to both channels defeats most of the reason to buy this model. Map each outlet, probe and heater on paper first. If the job is only one heater, read our Herpstat 1 review before paying for unused capacity.
Control modes need to match the heater
A light-emitting basking lamp normally wants smooth dimming. A ceramic emitter or deep heat projector may behave well with proportional control, depending on the manufacturer instructions. Simple mats and some low-wattage heaters can use on/off control, though the resulting swing must be checked. The thermostat cannot make an unsuitable heater safe. Our deep heat projector vs halogen comparison explains why the visible result and the warmed surface are different parts of the decision.
SpyderWeb is supervision, not the safety layer
Remote graphs and alerts help when the room is unattended. They do not replace a correctly restrained probe, a safe maximum output and an independent thermometer. Test the controller with Wi-Fi disabled and confirm that both channels keep running locally. Then reconnect it and check that alerts arrive on another network. A cloud dashboard is useful only after the controller has proved it can fail safely without the cloud.
Probe placement decides what the graph means
Fasten each probe where it measures the surface or air mass the heater is meant to control. Do not leave a probe loose under a hide and do not tape it where the animal can peel it away. The two probe cables should be labelled at both ends. Our thermostat probe placement guide covers restraint, distance and the difference between air and surface targets.
Commission both channels separately
Run output one by itself for a full warm-up, then output two, then both together. The third test matters because shared room air and enclosure materials can couple the zones. Record overshoot, cool-side temperature and recovery after a short power cut. Save screenshots only after the physical readings agree with the controller. If two probes disagree with an independent logger, stop and find the cause instead of averaging the numbers.
A seven-day field check
Run the finished setup for a week before treating it as settled. On day one, photograph every position and record the room conditions. Watch the first warm-up and the final hour of the schedule. Midweek, compare the main reading with an independent instrument placed beside it long enough to stabilize. Near the end of the week, test a safe interruption such as a network loss or short power cut.
Do not tune settings every time a single reading looks odd. Look for a repeated pattern and change one variable. A clear notebook entry is more useful than a folder of screenshots with no explanation.
Build a baseline you can reproduce
Write down the room temperature, enclosure dimensions, heat and light sources, probe positions and the time each reading was taken. A number without that context is hard to compare. Use a photograph from the same angle and place a small reference mark outside the animal’s contact area. The next check should be able to recreate the first one without relying on memory.
Run the setup from a normal overnight low instead of beginning with an already warm habitat. Note how long it takes to reach the working zone and whether it overshoots. Then repeat with the enclosure doors closed, lids fitted and ventilation in its final position. A test performed while the habitat is open describes the workshop, not daily use.
Decide what would make you stop using it
Set rejection points before becoming attached to the purchase or layout. A drifting probe, missed schedule, damaged cable, unreachable sensor or unreliable power recovery is a reason to pause. So is a control that only works while a phone or cloud service is available. Write the limit and the action beside it.
Small disagreements deserve investigation, not panic. Move the independent sensor beside the control probe, wait for both to stabilize and compare again. If the difference follows one location, placement is probably the issue. If it follows one device, calibration or replacement may be needed.
Read the graph like a maintenance record
A smooth line is not automatically a good line. Check whether the highs and lows occurred when lights, heat and misting were supposed to change. A flat sensor can indicate stable conditions, but it can also indicate a dead battery, failed sync or probe pressed against a large thermal mass. Compare the chart with an observed event.
Write a short note whenever the enclosure is opened for a long clean, moved to another room or left with a temporary heater. Those annotations explain the odd parts of the history. Without them, a future reviewer may try to correct a normal event or overlook a real fault.
Make replacement predictable
Save the model, purchase date, compatible replacement part and the last known-good settings. Keep an export or photograph outside the device app. When a sensor, controller or lamp fails, the replacement should begin from a documented baseline rather than a guess.
Do not discard the old unit until the new setup has completed a full cycle and the numbers have been compared. A replacement can be newer and still be wrong for the heater, socket, enclosure depth or network. Recommission it as a different system.
Common mistakes
- Trusting the first stable-looking number without mapping the surrounding zone
- Changing several settings at once and losing the cause of the result
- Leaving probes, cables or mounts where normal animal movement can shift them
- Treating an app or remote alert as the primary safety control
- Skipping a power-recovery test because the device retained settings once
Related Reptile Tech Lab guides
Frequently asked questions
Can both outputs use different modes?
Yes. Configure each channel for its own heater and verify the selected mode before connecting the load.
Does Wi-Fi have to stay connected?
Local control should continue. Test this deliberately before relying on the system.
Can one probe control both outlets?
Treat the outlets as separate controlled zones and use the assigned probe for each.
Is it better than two single-output thermostats?
It reduces boxes and can simplify monitoring, but two separate controllers provide more physical separation.