Category: Hardware & Sensors

Reptile equipment, environmental sensors and connected hardware.

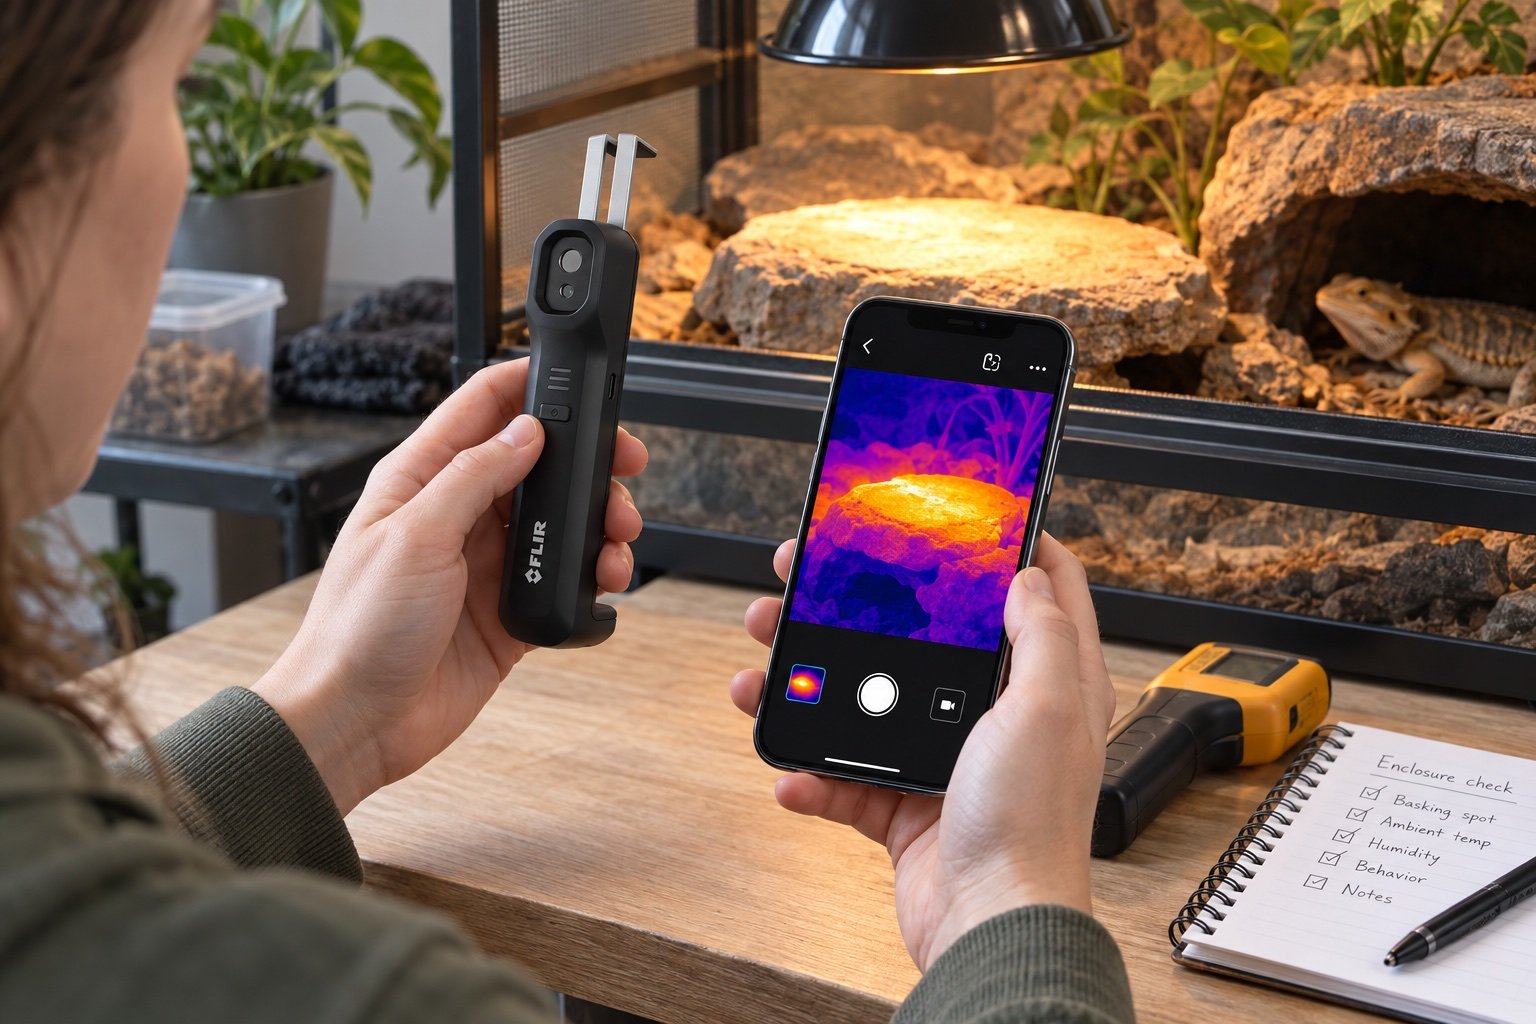
  • FLIR Edge Pro review for reptile enclosures: a map, not a thermostat

    FLIR Edge Pro review for reptile enclosures: a map, not a thermostat

    Quick verdict: The renamed FLIR Edge Pro is a capable thermal mapping tool for racks, basking zones and electrical checks. It reveals patterns that a single spot meter misses, but shiny surfaces, glass and emissivity can produce persuasive-looking errors.

    The useful comparison is the complete enclosure, not the number on the display. Our basking temperature measurement and thermometer guide provide the surrounding checks.

    Point What to know
    Thermal sensor 160 × 120 native resolution
    Range -20°C to 120°C and 0°C to 400°C modes
    Connection Wireless phone or tablet connection
    Protection IP54, 2 m drop test

    The name changed, the job did not

    FLIR renamed the FLIR ONE Edge Pro to FLIR Edge Pro in late 2025. Older listings and tutorials may use the previous name. The wireless design remains the main advantage in an enclosure room: you can hold the camera near a hard-to-reach surface while viewing the image on the phone.

    Thermal images need surface context

    A heat map shows emitted infrared energy, not air temperature and not the reptile’s internal temperature. Glass can reflect the room or the keeper. Glossy tile and metal can read strangely because emissivity differs from bark or matte stone. Set the material class, avoid shooting through glass and confirm important points with a contact or infrared measurement method you understand.

    Use it to find shape, then measure

    Scan the entire habitat for hot edges, cold corners and uneven lamp coverage. Mark the suspicious area and take repeatable readings at the same distance. The hottest-pixel marker is helpful, but it can jump to a reflection or lamp guard. Our basking temperature guide gives a repeatable inspection route.

    The accuracy figure needs perspective

    FLIR specifies accuracy of plus or minus 3°C or 5 percent under defined conditions after warm-up. That is not laboratory precision at every surface. The camera earns its keep by showing distribution and unexpected differences. Use a thermostat probe and logger for continuous control, and use the camera to ask where the system deserves a closer look.

    When the cost makes sense

    A breeder with many enclosures, a custom rack builder or someone diagnosing electrical and insulation problems can use it regularly. For one habitat, a competent spot infrared thermometer plus careful mapping is cheaper. Compare the methods in our IR thermometer vs probe guide before assuming a color image is automatically more accurate.

    What a good installation looks like after one week

    The equipment should be boring. Cables remain where they were fixed, schedules occur at the expected local time and the animal can use the enclosure without touching a probe or blocking a sensor. Charts show ordinary cycles rather than unexplained steps. Alerts are rare enough that someone will act on them.

    Repeat the acceptance check after major cleaning, seasonal room changes or firmware updates. If the system cannot recover cleanly from a routine interruption, it is not ready to become invisible infrastructure.

    Think about the next person who will touch it

    A clear label and one-page record are better than a clever setup that only its builder understands. Name every channel by enclosure and job. Put the normal reading range, emergency shutoff and last test date where a carer can find them without opening an account or searching old messages.

    Keep spare batteries, compatible probes and a basic manual near the room, but outside humid air. Do not store an unknown spare heater and assume it can be connected to the same controller. Record wattage, control type and the settings that were actually tested.

    Review cost as part of the system

    The purchase price is only the beginning. Include replacement sensors, lamps, batteries, cloud plans and the time needed to export or inspect data. A cheaper product that creates weekly false alarms can cost more attention than a simpler, stable device.

    That does not mean the most expensive option wins. Buy the least complex system that safely performs the required job and leaves a readable record. Extra channels and connected features are worthwhile when they remove a real task, not when they merely make the dashboard look complete.

    Keep the system easy to reverse

    During early testing, use mounts and routing that can be adjusted without damaging the habitat. Mark the successful positions before making them permanent. Change one part at a time and keep the previous setting in the record. If the result gets worse, you should be able to return to the proven baseline.

    Reversibility also applies to software. Export settings or photograph every screen before a reset. Avoid experimental automation on the same day that lamps, probes or enclosure furniture change.

    Use the animal’s routine as a final check

    Numbers describe the environment, while behavior shows how the animal uses the available choices. Note basking, hiding and movement at the same times for several days. A new device may be working electrically while its light, sound, airflow or placement alters normal use of the habitat.

    Behavior cannot diagnose a technical fault by itself. Treat an unexpected change as a reason to inspect the enclosure, verify measurements and consider health, not as permission to keep adjusting settings until the chart looks pleasing.

    Common mistakes

    • Trusting the first stable-looking number without mapping the surrounding zone
    • Changing several settings at once and losing the cause of the result
    • Leaving probes, cables or mounts where normal animal movement can shift them
    • Treating an app or remote alert as the primary safety control
    • Skipping a power-recovery test because the device retained settings once

    Related Reptile Tech Lab guides

    Frequently asked questions

    Can it measure through terrarium glass?

    It mainly sees the glass surface and reflections, not a reliable temperature behind it.

    Is 160 × 120 enough?

    It is useful for enclosure-scale patterns when the camera is used at a sensible distance.

    Does it replace a thermostat probe?

    No. It is an inspection tool, not continuous control.

    Why do shiny surfaces look wrong?

    Low emissivity and reflections can distort apparent temperature.
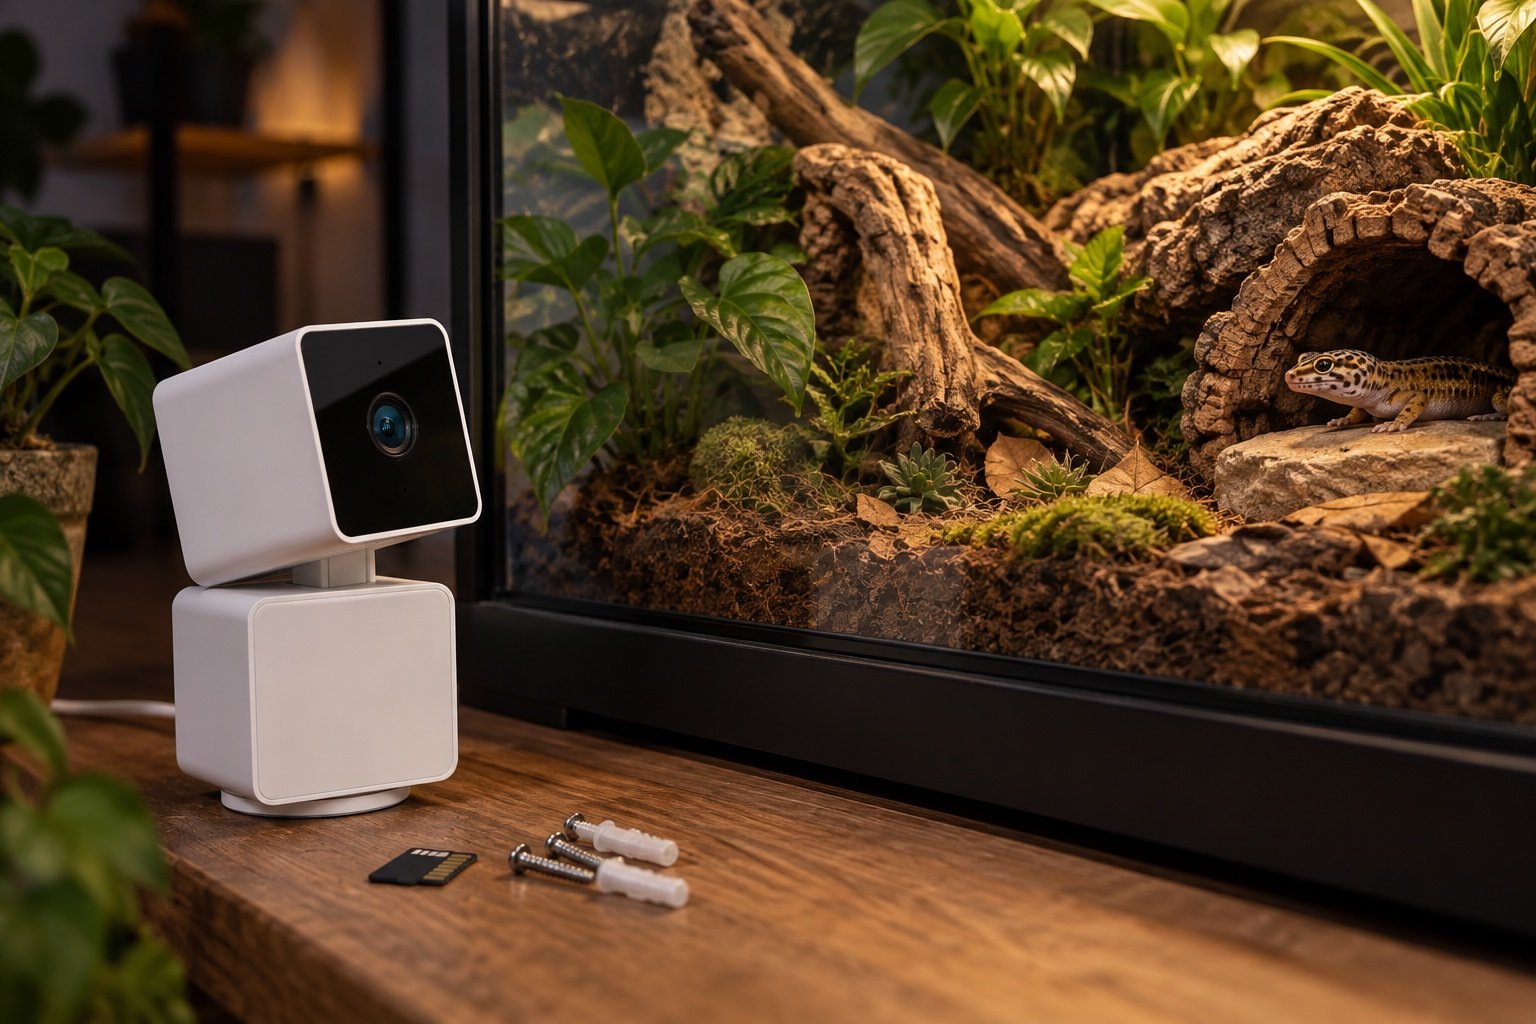
  • Wyze Cam Pan v3 review for reptile enclosures: movement versus glare

    Wyze Cam Pan v3 review for reptile enclosures: movement versus glare

    Quick verdict: The Pan v3 covers a large reptile room well, but motorized movement does not solve glass glare. It works best outside the enclosure, angled away from reflections, with motion tracking disabled when branches or insects cause constant hunting.

    We judge the device or method by the job it can repeat. Keep the best enclosure cameras and app data and privacy nearby while planning the setup.

    Point What to know
    Video 1080p, 20 fps day and 15 fps night
    Movement 360° horizontal and 180° vertical range
    Connection 2.4 GHz Wi-Fi
    Storage Local microSD plus optional cloud services

    Pan and tilt help the room more than one tank

    A fixed camera aimed correctly at one enclosure rarely needs to move. The Pan v3 becomes more useful when one mounting point must inspect several habitats or a whole rack aisle. Preset positions reduce wandering. If the camera constantly tracks feeder insects, foliage or reflections, the motor adds noise without adding evidence.

    Night vision and glass are uneasy partners

    The 850 nm infrared LEDs can bounce off glass and wash out the animal. Move the camera closer to the pane, shoot at an angle, darken the room behind the camera or disable onboard infrared and use external illumination positioned away from the lens. The reptile enclosure camera guide includes a simple glare test before permanent mounting.

    Mount outside the wet and hot zones

    IP65 weather resistance does not mean the camera belongs inside a hot, humid habitat. The cable, power adapter and moving base need room. Mount the unit outside, keep the USB lead away from misting lines and confirm that pan movement cannot pull the cable across a lamp or sharp edge.

    Privacy starts with the field of view

    The head-down privacy mode physically turns the lens away, which is clearer than a tiny software icon. Still, review every preset before enabling remote access. A camera aimed at an enclosure can easily capture doors, desks or people beyond it. Use a separate account, strong credentials and only the cloud features the household actually wants.

    Local recording needs a maintenance habit

    A microSD card reduces dependence on a subscription, but cards wear out and recordings can silently stop. Check playback monthly, confirm the clock after power loss and replace the card when errors appear. A camera is useful for behavior and incident review. It does not replace environmental alerts from a dedicated sensor.

    A seven-day field check

    Run the finished setup for a week before treating it as settled. On day one, photograph every position and record the room conditions. Watch the first warm-up and the final hour of the schedule. Midweek, compare the main reading with an independent instrument placed beside it long enough to stabilize. Near the end of the week, test a safe interruption such as a network loss or short power cut.

    Do not tune settings every time a single reading looks odd. Look for a repeated pattern and change one variable. A clear notebook entry is more useful than a folder of screenshots with no explanation.

    Build a baseline you can reproduce

    Write down the room temperature, enclosure dimensions, heat and light sources, probe positions and the time each reading was taken. A number without that context is hard to compare. Use a photograph from the same angle and place a small reference mark outside the animal’s contact area. The next check should be able to recreate the first one without relying on memory.

    Run the setup from a normal overnight low instead of beginning with an already warm habitat. Note how long it takes to reach the working zone and whether it overshoots. Then repeat with the enclosure doors closed, lids fitted and ventilation in its final position. A test performed while the habitat is open describes the workshop, not daily use.

    Decide what would make you stop using it

    Set rejection points before becoming attached to the purchase or layout. A drifting probe, missed schedule, damaged cable, unreachable sensor or unreliable power recovery is a reason to pause. So is a control that only works while a phone or cloud service is available. Write the limit and the action beside it.

    Small disagreements deserve investigation, not panic. Move the independent sensor beside the control probe, wait for both to stabilize and compare again. If the difference follows one location, placement is probably the issue. If it follows one device, calibration or replacement may be needed.

    Read the graph like a maintenance record

    A smooth line is not automatically a good line. Check whether the highs and lows occurred when lights, heat and misting were supposed to change. A flat sensor can indicate stable conditions, but it can also indicate a dead battery, failed sync or probe pressed against a large thermal mass. Compare the chart with an observed event.

    Write a short note whenever the enclosure is opened for a long clean, moved to another room or left with a temporary heater. Those annotations explain the odd parts of the history. Without them, a future reviewer may try to correct a normal event or overlook a real fault.

    Make replacement predictable

    Save the model, purchase date, compatible replacement part and the last known-good settings. Keep an export or photograph outside the device app. When a sensor, controller or lamp fails, the replacement should begin from a documented baseline rather than a guess.

    Do not discard the old unit until the new setup has completed a full cycle and the numbers have been compared. A replacement can be newer and still be wrong for the heater, socket, enclosure depth or network. Recommission it as a different system.

    Common mistakes

    • Trusting the first stable-looking number without mapping the surrounding zone
    • Changing several settings at once and losing the cause of the result
    • Leaving probes, cables or mounts where normal animal movement can shift them
    • Treating an app or remote alert as the primary safety control
    • Skipping a power-recovery test because the device retained settings once

    Related Reptile Tech Lab guides

    Frequently asked questions

    Can it see through glass at night?

    Sometimes, but onboard IR often reflects. Test angle and lighting before mounting.

    Does it support 5 GHz Wi-Fi?

    The Pan v3 uses 2.4 GHz Wi-Fi.

    Should motion tracking stay on?

    Only if it improves the intended view without chasing routine enclosure movement.

    Can it replace a temperature sensor?

    No. Video cannot provide dependable enclosure temperature data.

  • Zoo Med ReptiTemp Digital Thermostat review: simple heat and cool control

    Zoo Med ReptiTemp Digital Thermostat review: simple heat and cool control

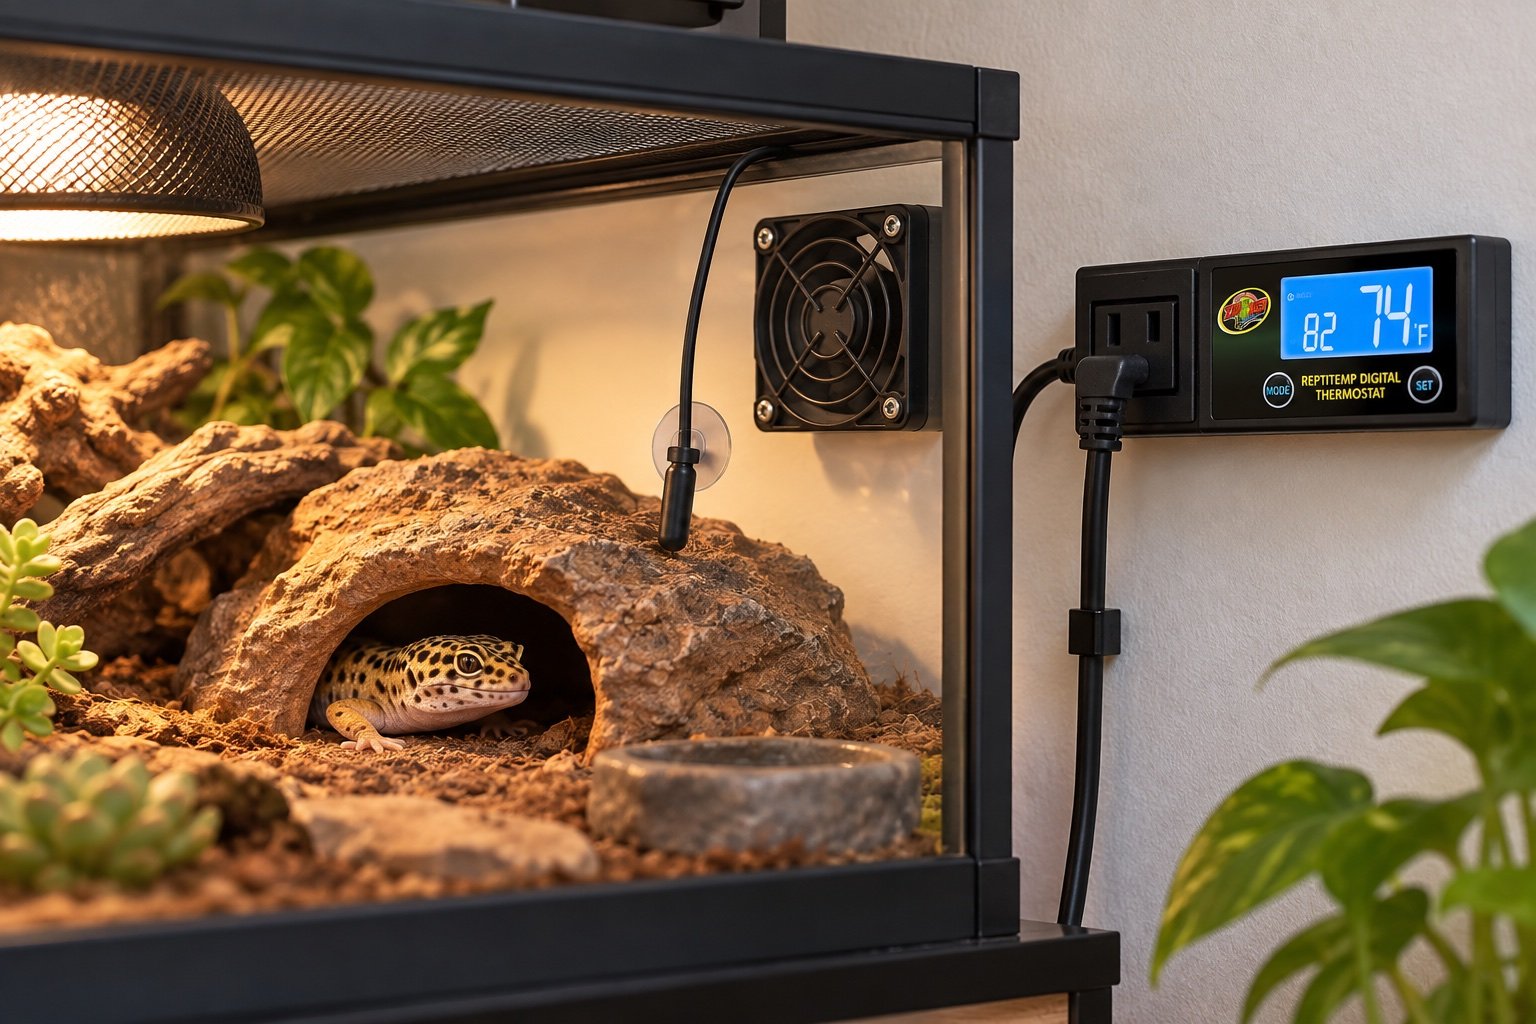
    Quick verdict: The RT-600 is a simple on/off controller that can run either heating or cooling. It fits mats, ceramic heat and small fans better than bright basking lamps. The single probe and basic display keep setup approachable, but independent monitoring is still required.

    This guide is built around commissioning, not box-opening. Compare it with our ventilation fan guide and heater comparison before changing a live enclosure.

    Point What to know
    Range 50°F to 122°F
    Heating load Up to 600 W
    Cooling load Up to 150 W
    Probe Remote sensor on a 6 ft cable

    Heat or cool, not both as a climate station

    Choose the operating mode deliberately. In heat mode, the socket powers a heater when temperature falls. In cool mode, it can power a fan when temperature rises. This is not the same as a two-stage controller that coordinates heating and cooling together. Label the selected mode near the plug so a later equipment swap does not invert the response.

    On/off behavior limits heater choice

    A ceramic emitter, mat or cooling fan can suit relay control when the full system is tested. A halogen lamp will switch visibly and may cycle more than desired. If the enclosure uses light-emitting heat, compare a dimming model in our reptile thermostat guide.

    The probe cable is long enough to create mistakes

    Six feet helps place the controller outside the habitat, but loose cable invites snagging. Secure the probe at the controlled zone, route the cable away from the animal and leave a service loop outside. Do not trap the wire under a sliding door. The probe placement guide shows safer restraint options.

    Cooling mode needs a room-air reality check

    A small fan can exchange enclosure air only when the room is cooler or drier than the habitat. If the whole room overheats, recirculation may do almost nothing. Log room and enclosure temperatures together, guard fan blades and avoid directing strong airflow across an animal’s preferred resting place.

    Test the failure direction

    Warm the probe gently in cool mode and confirm the fan starts. Cool it in heat mode and confirm the heater starts. Then unplug the probe if the manual permits that diagnostic and observe the fault behavior. Use a separate alarm sensor because a thermostat cannot report its own complete loss of power.

    What a good installation looks like after one week

    The equipment should be boring. Cables remain where they were fixed, schedules occur at the expected local time and the animal can use the enclosure without touching a probe or blocking a sensor. Charts show ordinary cycles rather than unexplained steps. Alerts are rare enough that someone will act on them.

    Repeat the acceptance check after major cleaning, seasonal room changes or firmware updates. If the system cannot recover cleanly from a routine interruption, it is not ready to become invisible infrastructure.

    Keep a change log, even for a single enclosure

    Record the date, old setting, new setting and reason. Add one observation after the next full day. This stops a sequence of sensible-looking tweaks from drifting far away from the original plan. It also helps another carer understand why an unusual schedule or position exists.

    Firmware, app and clock changes belong in the same record as physical maintenance. After an update, confirm units, time zone, schedules, alarm limits and channel names. Do not assume a graph that looks familiar proves the outputs are mapped correctly.

    Check the animal’s access around the hardware

    Run a hand along the routes the animal can climb. Look for hot guards, sharp clips, adhesive edges and cable loops. Make sure a hide, plant or deep substrate cannot press against the sensor and create a false reading. Equipment placement is finished only when the animal can use the habitat normally without becoming part of the mounting system.

    Observe the first week at ordinary care times, not only during a staged inspection. Feeding, misting, opening doors and moving bowls are the moments that disturb cables and airflow. If a control survives only when nobody touches the enclosure, it is not a durable installation.

    Watch what happens during ordinary care

    Open the enclosure, change water, mist, feed and move the usual hide or branch. Then check the hardware. Good installation survives those actions without a cable pulling tight, a probe moving or an alert becoming meaningless. A perfect result in an untouched display is less useful than a stable result during real care.

    Ask another person to perform the round using the written labels. If they cannot identify the shutoff, correct sensor or affected habitat, improve the record. This is especially important when one controller or gateway serves several enclosures.

    Plan the retirement path

    Connected products eventually lose app support, batteries weaken and replacement probes disappear. Export data in an open format and keep essential settings in plain text. Avoid building a safety function that only one discontinued phone app can change.

    Before replacing a working device, define the improvement you expect: quieter control, a second zone, remote alerts or better moisture protection. If the new product does not solve that specific limitation, maintenance and a spare part may be the better purchase.

    Common mistakes

    • Trusting the first stable-looking number without mapping the surrounding zone
    • Changing several settings at once and losing the cause of the result
    • Leaving probes, cables or mounts where normal animal movement can shift them
    • Treating an app or remote alert as the primary safety control
    • Skipping a power-recovery test because the device retained settings once

    Related Reptile Tech Lab guides

    Frequently asked questions

    Can it dim a lamp?

    No. It controls by switching power on and off.

    Can it run heating and cooling together?

    It operates in the selected heat or cool mode, not as a dual-stage system.

    Is the controller waterproof?

    Keep the controller and socket dry; follow the manual for probe placement.

    What can cooling mode control?

    A suitably rated fan or cooling device within the 150 W limit.

  • Herpstat 2 SpyderWeb review: two-zone control without guesswork

    Herpstat 2 SpyderWeb review: two-zone control without guesswork

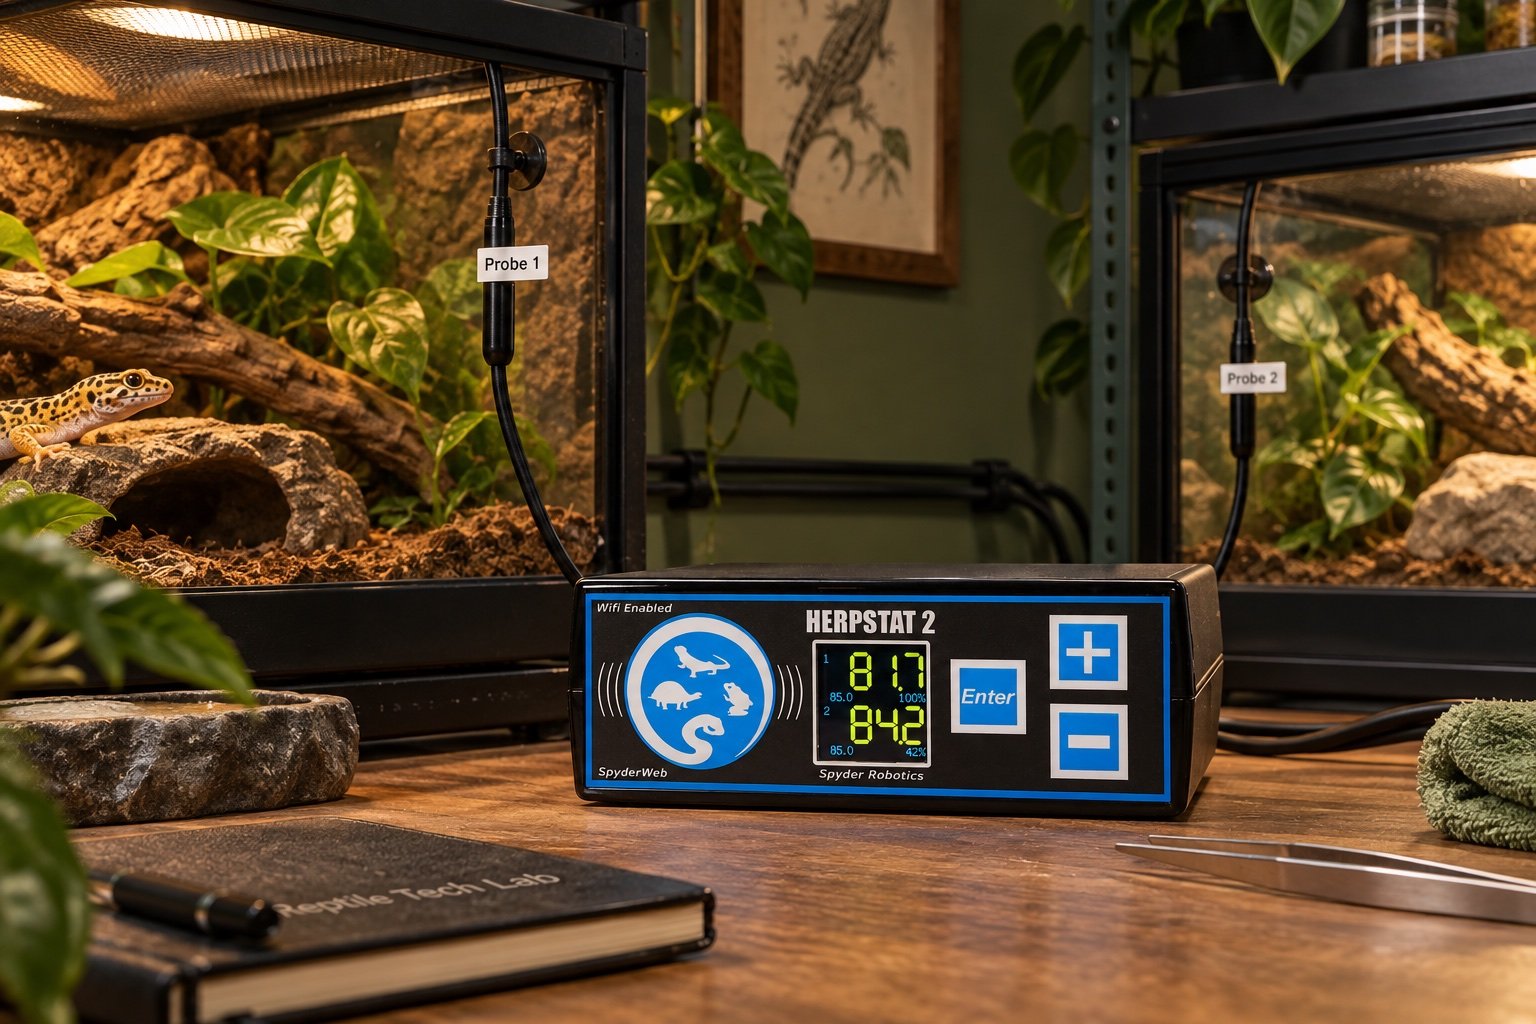
    Quick verdict: The Herpstat 2 SpyderWeb is most convincing when two heat zones need independent probes, schedules and alarms. It is overkill for one simple heat mat, but the extra output is genuinely useful in a two-enclosure rack or a habitat with separate daytime and background heat.

    This guide is built around commissioning, not box-opening. Compare it with our best reptile thermostats and Herpstat 1 review before changing a live enclosure.

    Point What to know
    Outputs 2 independently configured outlets
    Control Dimming, pulse proportional or on/off by setup
    Connection Wi-Fi with SpyderWeb interface
    Best fit Two zones that need separate probes and limits

    What changes when you move from one output to two

    A second socket sounds like a small upgrade until the probes are installed. Each output can solve a different problem: two enclosures, a basking lamp plus non-light heat, or warm-side control in a divided system. The useful part is independence. Copying one set point to both channels defeats most of the reason to buy this model. Map each outlet, probe and heater on paper first. If the job is only one heater, read our Herpstat 1 review before paying for unused capacity.

    Control modes need to match the heater

    A light-emitting basking lamp normally wants smooth dimming. A ceramic emitter or deep heat projector may behave well with proportional control, depending on the manufacturer instructions. Simple mats and some low-wattage heaters can use on/off control, though the resulting swing must be checked. The thermostat cannot make an unsuitable heater safe. Our deep heat projector vs halogen comparison explains why the visible result and the warmed surface are different parts of the decision.

    SpyderWeb is supervision, not the safety layer

    Remote graphs and alerts help when the room is unattended. They do not replace a correctly restrained probe, a safe maximum output and an independent thermometer. Test the controller with Wi-Fi disabled and confirm that both channels keep running locally. Then reconnect it and check that alerts arrive on another network. A cloud dashboard is useful only after the controller has proved it can fail safely without the cloud.

    Probe placement decides what the graph means

    Fasten each probe where it measures the surface or air mass the heater is meant to control. Do not leave a probe loose under a hide and do not tape it where the animal can peel it away. The two probe cables should be labelled at both ends. Our thermostat probe placement guide covers restraint, distance and the difference between air and surface targets.

    Commission both channels separately

    Run output one by itself for a full warm-up, then output two, then both together. The third test matters because shared room air and enclosure materials can couple the zones. Record overshoot, cool-side temperature and recovery after a short power cut. Save screenshots only after the physical readings agree with the controller. If two probes disagree with an independent logger, stop and find the cause instead of averaging the numbers.

    A seven-day field check

    Run the finished setup for a week before treating it as settled. On day one, photograph every position and record the room conditions. Watch the first warm-up and the final hour of the schedule. Midweek, compare the main reading with an independent instrument placed beside it long enough to stabilize. Near the end of the week, test a safe interruption such as a network loss or short power cut.

    Do not tune settings every time a single reading looks odd. Look for a repeated pattern and change one variable. A clear notebook entry is more useful than a folder of screenshots with no explanation.

    Build a baseline you can reproduce

    Write down the room temperature, enclosure dimensions, heat and light sources, probe positions and the time each reading was taken. A number without that context is hard to compare. Use a photograph from the same angle and place a small reference mark outside the animal’s contact area. The next check should be able to recreate the first one without relying on memory.

    Run the setup from a normal overnight low instead of beginning with an already warm habitat. Note how long it takes to reach the working zone and whether it overshoots. Then repeat with the enclosure doors closed, lids fitted and ventilation in its final position. A test performed while the habitat is open describes the workshop, not daily use.

    Decide what would make you stop using it

    Set rejection points before becoming attached to the purchase or layout. A drifting probe, missed schedule, damaged cable, unreachable sensor or unreliable power recovery is a reason to pause. So is a control that only works while a phone or cloud service is available. Write the limit and the action beside it.

    Small disagreements deserve investigation, not panic. Move the independent sensor beside the control probe, wait for both to stabilize and compare again. If the difference follows one location, placement is probably the issue. If it follows one device, calibration or replacement may be needed.

    Read the graph like a maintenance record

    A smooth line is not automatically a good line. Check whether the highs and lows occurred when lights, heat and misting were supposed to change. A flat sensor can indicate stable conditions, but it can also indicate a dead battery, failed sync or probe pressed against a large thermal mass. Compare the chart with an observed event.

    Write a short note whenever the enclosure is opened for a long clean, moved to another room or left with a temporary heater. Those annotations explain the odd parts of the history. Without them, a future reviewer may try to correct a normal event or overlook a real fault.

    Make replacement predictable

    Save the model, purchase date, compatible replacement part and the last known-good settings. Keep an export or photograph outside the device app. When a sensor, controller or lamp fails, the replacement should begin from a documented baseline rather than a guess.

    Do not discard the old unit until the new setup has completed a full cycle and the numbers have been compared. A replacement can be newer and still be wrong for the heater, socket, enclosure depth or network. Recommission it as a different system.

    Common mistakes

    • Trusting the first stable-looking number without mapping the surrounding zone
    • Changing several settings at once and losing the cause of the result
    • Leaving probes, cables or mounts where normal animal movement can shift them
    • Treating an app or remote alert as the primary safety control
    • Skipping a power-recovery test because the device retained settings once

    Related Reptile Tech Lab guides

    Frequently asked questions

    Can both outputs use different modes?

    Yes. Configure each channel for its own heater and verify the selected mode before connecting the load.

    Does Wi-Fi have to stay connected?

    Local control should continue. Test this deliberately before relying on the system.

    Can one probe control both outlets?

    Treat the outlets as separate controlled zones and use the assigned probe for each.

    Is it better than two single-output thermostats?

    It reduces boxes and can simplify monitoring, but two separate controllers provide more physical separation.

  • Inkbird ITC-306T review for reptile heating: useful timer, hard limits

    Inkbird ITC-306T review for reptile heating: useful timer, hard limits

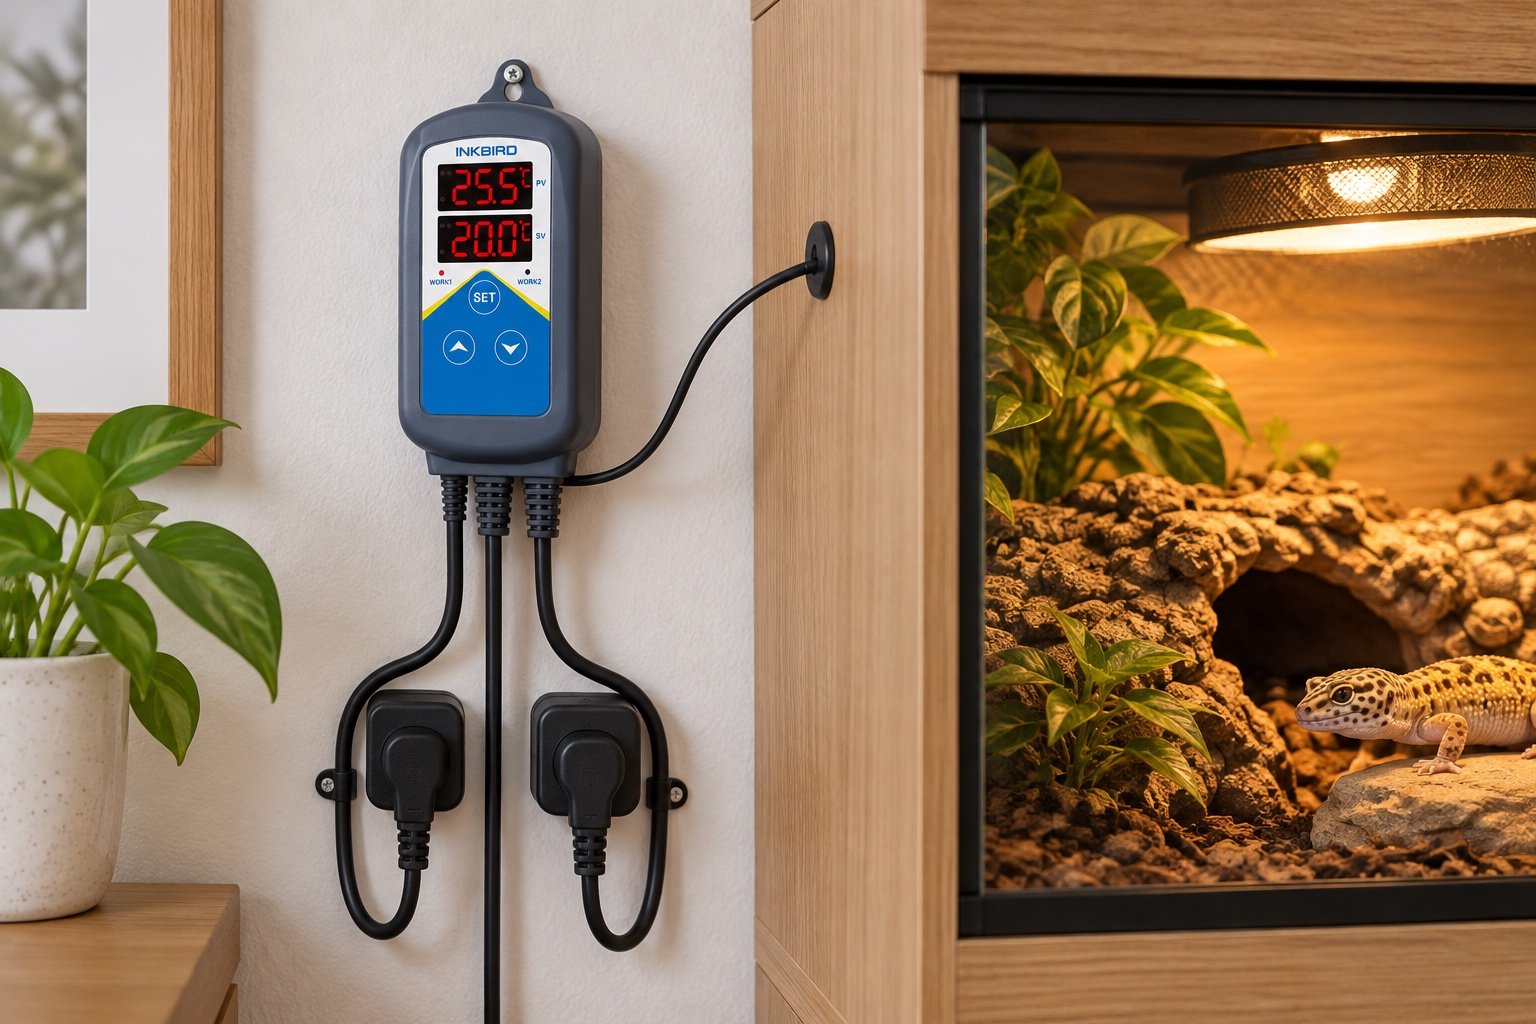
    Quick verdict: The ITC-306T is a straightforward heating-only, on/off controller with two sockets on one relay. It can suit non-light heaters that tolerate cycling. It is a poor match for a halogen basking lamp and should not be mistaken for two independently controlled zones.

    The useful comparison is the complete enclosure, not the number on the display. Our reptile thermostat guide and ceramic emitter vs deep heat projector provide the surrounding checks.

    Point What to know
    Control type Heating only, on/off
    Load Up to 10 A, regional wattage varies
    Schedule Two timed temperature periods
    Probe 2 m NTC probe, IP67 probe body

    Two sockets do not mean two thermostats

    Both outlets follow the same control decision. That can run two compatible heaters, but it cannot maintain separate temperatures or protect two unrelated enclosures. Combined load still matters. If the heaters serve different habitats, one displaced probe can affect both. The Herpstat vs Inkbird comparison explains the gap between a shared relay controller and a proportional reptile thermostat.

    The day and night schedule is basic but useful

    The controller stores two temperature periods across a 24-hour cycle. That is enough for a modest night drop without adding a separate timer. It is not a gradual sunrise routine. At the changeover, the target changes and the relay reacts. Measure the enclosure through several transitions because stored heat can make the first night reading look better than the rest of the night.

    Choose a heater that can be switched

    The ITC-306T turns power fully on and off. Ceramic emitters and some mats can tolerate that pattern when installed correctly. A bright lamp will visibly blink and its life may suffer. For light-emitting heat, a dimming controller is usually the cleaner choice. Read the heater instructions, stay below the controller and socket ratings, and keep a safety margin rather than treating 10 A as a daily target.

    Water resistance stops at the probe

    Inkbird rates the probe body IP67, not the display, plugs or cable junctions. Keep the controller and outlets outside the wet zone. Add drip loops and position the probe where mist cannot run along the cable into a socket. In a humid enclosure, inspect the cable entry and any protective sleeve during every deep clean.

    A sensible acceptance test

    Set a deliberately low target with no animal present and confirm both sockets switch together. Raise the target, watch the warm-up, and compare the controller with a separate logger placed beside the probe. Unplug power long enough to test memory, then check the schedule clock. Finally, loosen nothing: tug the probe restraint gently and make sure normal animal movement cannot change the reading.

    What a good installation looks like after one week

    The equipment should be boring. Cables remain where they were fixed, schedules occur at the expected local time and the animal can use the enclosure without touching a probe or blocking a sensor. Charts show ordinary cycles rather than unexplained steps. Alerts are rare enough that someone will act on them.

    Repeat the acceptance check after major cleaning, seasonal room changes or firmware updates. If the system cannot recover cleanly from a routine interruption, it is not ready to become invisible infrastructure.

    Keep a change log, even for a single enclosure

    Record the date, old setting, new setting and reason. Add one observation after the next full day. This stops a sequence of sensible-looking tweaks from drifting far away from the original plan. It also helps another carer understand why an unusual schedule or position exists.

    Firmware, app and clock changes belong in the same record as physical maintenance. After an update, confirm units, time zone, schedules, alarm limits and channel names. Do not assume a graph that looks familiar proves the outputs are mapped correctly.

    Check the animal’s access around the hardware

    Run a hand along the routes the animal can climb. Look for hot guards, sharp clips, adhesive edges and cable loops. Make sure a hide, plant or deep substrate cannot press against the sensor and create a false reading. Equipment placement is finished only when the animal can use the habitat normally without becoming part of the mounting system.

    Observe the first week at ordinary care times, not only during a staged inspection. Feeding, misting, opening doors and moving bowls are the moments that disturb cables and airflow. If a control survives only when nobody touches the enclosure, it is not a durable installation.

    Watch what happens during ordinary care

    Open the enclosure, change water, mist, feed and move the usual hide or branch. Then check the hardware. Good installation survives those actions without a cable pulling tight, a probe moving or an alert becoming meaningless. A perfect result in an untouched display is less useful than a stable result during real care.

    Ask another person to perform the round using the written labels. If they cannot identify the shutoff, correct sensor or affected habitat, improve the record. This is especially important when one controller or gateway serves several enclosures.

    Plan the retirement path

    Connected products eventually lose app support, batteries weaken and replacement probes disappear. Export data in an open format and keep essential settings in plain text. Avoid building a safety function that only one discontinued phone app can change.

    Before replacing a working device, define the improvement you expect: quieter control, a second zone, remote alerts or better moisture protection. If the new product does not solve that specific limitation, maintenance and a spare part may be the better purchase.

    Common mistakes

    • Trusting the first stable-looking number without mapping the surrounding zone
    • Changing several settings at once and losing the cause of the result
    • Leaving probes, cables or mounts where normal animal movement can shift them
    • Treating an app or remote alert as the primary safety control
    • Skipping a power-recovery test because the device retained settings once

    Related Reptile Tech Lab guides

    Frequently asked questions

    Can it cool an enclosure?

    No. The ITC-306T controls heating only.

    Are the two sockets independent?

    No. They share the same relay and temperature decision.

    Can it run a basking bulb?

    It can switch a lamp electrically, but visible on/off cycling makes it a poor choice for most basking bulbs.

    Does it have a custom low-temperature alarm?

    The model has limited alarm behavior, so use an independent monitor for husbandry alerts.

  • Microclimate EVO Connected 3 review: three channels, one control plan

    Microclimate EVO Connected 3 review: three channels, one control plan

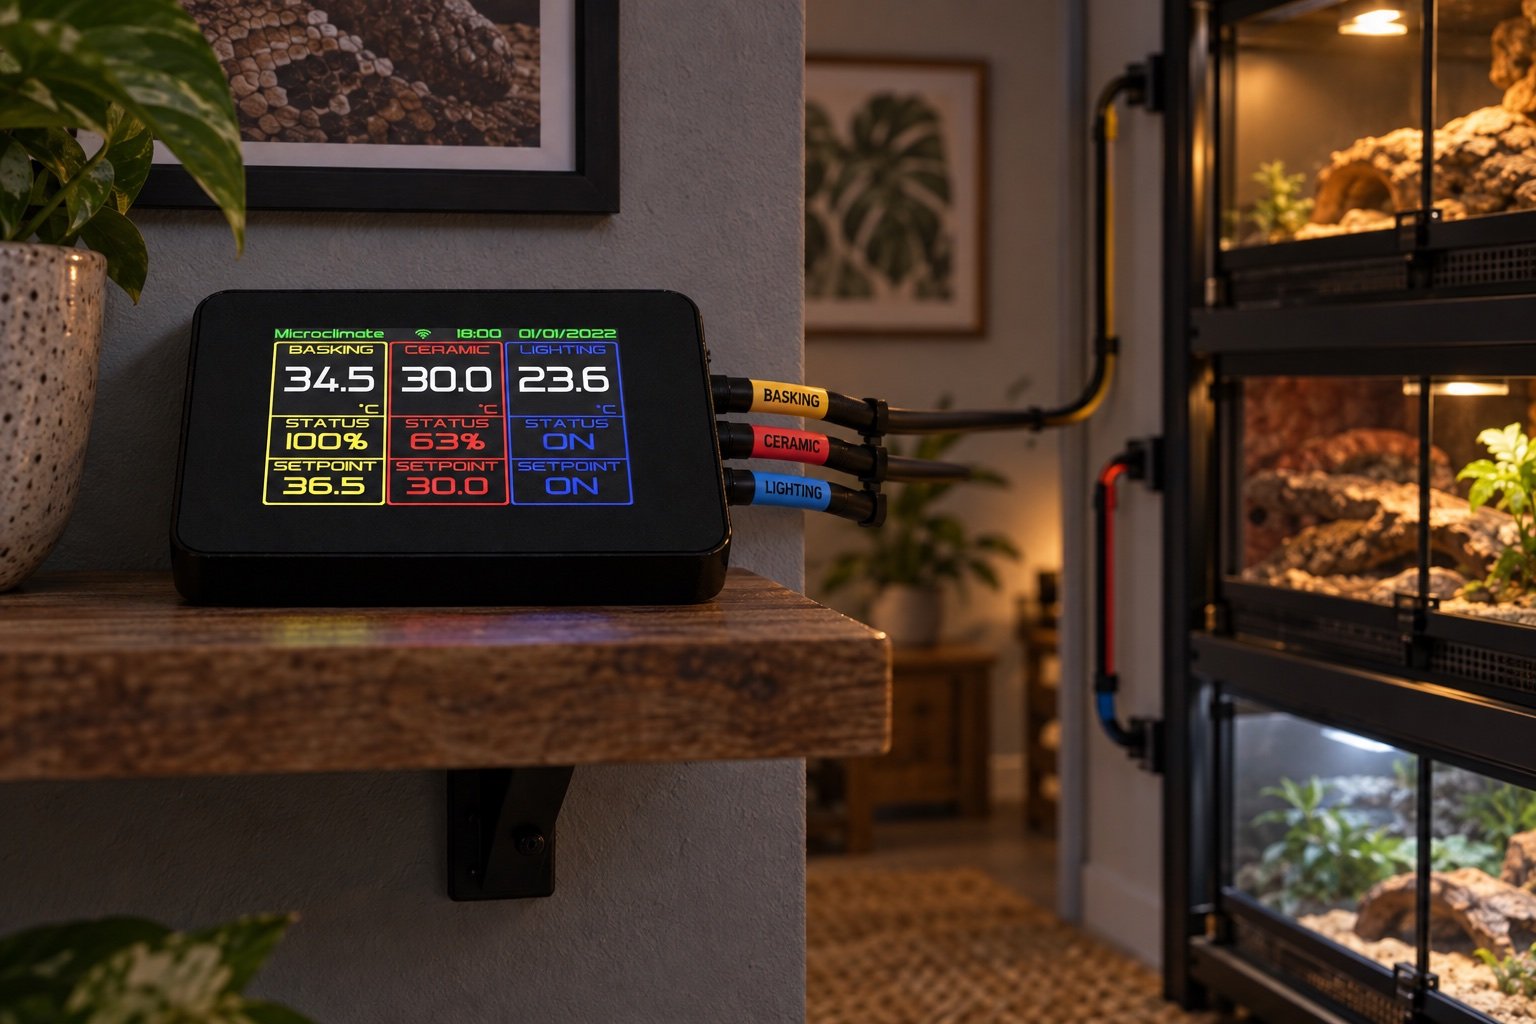
    Quick verdict: The EVO Connected 3 makes sense for a complex habitat or a small bank of enclosures where three controlled outputs reduce cable clutter. Its advantage is coordination. That also makes careful labelling, load planning and failure testing non-negotiable.

    We judge the device or method by the job it can repeat. Keep the Herpstat 2 SpyderWeb review and Zoo Med Environmental Control Center review nearby while planning the setup.

    Point What to know
    Channels 3 controlled outputs
    Interface Local control plus connected features
    Use case Multi-device or multi-zone systems
    Main risk Complex setup can hide a mapping error

    Start with a channel map, not the app

    Write down channel number, heater, probe, target, maximum safe temperature and fallback action. Attach the same channel number to both ends of every cable. Only then create the digital configuration. This catches the most dangerous setup error: a probe from one enclosure controlling a heater in another. A neat dashboard cannot reveal crossed physical wiring.

    Three channels can solve different jobs

    One habitat might use a dimmed daytime basking lamp, a separate background heater and a controlled cooling fan. A rack might use one channel per enclosure. Those layouts have different failure paths. If outputs influence the same air volume, run them together during testing. If they control separate animals, verify that settings and alarms never depend on a shared assumption.

    Connected control should remain optional

    Set the essential limits on the controller and confirm that heat remains stable when the network is unavailable. Remote changes are convenient, especially across seasonal room shifts, but they also make accidental edits easier. Use account security, document the approved configuration and avoid changing a set point from a phone without someone checking the physical enclosure afterward.

    Check the boring physical details

    Probe strain relief, cable routing and ventilation around the controller matter more than a polished graph. Keep mains connections dry and accessible. Do not bury the unit behind a rack where heat builds or where a warning display cannot be seen. The electrical safety guide shows how to separate low-voltage probes from wet equipment and mains leads.

    Who should choose something simpler

    A single enclosure with one heater rarely needs three outputs. Extra menus and wiring add more ways to make a mistake. In that case, compare the best reptile thermostats by heater type, not feature count. The EVO becomes attractive when its third channel replaces a real second or third control problem, not when it merely leaves room for imaginary upgrades.

    A seven-day field check

    Run the finished setup for a week before treating it as settled. On day one, photograph every position and record the room conditions. Watch the first warm-up and the final hour of the schedule. Midweek, compare the main reading with an independent instrument placed beside it long enough to stabilize. Near the end of the week, test a safe interruption such as a network loss or short power cut.

    Do not tune settings every time a single reading looks odd. Look for a repeated pattern and change one variable. A clear notebook entry is more useful than a folder of screenshots with no explanation.

    Separate a useful alert from ordinary noise

    Set warnings far enough from normal cycling that they mean something, but early enough to allow a response. Review a full week of data before tightening limits. Misting peaks, nighttime drops and door-open care periods may be expected. Label those events in the record so they are not mistaken for hardware faults.

    Every alarm needs a person, a time window and an action. If nobody can reach the enclosure, a remote notification mainly documents the problem. Keep contact details and the safe immediate steps with the care instructions, then test the alert on another network.

    Use independent evidence for the important claim

    If a thermostat says the basking zone is safe, confirm the surface with the correct instrument. If a logger claims the room stayed stable, compare it with a second sensor during commissioning. If an app says a schedule ran, observe the actual lamp, fan or pump. Independent checks should use a different device and, where possible, a different power path.

    Agreement once is not proof forever. Recheck after moving decor, replacing a bulb, changing substrate depth or altering room heating. Those changes can affect the habitat more than a small adjustment inside the app.

    Check the setup at two room temperatures

    A controller that behaves well on a mild afternoon may struggle during the coldest night or hottest sunny day. Repeat the map when the room changes naturally. Do not create dangerous conditions for a test, but use seasonal weather to confirm that the system has enough capacity and still leaves a cool retreat.

    Room data helps explain enclosure data. Place a temporary logger outside the habitat while commissioning and note HVAC cycles, open windows and direct sun. Remove it later if it adds no actionable information.

    Know which number deserves action

    Small consumer-sensor differences are normal. Focus on repeated drift, missed cycles and values that cross a husbandry or equipment limit. Write the action beside the threshold: inspect a probe, disable one heater, call the local carer or move the animal to the prepared backup.

    An alarm with no response rule becomes background noise. Test delivery, acknowledge it and record how long the response took. Then adjust the threshold only if the normal data shows that it is poorly placed.

    Common mistakes

    • Trusting the first stable-looking number without mapping the surrounding zone
    • Changing several settings at once and losing the cause of the result
    • Leaving probes, cables or mounts where normal animal movement can shift them
    • Treating an app or remote alert as the primary safety control
    • Skipping a power-recovery test because the device retained settings once

    Related Reptile Tech Lab guides

    Frequently asked questions

    Can it control three separate enclosures?

    It can control separate loads, but each channel needs a correctly assigned probe and independent verification.

    Does remote access replace local alarms?

    No. Network access is a convenience layer.

    Should all channels use the same schedule?

    Only if the husbandry plan calls for it. Configure by zone, not by symmetry.

    What should be tested first?

    Test every channel alone, then test the combined system and power recovery.

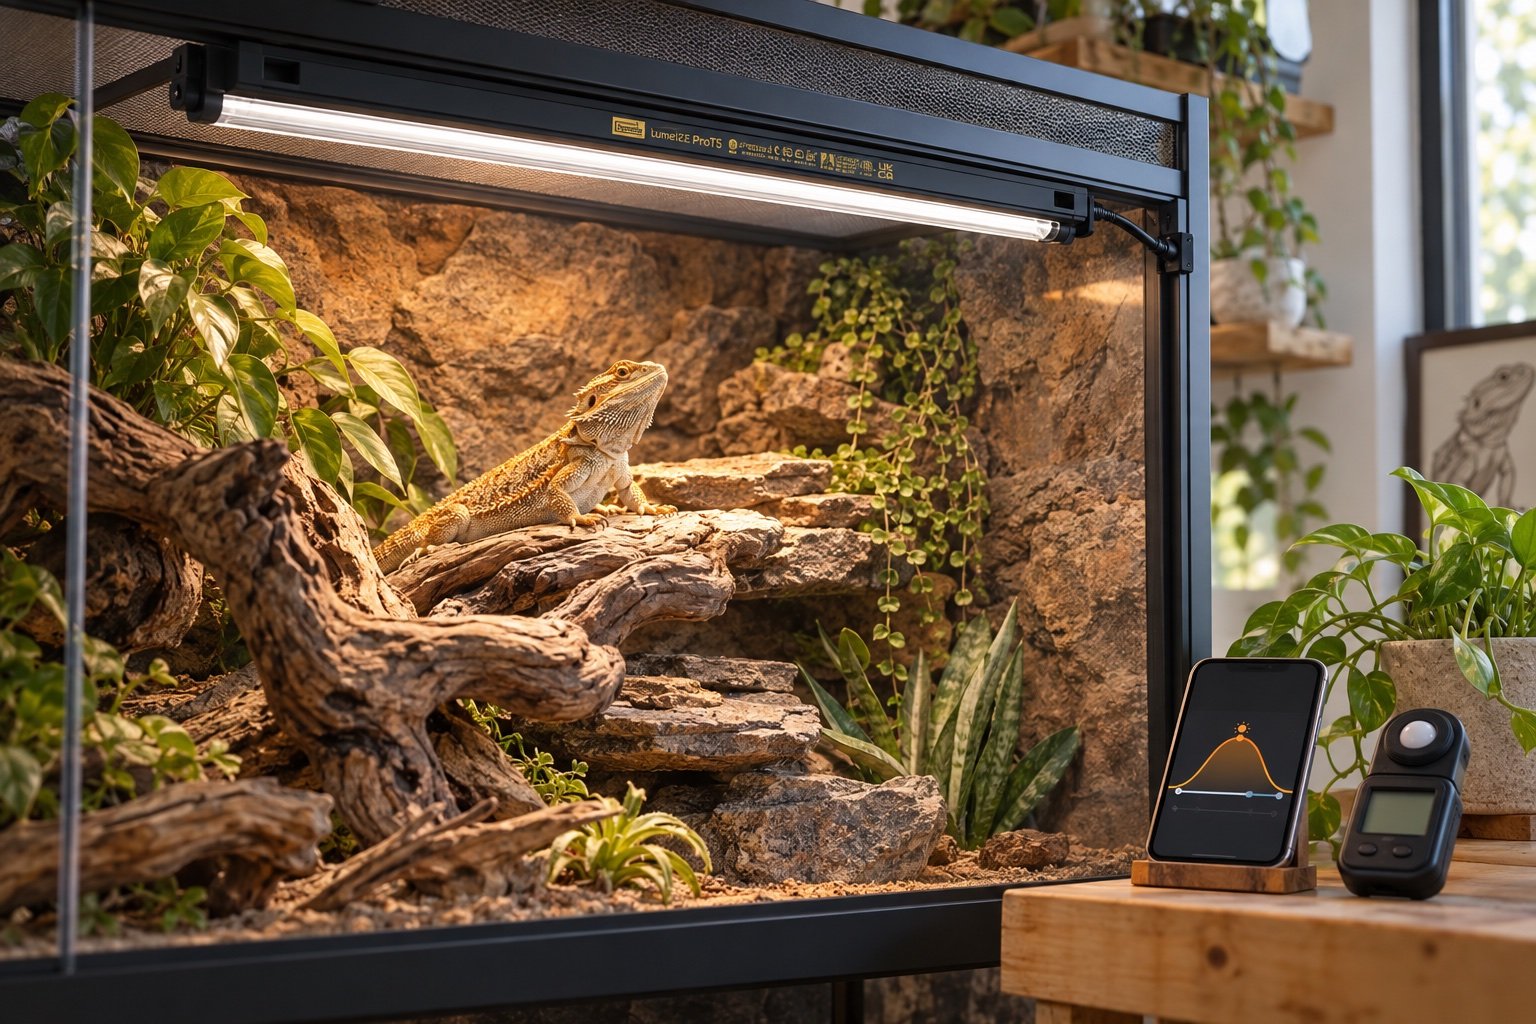
  • Arcadia LumenIZE ProT5 review: useful dimming with setup caveats

    Arcadia LumenIZE ProT5 review: useful dimming with setup caveats

    Quick verdict: LumenIZE ProT5 adds programmable ramps and local schedule memory to a familiar T5 UVB format. It is worthwhile for keepers who will measure the resulting UVI curve. Dimming percentages are controls, not husbandry measurements.

    The useful comparison is the complete enclosure, not the number on the display. Our standard Arcadia ProT5 review and UVB through mesh provide the surrounding checks.

    Point What to know
    Control Bluetooth app with stored daily schedule
    Protection Current LumenIZE range rated IP65
    Memory Internal memory with replaceable backup battery
    Compatibility LumenIZE links only with compatible LumenIZE products

    A sunrise curve changes exposure, not just appearance

    A ramped morning looks gentler than an instant switch, but the practical effect is a changing UV Index across the day. Measure at full output first. Then sample the programmed curve at the same marked basking point. The percentage shown in the app is not guaranteed to equal the same percentage of UVI at every point. Our UVB lighting guide explains how to build a usable zone before adding automation.

    The schedule lives in the fitting

    Arcadia says the programmed cycle is stored in the bar and backed by an internal battery. That is the right architecture for a habitat device because a phone does not need to remain nearby. Test it. Disconnect power, wait, restore it and check both the clock position and actual output. Repeat after app updates or a battery change.

    Compatibility is easy to misunderstand

    LumenIZE bars do not gain control by linking them to older standard ProT5 or LED Bar kits. The app controls the compatible LumenIZE hardware. Check product codes before ordering link cables or planning one power run. Mixing generations can leave you with a physically connected system that does not behave as expected.

    Monthly refresh and manual recovery deserve attention

    The instructions recommend a monthly full-power refresh. They also describe a hardware sequence for recovering control or resetting a used fitting. Put those steps in the maintenance record instead of relying on memory. If the app becomes unavailable, the light can run at full output, but dimming control requires the app.

    Who gains from the upgrade

    A keeper already measuring UVI, documenting lamp age and tuning a complex day cycle can use LumenIZE well. Someone who has not mapped distance and mesh should start with the standard Arcadia ProT5 review and a reliable timer. Automation is the last layer, not the first correction.

    A seven-day field check

    Run the finished setup for a week before treating it as settled. On day one, photograph every position and record the room conditions. Watch the first warm-up and the final hour of the schedule. Midweek, compare the main reading with an independent instrument placed beside it long enough to stabilize. Near the end of the week, test a safe interruption such as a network loss or short power cut.

    Do not tune settings every time a single reading looks odd. Look for a repeated pattern and change one variable. A clear notebook entry is more useful than a folder of screenshots with no explanation.

    Build a baseline you can reproduce

    Write down the room temperature, enclosure dimensions, heat and light sources, probe positions and the time each reading was taken. A number without that context is hard to compare. Use a photograph from the same angle and place a small reference mark outside the animal’s contact area. The next check should be able to recreate the first one without relying on memory.

    Run the setup from a normal overnight low instead of beginning with an already warm habitat. Note how long it takes to reach the working zone and whether it overshoots. Then repeat with the enclosure doors closed, lids fitted and ventilation in its final position. A test performed while the habitat is open describes the workshop, not daily use.

    Decide what would make you stop using it

    Set rejection points before becoming attached to the purchase or layout. A drifting probe, missed schedule, damaged cable, unreachable sensor or unreliable power recovery is a reason to pause. So is a control that only works while a phone or cloud service is available. Write the limit and the action beside it.

    Small disagreements deserve investigation, not panic. Move the independent sensor beside the control probe, wait for both to stabilize and compare again. If the difference follows one location, placement is probably the issue. If it follows one device, calibration or replacement may be needed.

    Read the graph like a maintenance record

    A smooth line is not automatically a good line. Check whether the highs and lows occurred when lights, heat and misting were supposed to change. A flat sensor can indicate stable conditions, but it can also indicate a dead battery, failed sync or probe pressed against a large thermal mass. Compare the chart with an observed event.

    Write a short note whenever the enclosure is opened for a long clean, moved to another room or left with a temporary heater. Those annotations explain the odd parts of the history. Without them, a future reviewer may try to correct a normal event or overlook a real fault.

    Make replacement predictable

    Save the model, purchase date, compatible replacement part and the last known-good settings. Keep an export or photograph outside the device app. When a sensor, controller or lamp fails, the replacement should begin from a documented baseline rather than a guess.

    Do not discard the old unit until the new setup has completed a full cycle and the numbers have been compared. A replacement can be newer and still be wrong for the heater, socket, enclosure depth or network. Recommission it as a different system.

    Common mistakes

    • Trusting the first stable-looking number without mapping the surrounding zone
    • Changing several settings at once and losing the cause of the result
    • Leaving probes, cables or mounts where normal animal movement can shift them
    • Treating an app or remote alert as the primary safety control
    • Skipping a power-recovery test because the device retained settings once

    Related Reptile Tech Lab guides

    Frequently asked questions

    Does the lamp keep its schedule without a phone nearby?

    The schedule is stored in the fitting. Test power recovery as part of setup.

    Can the app control an older ProT5?

    No. Standard non-LumenIZE products do not gain app control.

    Is a dimming percentage the same as UVI?

    No. Measure UV Index at the animal’s position.

    Can it run at all without the app?

    It can operate at full output, while programming and dimming depend on the app.

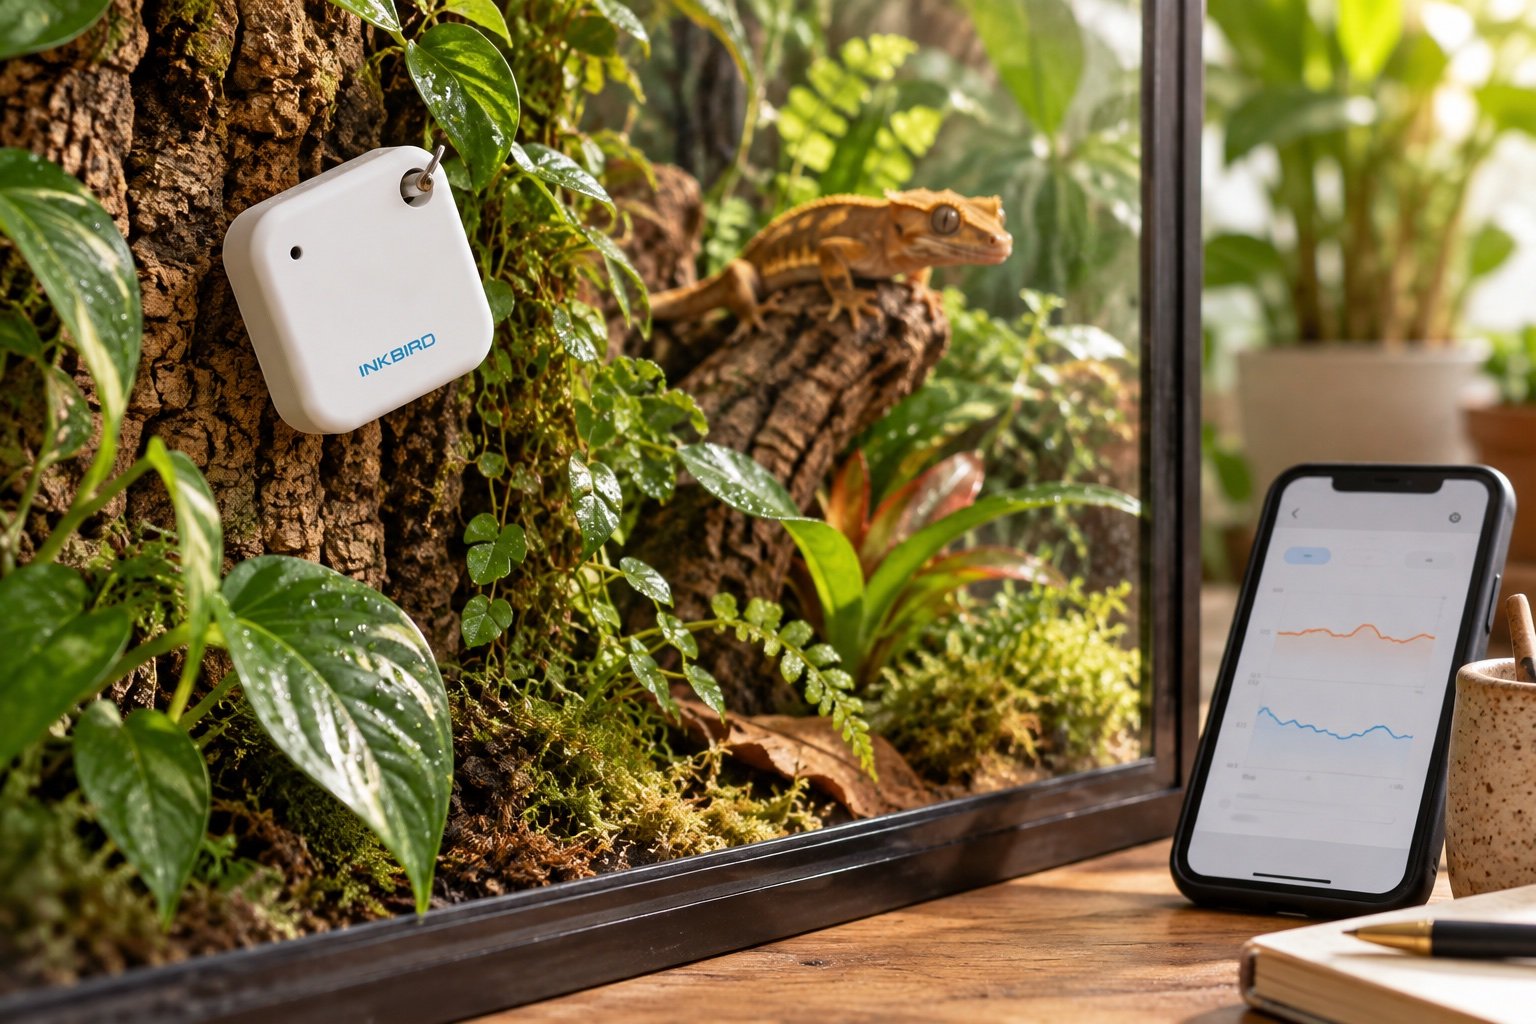
  • Inkbird IBS-TH2 review for reptile enclosures: cheap logs, local range

    Inkbird IBS-TH2 review for reptile enclosures: cheap logs, local range

    Quick verdict: The IBS-TH2 is an inexpensive local logger for enclosures where Bluetooth checks are enough. It stores plenty of history and supports offsets, but IPX4 is not permission to place it in a mist stream and it cannot deliver remote alerts without additional hardware.

    We judge the device or method by the job it can repeat. Keep the thermometer and hygrometer guide and Govee H5075 review nearby while planning the setup.

    Point What to know
    Connection Bluetooth, published range up to 30 m
    Storage Up to 30,000 offline data points
    Protection IPX4
    Power 2 AAA batteries, claimed 3 to 6 months

    The missing screen is a tradeoff

    You read the sensor through the app, so a quick room walk requires a phone. In return, the compact body can log without a bright display. Decide whether staff or family members need a value at a glance. If they do, the SwitchBot Meter Plus review covers a display-first alternative.

    Bluetooth range shrinks around real racks

    The 30 m figure is a planning maximum. Foil insulation, water, metal shelving and walls all reduce practical range. Walk the exact route with enclosure doors closed and confirm synchronization from the place you will actually stand. A logger that only updates when the phone is beside the glass still records useful history, but it is not a remote alarm.

    Accuracy claims need a side-by-side check

    Inkbird lists typical temperature accuracy of plus or minus 0.3°C and typical humidity accuracy of plus or minus 3% RH under stated conditions. Consumer sensors can still differ. Place two or three units together for a day, allow them to stabilize, then apply a documented offset only if the difference is consistent. Do not force every sensor to match a fast handheld reading.

    IPX4 is splash resistance

    Keep the body outside direct spray and away from standing water. Mount it where enclosure air reaches the vents without allowing an animal to climb on it or dislodge it. If the sensor is soaked, humidity recovery can be slow and the chart can exaggerate how long the habitat stayed wet.

    Export before the history matters

    Fill a week of data, export it and open the file. Check timestamps, units and sensor names. Repeat the process before replacing a phone or changing accounts. The data export and privacy guide applies to a temperature logger just as much as it does to a husbandry app.

    What a good installation looks like after one week

    The equipment should be boring. Cables remain where they were fixed, schedules occur at the expected local time and the animal can use the enclosure without touching a probe or blocking a sensor. Charts show ordinary cycles rather than unexplained steps. Alerts are rare enough that someone will act on them.

    Repeat the acceptance check after major cleaning, seasonal room changes or firmware updates. If the system cannot recover cleanly from a routine interruption, it is not ready to become invisible infrastructure.

    Keep a change log, even for a single enclosure

    Record the date, old setting, new setting and reason. Add one observation after the next full day. This stops a sequence of sensible-looking tweaks from drifting far away from the original plan. It also helps another carer understand why an unusual schedule or position exists.

    Firmware, app and clock changes belong in the same record as physical maintenance. After an update, confirm units, time zone, schedules, alarm limits and channel names. Do not assume a graph that looks familiar proves the outputs are mapped correctly.

    Check the animal’s access around the hardware

    Run a hand along the routes the animal can climb. Look for hot guards, sharp clips, adhesive edges and cable loops. Make sure a hide, plant or deep substrate cannot press against the sensor and create a false reading. Equipment placement is finished only when the animal can use the habitat normally without becoming part of the mounting system.

    Observe the first week at ordinary care times, not only during a staged inspection. Feeding, misting, opening doors and moving bowls are the moments that disturb cables and airflow. If a control survives only when nobody touches the enclosure, it is not a durable installation.

    Watch what happens during ordinary care

    Open the enclosure, change water, mist, feed and move the usual hide or branch. Then check the hardware. Good installation survives those actions without a cable pulling tight, a probe moving or an alert becoming meaningless. A perfect result in an untouched display is less useful than a stable result during real care.

    Ask another person to perform the round using the written labels. If they cannot identify the shutoff, correct sensor or affected habitat, improve the record. This is especially important when one controller or gateway serves several enclosures.

    Plan the retirement path

    Connected products eventually lose app support, batteries weaken and replacement probes disappear. Export data in an open format and keep essential settings in plain text. Avoid building a safety function that only one discontinued phone app can change.

    Before replacing a working device, define the improvement you expect: quieter control, a second zone, remote alerts or better moisture protection. If the new product does not solve that specific limitation, maintenance and a spare part may be the better purchase.

    Common mistakes

    • Trusting the first stable-looking number without mapping the surrounding zone
    • Changing several settings at once and losing the cause of the result
    • Leaving probes, cables or mounts where normal animal movement can shift them
    • Treating an app or remote alert as the primary safety control
    • Skipping a power-recovery test because the device retained settings once

    Related Reptile Tech Lab guides

    Frequently asked questions

    Does the IBS-TH2 have Wi-Fi?

    No. This model uses Bluetooth.

    Can it sit under a misting nozzle?

    No. IPX4 does not make direct spraying a good placement.

    How much history can it hold?

    Inkbird states up to 30,000 data points.

    Can readings be calibrated?

    The app supports offsets, which should be based on a stable comparison.

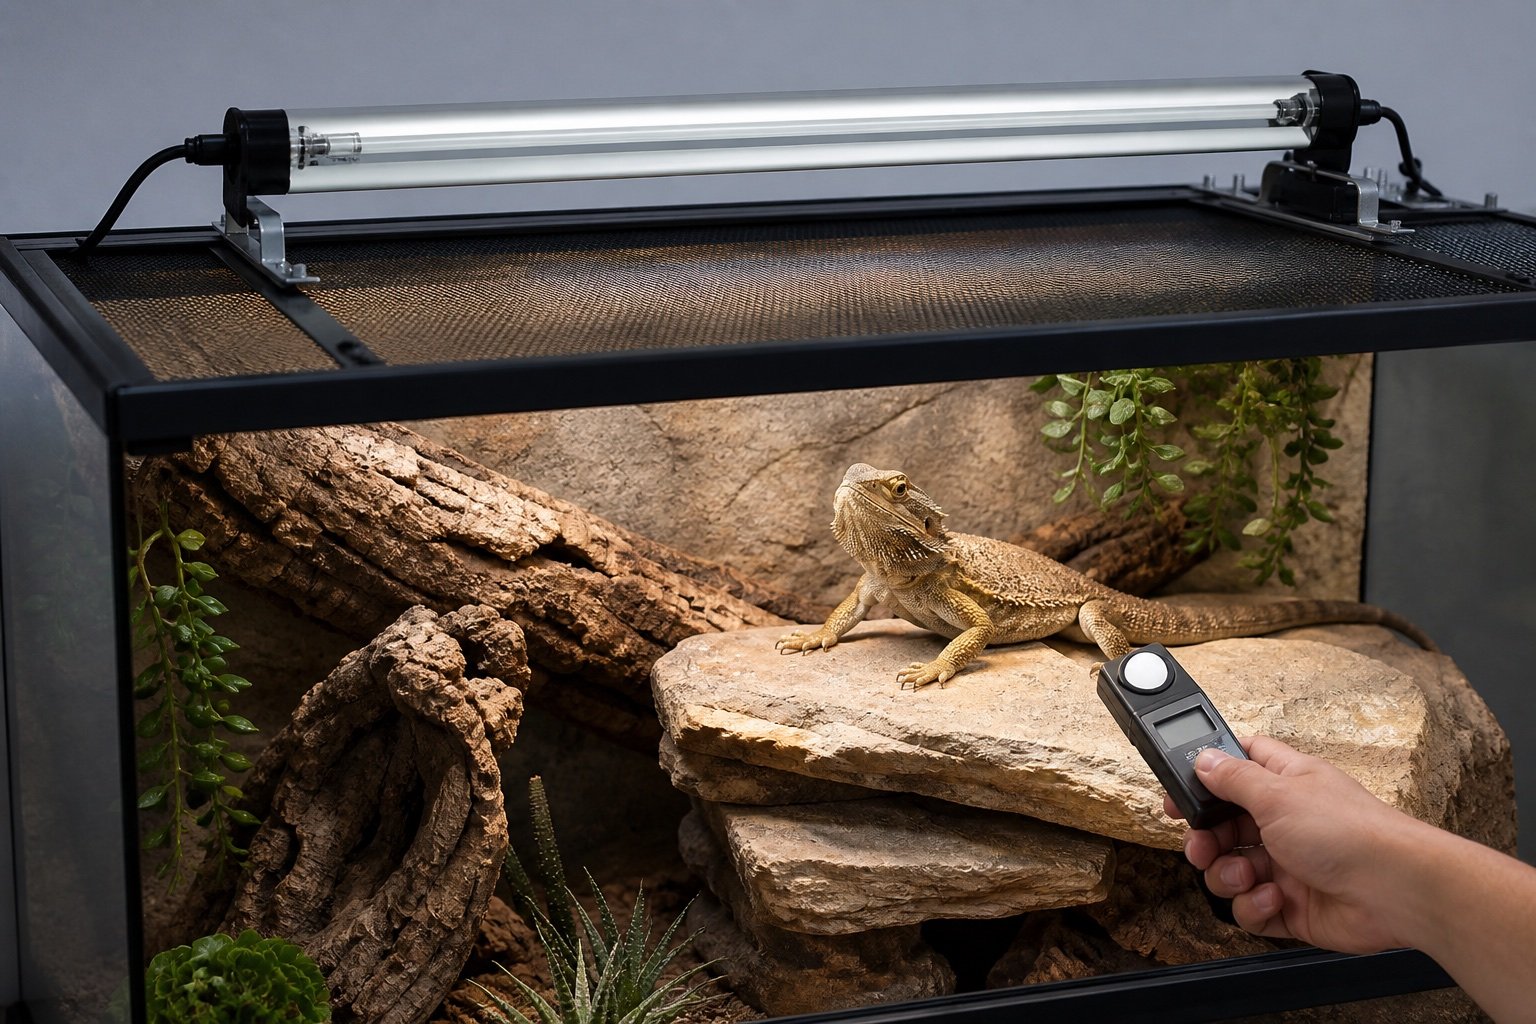
  • Arcadia ProT5 review: output, reflector, mounting and lamp choice

    Arcadia ProT5 review: output, reflector, mounting and lamp choice

    Quick verdict: Arcadia ProT5 is a flexible high-output UVB system with a good reflector and clear lamp choices. Its strength is also the reason to plan carefully: the 12% and 14% lamps can overshoot a close basking position, especially without shade.

    The kit combines a T5 HO fixture, removable reflector and Arcadia lamp. It can link up to ten units and is sold with 6% Forest, 12% Desert or 14% Dragon tubes. That makes it easier to match different enclosure heights without changing the whole fixture.

    Setup or factor Published or practical value Use
    6% Forest UVI 4.5 at 300 mm Medium forest or closer controlled setups
    12% Desert UVI 8.5 at 300 mm Taller enclosures and stronger exposure
    14% Dragon UVI 10.5 at 300 mm High-demand setups with substantial distance
    Minimum published distance 250 mm Treat as a floor, not a universal target

    What the published numbers mean

    Arcadia publishes center readings without mesh. At 500 mm, the listed UVI values are 2.5, 3.8 and 4.6 for the 6%, 12% and 14% lamps. These are planning figures. Reflective decor, mesh and fixture position can shift the result in a real enclosure.

    Mounting and coverage

    Run the tube across the basking zone rather than across the full ceiling. This leaves a naturally dimmer side. Secure the fixture so cleaning cannot change its angle, and use guards where an animal could touch the lamp.

    Mesh and distance

    A dense top can remove a meaningful share of output. Do not compensate by guessing. Measure below the mesh at the basking height and compare several points, as described in our mesh loss guide.

    Daily use

    Put UVB and daylight on a dependable reptile light timer. Keep heat control separate. The ProT5 is a light fixture, not a thermostat or basking heat source.

    Who should skip it

    Very small, low enclosures can be easier to tune with a lower-output compact system. Read our ShadeDweller review before forcing a powerful fixture into a short space.

    A commissioning routine that catches mistakes

    Assemble and run the system before the animal depends on it. Photograph the final positions, label cables, and compare the working zone with an independent instrument. Test one normal day, one night transition and a short power interruption. The goal is not a perfectly flat chart. It is a stable, understandable gradient with safe recovery.

    Recheck after cleaning because fixtures, probes and branches rarely return to the exact same position by accident. A two-minute baseline check is cheaper than troubleshooting weeks of unexplained behavior.

    Common mistakes

    • Selecting 14% because it sounds more complete
    • Using the manufacturer table as a substitute for enclosure measurements
    • Covering the entire roof and removing the shade route
    • Letting spray hit the fixture
    • Forgetting to log tube age and baseline output

    How to verify the result in a real enclosure

    Lighting work becomes much easier when the enclosure is treated as a map rather than a box with one reading. Mark the basking center, both edges of the perch, the warm hide entrance and the darkest retreat. Take measurements at the height of the animal’s back. This reveals whether the reptile can make small choices instead of moving between two extremes.

    Visible light, UVB and heat overlap during the day, but each should be evaluated separately. A bright enclosure can still have weak UVB, and a strong UVB fixture does not create the correct basking surface temperature. Keep the lighting schedule consistent, control heat with suitable hardware, and change only one part before repeating the map.

    A practical seven-day check

    1. Day one: photograph positions, record room conditions and capture baseline readings.
    2. Day two: review the full day-night transition and check that schedules occurred at the intended local time.
    3. Day three: inspect mounts, probe restraints, plugs, tubing and any area exposed to moisture.
    4. Day four: compare the main reading with an independent instrument placed beside it long enough to stabilize.
    5. Day five: review animal access and behavior. Confirm that equipment does not block hides, climbing routes or the cool zone.
    6. Day six: simulate one safe failure, such as a short internet loss or power interruption, then check recovery.
    7. Day seven: save the final settings and observations in the enclosure record.

    Repeat the short version of this audit after major cleaning, seasonal room changes or equipment replacement. The point is not constant tinkering. It is catching the few changes that can quietly alter a previously stable habitat.

    Related Reptile Tech Lab guides

    Frequently asked questions

    Does ProT5 include a lamp?

    Product packages commonly pair the fixture with a specific Arcadia lamp, but regional listings vary. Confirm the exact box contents before purchase.

    Can ProT5 sit above mesh?

    Yes, if the remaining output at basking height is measured and suitable.

    Can units be linked?

    Arcadia states that up to ten ProT5 units can be linked. The electrical layout still needs a safe load calculation.

    Is 12% better than 6%?

    It is stronger, not automatically better. Choose by target UVI, distance and enclosure geometry. See our UVB selection guide.

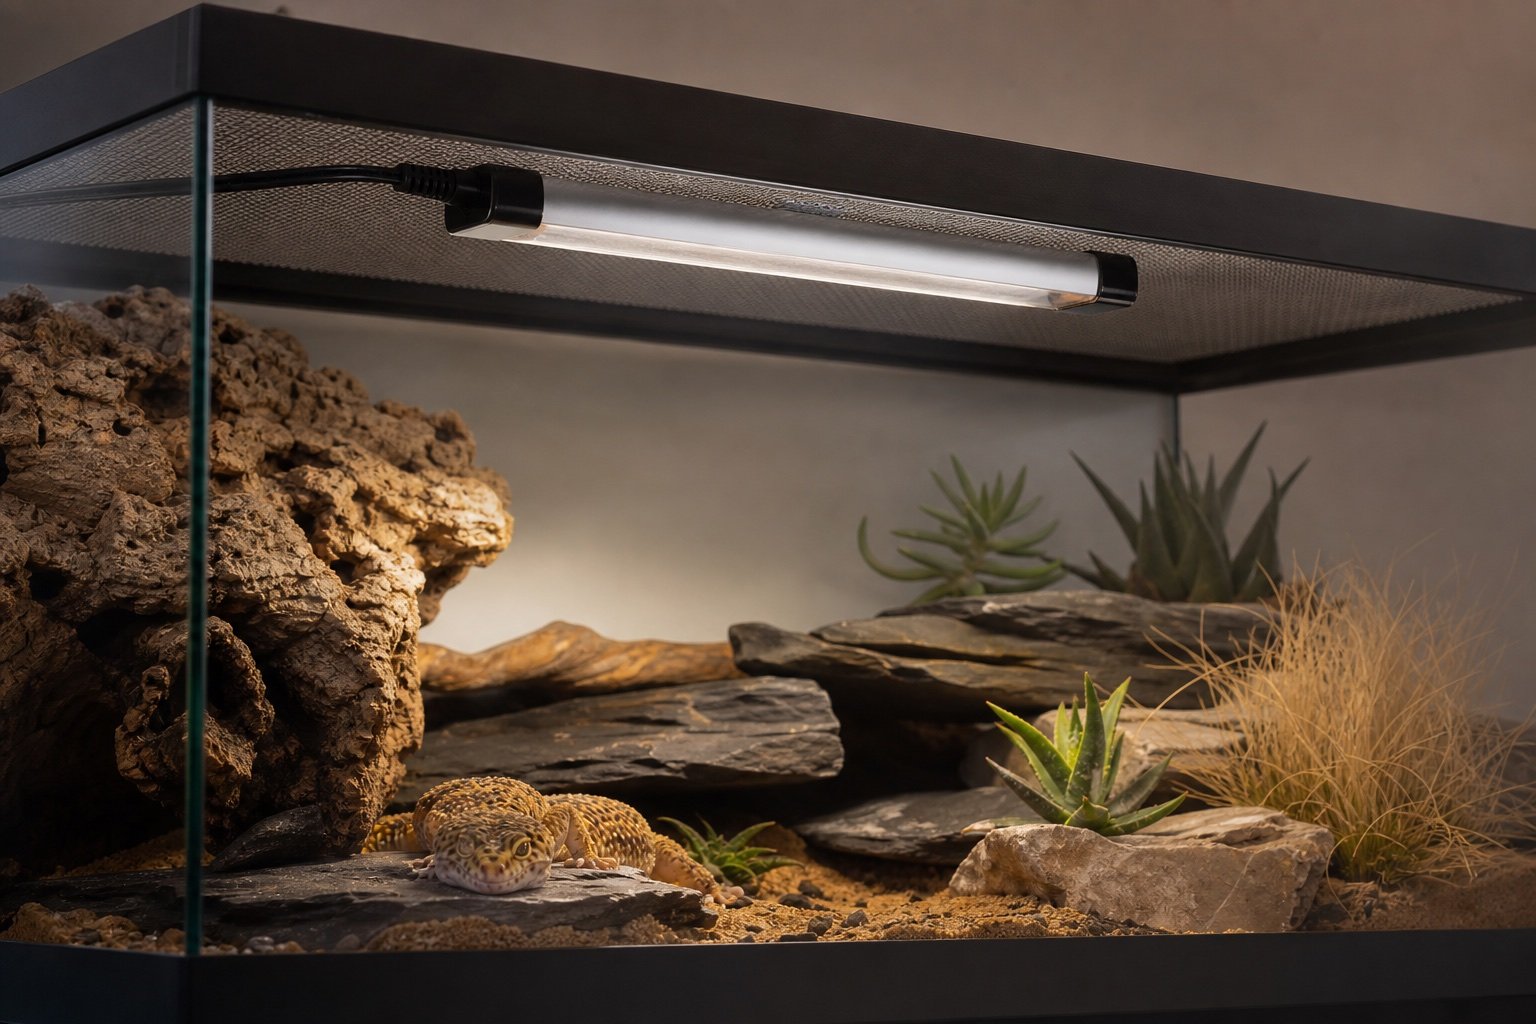
  • Arcadia ShadeDweller ProT5 review: compact UVB for low-light species

    Arcadia ShadeDweller ProT5 review: compact UVB for low-light species

    Quick verdict: ShadeDweller ProT5 is one of the easiest UVB kits to place over a short enclosure for crepuscular or low-exposure species. The compact 8W, 7% lamp produces a gentle zone, but dense mesh can reduce an already modest margin.

    The fixture is 315 mm long and was designed around a working distance close to 300 mm. Arcadia lists center readings of UVI 0.80 at 250 mm, 0.65 at 300 mm, 0.45 at 380 mm and 0.30 at 450 mm before screen losses.

    Setup or factor Published or practical value Use
    250 mm UVI 0.80 Strong end of the published compact range
    300 mm UVI 0.65 Useful planning distance
    380 mm UVI 0.45 Lower exposure
    450 mm UVI 0.30 Little headroom for mesh loss

    Where it fits

    The unit suits low-profile vivariums where a full-size high-output tube would be difficult to tame. It can also create a defined low-UV zone inside a larger habitat, provided the animal has access to the correct thermal and visible-light environment.

    Mesh is the deciding variable

    Arcadia notes that stainless mesh can reduce UVI by 30% or more. At the longer published distances, that loss may leave too little useful exposure. Our UVB through mesh test helps quantify it.

    Placement

    Align the tube with the basking perch and keep a shaded retreat beyond the reflector footprint. The fixture is linkable and includes electrical protections, but it still belongs outside the wettest spray path.

    Measurement

    Use a UVI meter at animal height. A reading taken at the substrate means little if the gecko rests on cork 150 mm closer to the tube. Map the positions the animal actually uses.

    Alternative

    If the enclosure is tall or the target UVI is higher, the broader ProT5 range provides more output choices. Do not raise the ShadeDweller far beyond its useful range just to make it fit.

    A commissioning routine that catches mistakes

    Assemble and run the system before the animal depends on it. Photograph the final positions, label cables, and compare the working zone with an independent instrument. Test one normal day, one night transition and a short power interruption. The goal is not a perfectly flat chart. It is a stable, understandable gradient with safe recovery.

    Recheck after cleaning because fixtures, probes and branches rarely return to the exact same position by accident. A two-minute baseline check is cheaper than troubleshooting weeks of unexplained behavior.

    Common mistakes

    • Assuming 7% describes the UVI reaching the animal
    • Placing the only perch outside the reflector footprint
    • Ignoring screen loss
    • Adding a stronger reflector without remeasuring
    • Leaving no dark retreat

    How to verify the result in a real enclosure

    Lighting work becomes much easier when the enclosure is treated as a map rather than a box with one reading. Mark the basking center, both edges of the perch, the warm hide entrance and the darkest retreat. Take measurements at the height of the animal’s back. This reveals whether the reptile can make small choices instead of moving between two extremes.

    Visible light, UVB and heat overlap during the day, but each should be evaluated separately. A bright enclosure can still have weak UVB, and a strong UVB fixture does not create the correct basking surface temperature. Keep the lighting schedule consistent, control heat with suitable hardware, and change only one part before repeating the map.

    A practical seven-day check

    1. Day one: photograph positions, record room conditions and capture baseline readings.
    2. Day two: review the full day-night transition and check that schedules occurred at the intended local time.
    3. Day three: inspect mounts, probe restraints, plugs, tubing and any area exposed to moisture.
    4. Day four: compare the main reading with an independent instrument placed beside it long enough to stabilize.
    5. Day five: review animal access and behavior. Confirm that equipment does not block hides, climbing routes or the cool zone.
    6. Day six: simulate one safe failure, such as a short internet loss or power interruption, then check recovery.
    7. Day seven: save the final settings and observations in the enclosure record.

    Repeat the short version of this audit after major cleaning, seasonal room changes or equipment replacement. The point is not constant tinkering. It is catching the few changes that can quietly alter a previously stable habitat.

    Related Reptile Tech Lab guides

    Frequently asked questions

    Is ShadeDweller only for geckos?

    No. The decision should follow the species target, behavior and enclosure geometry, not a marketing label.

    Can it replace a basking lamp?

    No. It provides UVB and visible light, not controlled basking heat.

    How often should readings be checked?

    At installation, after layout changes and periodically as the tube ages.

    How does it compare with full-size T5?

    It is shorter and gentler. Our best UVB light guide explains when more output is useful.