Category: Hardware & Sensors

Reptile equipment, environmental sensors and connected hardware.

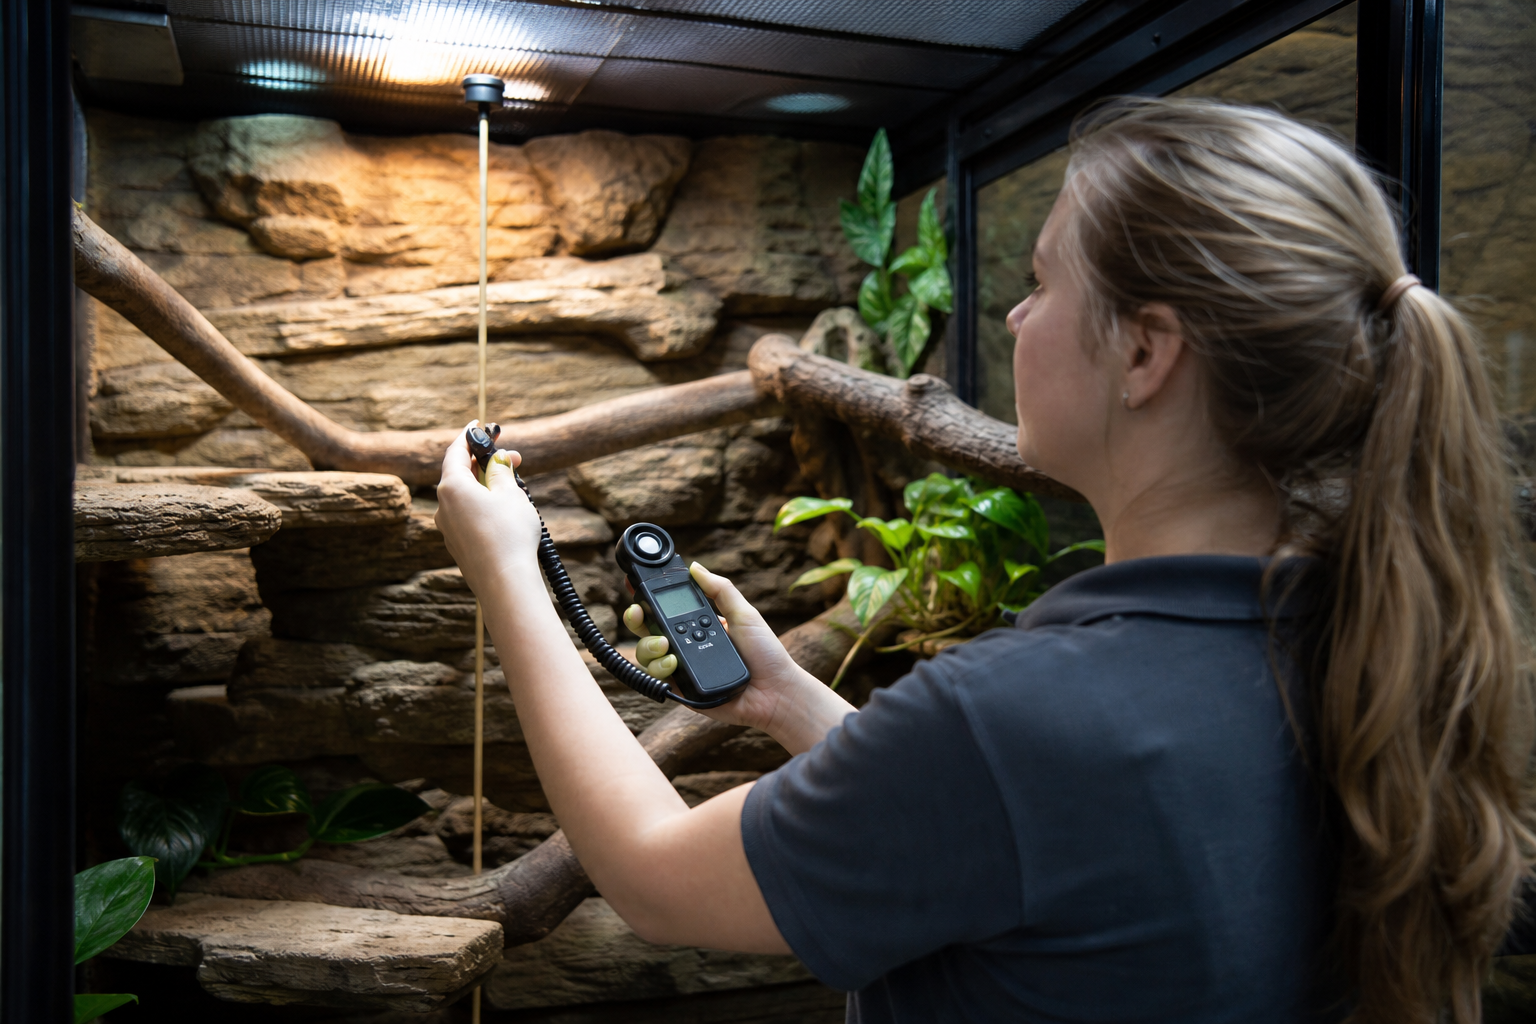
  • UVB through mesh: how screens change distance and usable output

    UVB through mesh: how screens change distance and usable output

    Quick verdict: UVB through mesh cannot be corrected with a universal percentage. Screens differ too much. Measure the same lamp at the same point above and below the lid, then map the basking area below the final installation.

    Fine dark mesh, thick wire and oblique lamp angles usually block more radiation than an open, thin screen. Distance compounds the loss because the beam has already spread before it reaches the animal.

    Setup or factor Published or practical value Use
    Lamp and reflector Keep unchanged Prevents a false comparison
    Meter angle Point at lamp center Controls cosine error
    Distance Mark exact positions Separates screen loss from distance loss
    Warm-up Use the same interval Keeps lamp output comparable

    A repeatable test

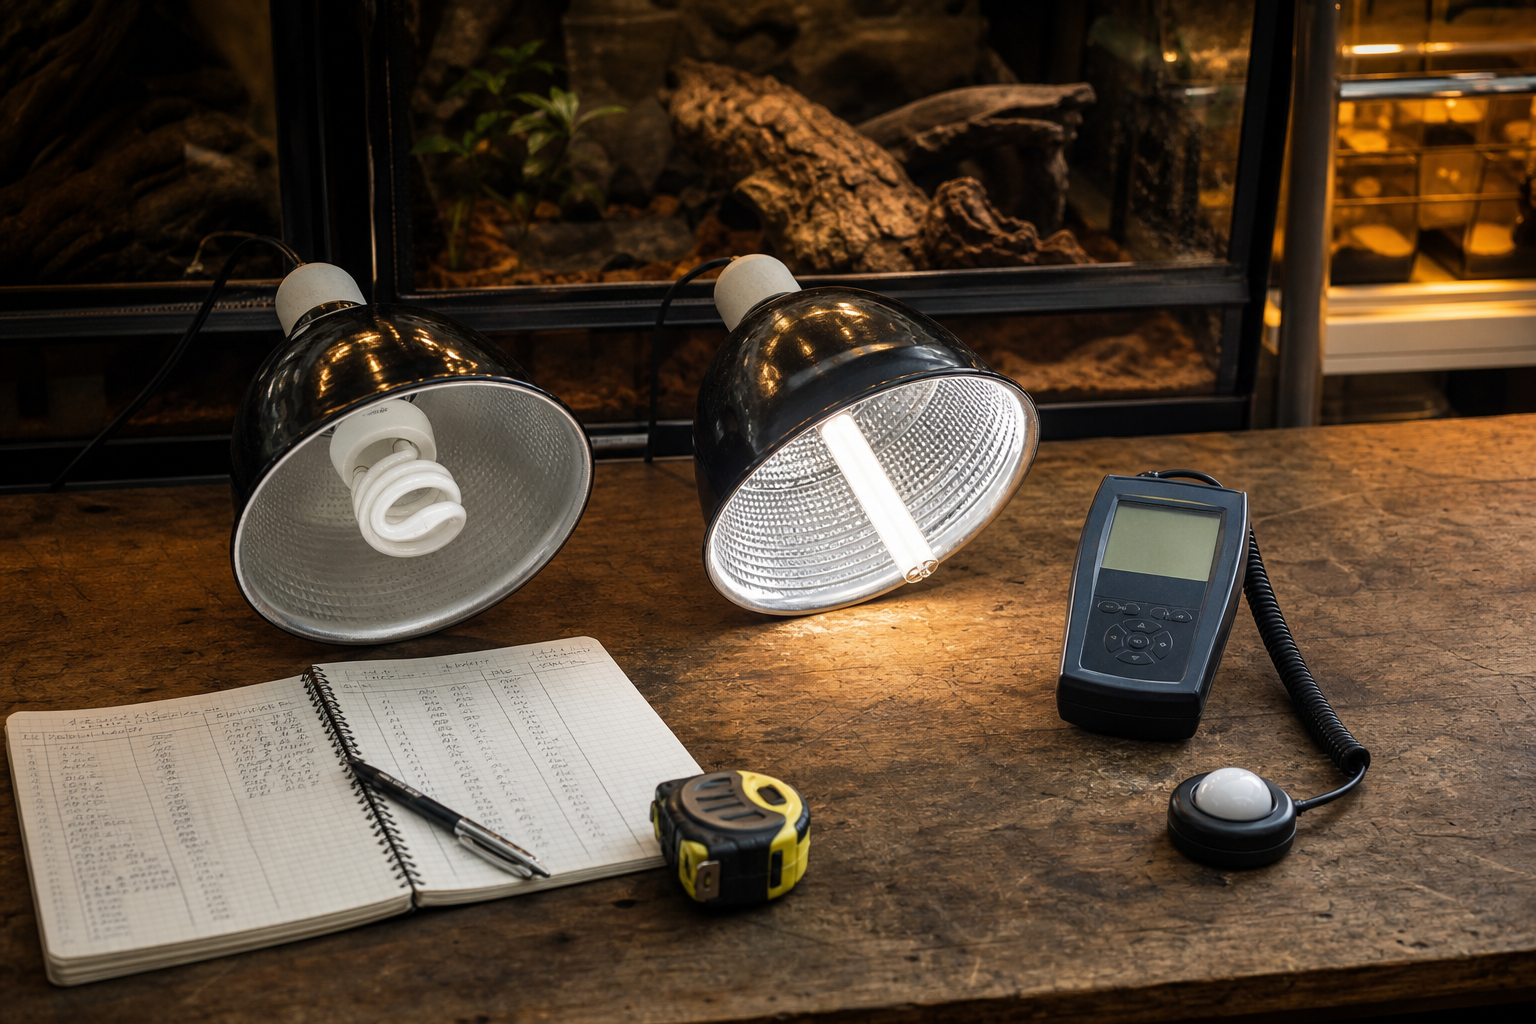
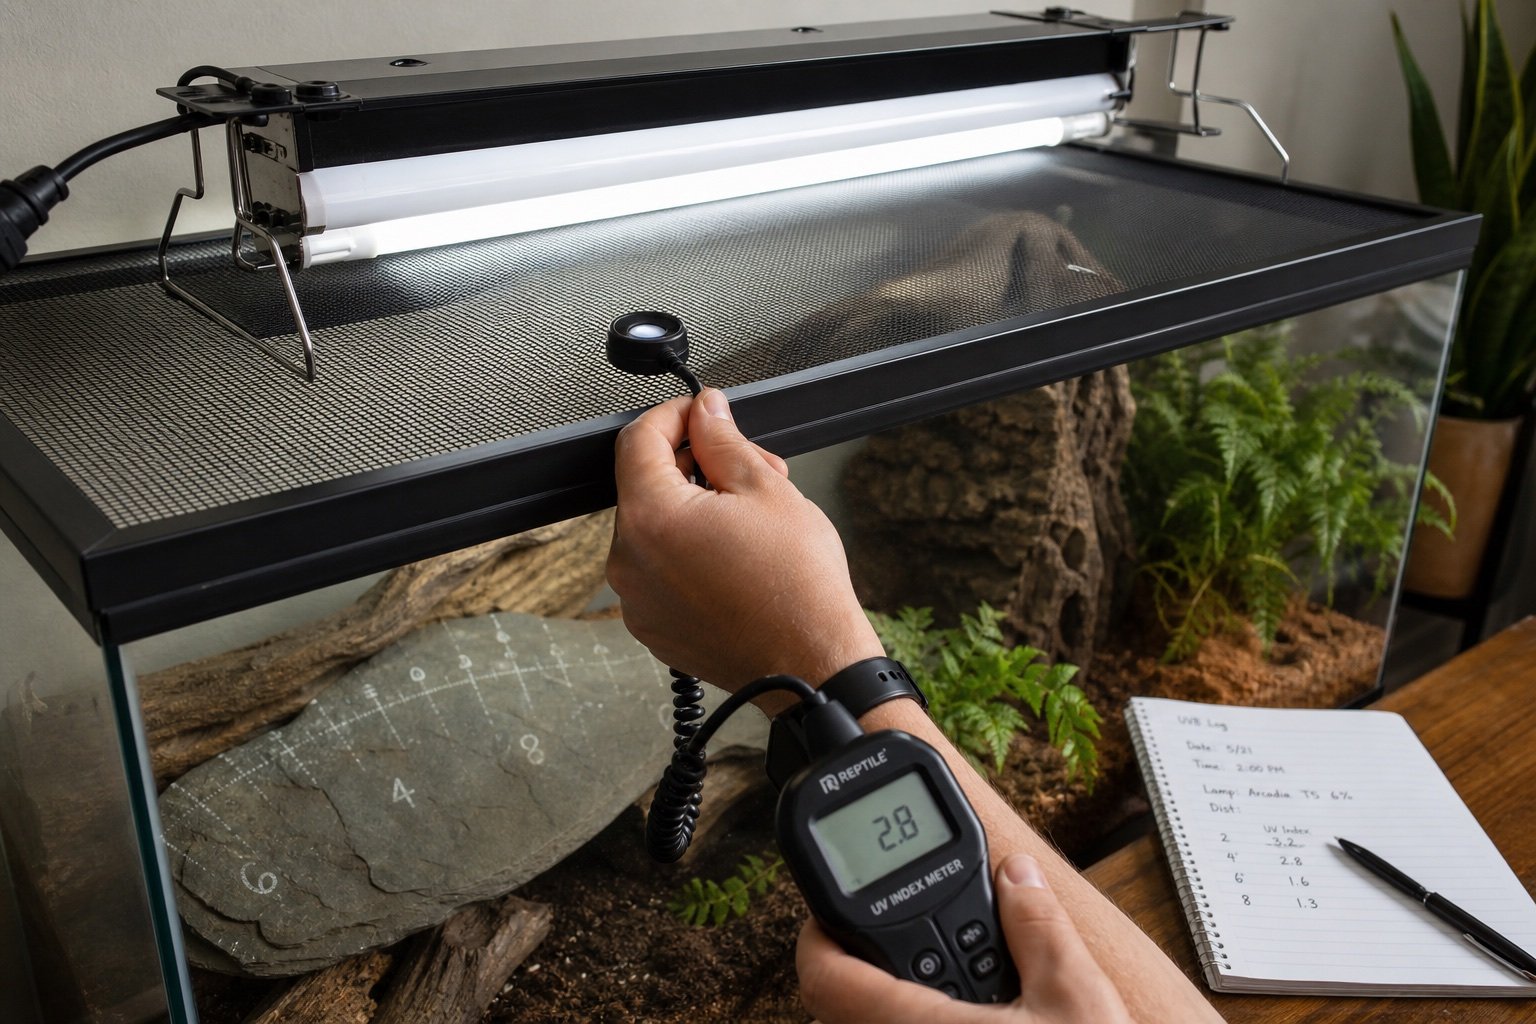
    Warm the lamp for the manufacturer-recommended period. Take three readings at a marked point without the screen, replace the screen without moving the lamp or meter, then take three more. Divide the lower average by the open average to find transmission.

    Map the animal zone

    The loss percentage is only the first step. Put the enclosure back together and measure the basking surface, nearby branches and the shaded edge. This final map is what guides husbandry.

    Why online percentages disagree

    Mesh products use different wire thickness, pitch, paint and open area. Lamp angle also changes how much wire the radiation encounters. A result from another lid is a rough warning, not a calibration value.

    Safe corrections

    First improve lamp alignment or reduce unnecessary separation. If output remains low, choose a more suitable fixture. Do not remove a secure lid or create a burn route simply to chase a number.

    Keep a record

    Photograph the meter position and write down tube age, distance and screen model. Retest after replacing the top, moving decor or changing to a different UVB lamp.

    A commissioning routine that catches mistakes

    Assemble and run the system before the animal depends on it. Photograph the final positions, label cables, and compare the working zone with an independent instrument. Test one normal day, one night transition and a short power interruption. The goal is not a perfectly flat chart. It is a stable, understandable gradient with safe recovery.

    Recheck after cleaning because fixtures, probes and branches rarely return to the exact same position by accident. A two-minute baseline check is cheaper than troubleshooting weeks of unexplained behavior.

    Common mistakes

    • Comparing readings taken at different distances
    • Holding the meter by hand at changing angles
    • Testing a cold lamp against a warm lamp
    • Using one center reading for the whole enclosure
    • Assuming mesh affects visible light and UVB equally

    How to verify the result in a real enclosure

    Lighting work becomes much easier when the enclosure is treated as a map rather than a box with one reading. Mark the basking center, both edges of the perch, the warm hide entrance and the darkest retreat. Take measurements at the height of the animal’s back. This reveals whether the reptile can make small choices instead of moving between two extremes.

    Visible light, UVB and heat overlap during the day, but each should be evaluated separately. A bright enclosure can still have weak UVB, and a strong UVB fixture does not create the correct basking surface temperature. Keep the lighting schedule consistent, control heat with suitable hardware, and change only one part before repeating the map.

    A practical seven-day check

    1. Day one: photograph positions, record room conditions and capture baseline readings.
    2. Day two: review the full day-night transition and check that schedules occurred at the intended local time.
    3. Day three: inspect mounts, probe restraints, plugs, tubing and any area exposed to moisture.
    4. Day four: compare the main reading with an independent instrument placed beside it long enough to stabilize.
    5. Day five: review animal access and behavior. Confirm that equipment does not block hides, climbing routes or the cool zone.
    6. Day six: simulate one safe failure, such as a short internet loss or power interruption, then check recovery.
    7. Day seven: save the final settings and observations in the enclosure record.

    Repeat the short version of this audit after major cleaning, seasonal room changes or equipment replacement. The point is not constant tinkering. It is catching the few changes that can quietly alter a previously stable habitat.

    Related Reptile Tech Lab guides

    Frequently asked questions

    Does black mesh block more UVB?

    Color alone is not enough to predict it. Open area, thickness and coating all matter.

    Can I estimate loss from a photo?

    No reliable husbandry decision should rest on a photo estimate.

    Which meter is appropriate?

    A meter designed to read UV Index, such as the model discussed in our Solarmeter 6.5R review.

    Should the lamp touch the mesh?

    Follow fixture clearances and keep heat, electrical and animal-contact safety ahead of output.
  • Exo Terra Thermostat 600W review: dimming, pulse and day-night control

    Exo Terra Thermostat 600W review: dimming, pulse and day-night control

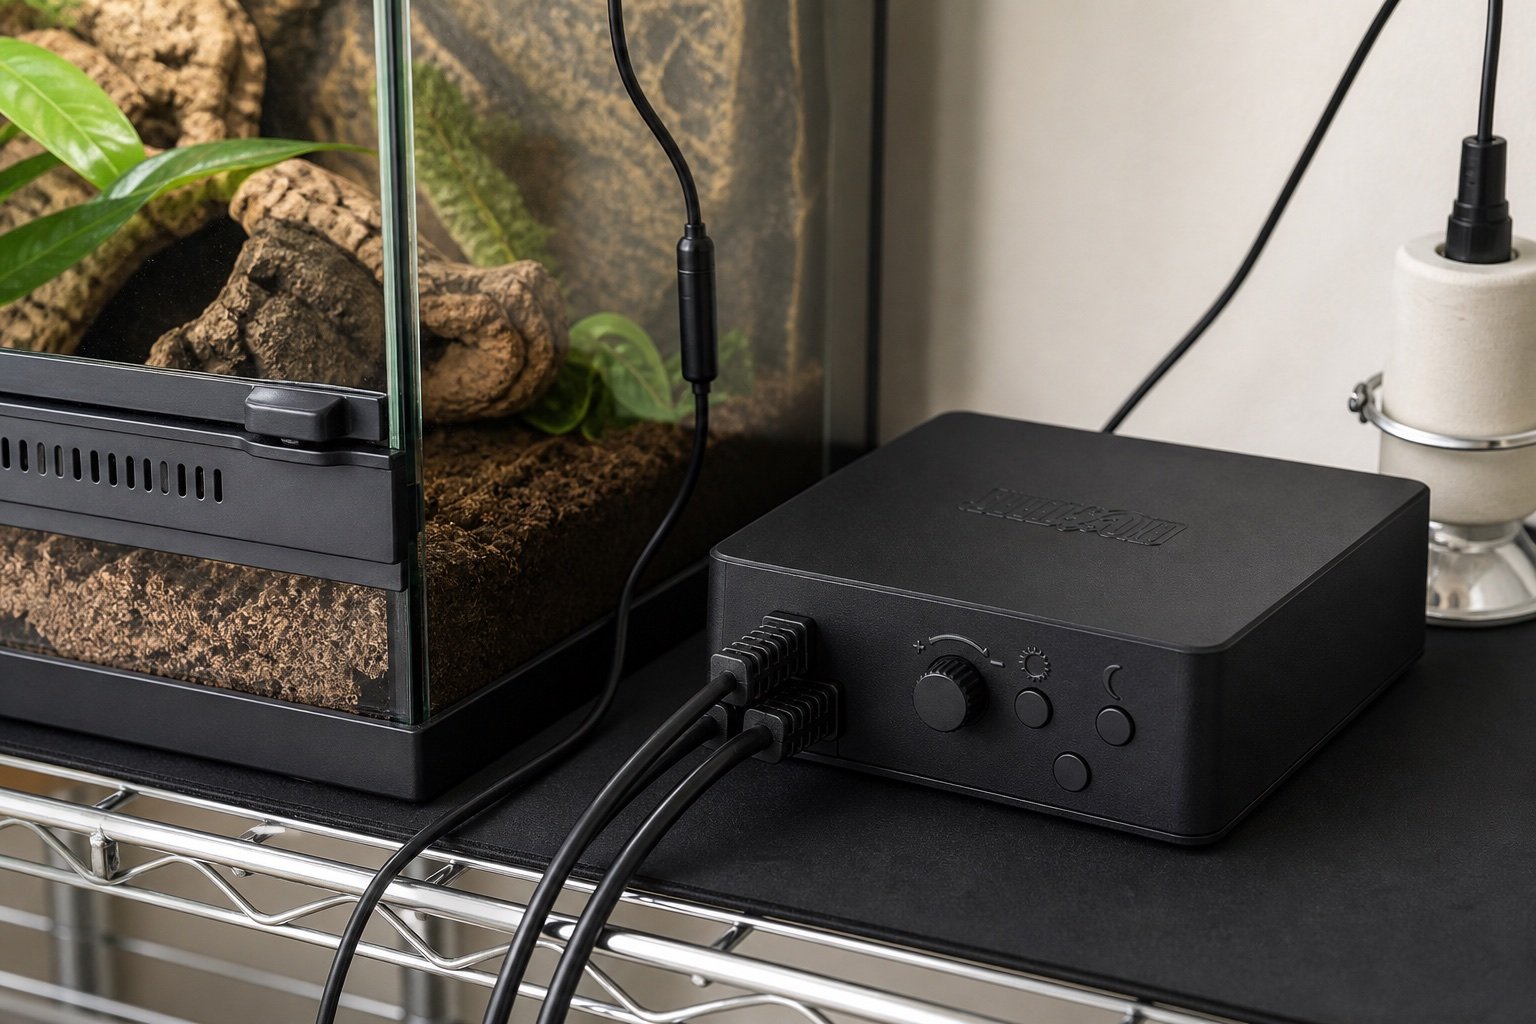
    Quick verdict: The Exo Terra Thermostat 600W is a capable single-zone controller for keepers who want dimming and pulse modes plus separate day and night targets. The main caveat is regional hardware: receptacles and package details differ, so check the exact model before purchase.

    Exo Terra Thermostat 600W review: dimming, pulse and day-night control is a narrow buying and setup question, so this guide stays focused on that job. It does not repeat our broader category pages. The aim is to help you choose, install and verify the equipment without turning one convenient device into a single point of failure.

    What matters in this comparison

    Factor Option or result Why it matters
    Maximum stated load 600 W Confirm regional manual
    Control modes Dimming and pulse proportional Match to heat source
    Set range 10 to 60 C Species target still comes from husbandry plan
    Probe Waterproof remote probe Secure against movement

    Specifications are useful for screening products, but enclosure performance depends on placement. Room temperature, ventilation, mesh, substrate moisture and animal access can move the result far from a brochure figure. Work from a measured baseline and change one variable at a time.

    How to set it up

    1. Match the mode

    Use the heat-source maker recommendation. Test the result under normal enclosure conditions and write down what you observed. A setting that works on an empty bench can behave differently after decor, ventilation and daily room changes are added.

    2. Place the light sensor

    Avoid shadows that cause false day-night switching. Test the result under normal enclosure conditions and write down what you observed. A setting that works on an empty bench can behave differently after decor, ventilation and daily room changes are added.

    3. Fix the temperature probe

    Do not let the animal move it. Test the result under normal enclosure conditions and write down what you observed. A setting that works on an empty bench can behave differently after decor, ventilation and daily room changes are added.

    4. Test the safety response

    Warm the probe gently and confirm output falls. Test the result under normal enclosure conditions and write down what you observed. A setting that works on an empty bench can behave differently after decor, ventilation and daily room changes are added.

    5. Simulate power loss

    Verify stored settings and recovery. Test the result under normal enclosure conditions and write down what you observed. A setting that works on an empty bench can behave differently after decor, ventilation and daily room changes are added.

    What ownership looks like after the first week

    The first week should be treated as commissioning, not proof that the system will remain stable. Check the morning minimum, daytime peak and the transition between them. Look for loose probes, wet connectors, drifting clocks, blocked vents and any behavior that suggests the animal cannot use the intended zone.

    After the setup settles, use a short written routine. A glance at the device is not enough. Compare it with an independent instrument, inspect cables and mounts, and review stored history when available. Replace consumable parts based on condition and verified performance rather than memory.

    Common mistakes

    • Buying the wrong regional version
    • Putting the probe directly under an intense lamp without a control plan
    • Using the day-night sensor where room lights confuse it
    • Loading several heaters near the maximum
    • Treating the display as independent verification

    Who this approach suits

    This approach suits keepers who want a system that another person can understand during a holiday or emergency. It also scales better across several enclosures because labels, baseline readings and failure tests remove guesswork. If a device requires constant manual correction, the installation needs work even when its feature list looks impressive.

    How to verify the result in a real enclosure

    Test heat control during the room’s coldest and warmest ordinary periods. A setup tuned on a mild afternoon may run at full output overnight, while one tuned during winter may overshoot in summer. Review the heater duty cycle, surface temperature and cool-side air together. Each value answers a different question.

    Probe security deserves physical testing. Tug the cable gently, move nearby decor and perform the normal cleaning motion. If the probe can slip, be covered or pressed directly against the heater, the controller can receive a false reading. Add a second independent sensor where it will notice the resulting enclosure change rather than duplicate the same failure point.

    A practical seven-day check

    1. Day one: photograph positions, record room conditions and capture baseline readings.
    2. Day two: review the full day-night transition and check that schedules occurred at the intended local time.
    3. Day three: inspect mounts, probe restraints, plugs, tubing and any area exposed to moisture.
    4. Day four: compare the main reading with an independent instrument placed beside it long enough to stabilize.
    5. Day five: review animal access and behavior. Confirm that equipment does not block hides, climbing routes or the cool zone.
    6. Day six: simulate one safe failure, such as a short internet loss or power interruption, then check recovery.
    7. Day seven: save the final settings and observations in the enclosure record.

    Repeat the short version of this audit after major cleaning, seasonal room changes or equipment replacement. The point is not constant tinkering. It is catching the few changes that can quietly alter a previously stable habitat.

    Related Reptile Tech Lab guides

    Frequently asked questions

    Should I rely on the built-in display?

    No. Use a separate thermometer, hygrometer, light meter or logger appropriate to the job. Independent verification catches probe movement and controller errors.

    How long should I test before animals or eggs depend on it?

    At least one complete day-night cycle, and longer for equipment affected by room weather or water use. Incubation and emergency systems deserve several days plus a power-loss test.

    Can an app replace local control?

    An app is useful for history and alerts. Critical regulation should continue safely when the phone, router or cloud service is unavailable.

    What should I record?

    Record device model, installation date, set points, probe location, baseline readings and the result of outage or disconnection tests. Those notes make later troubleshooting much faster.

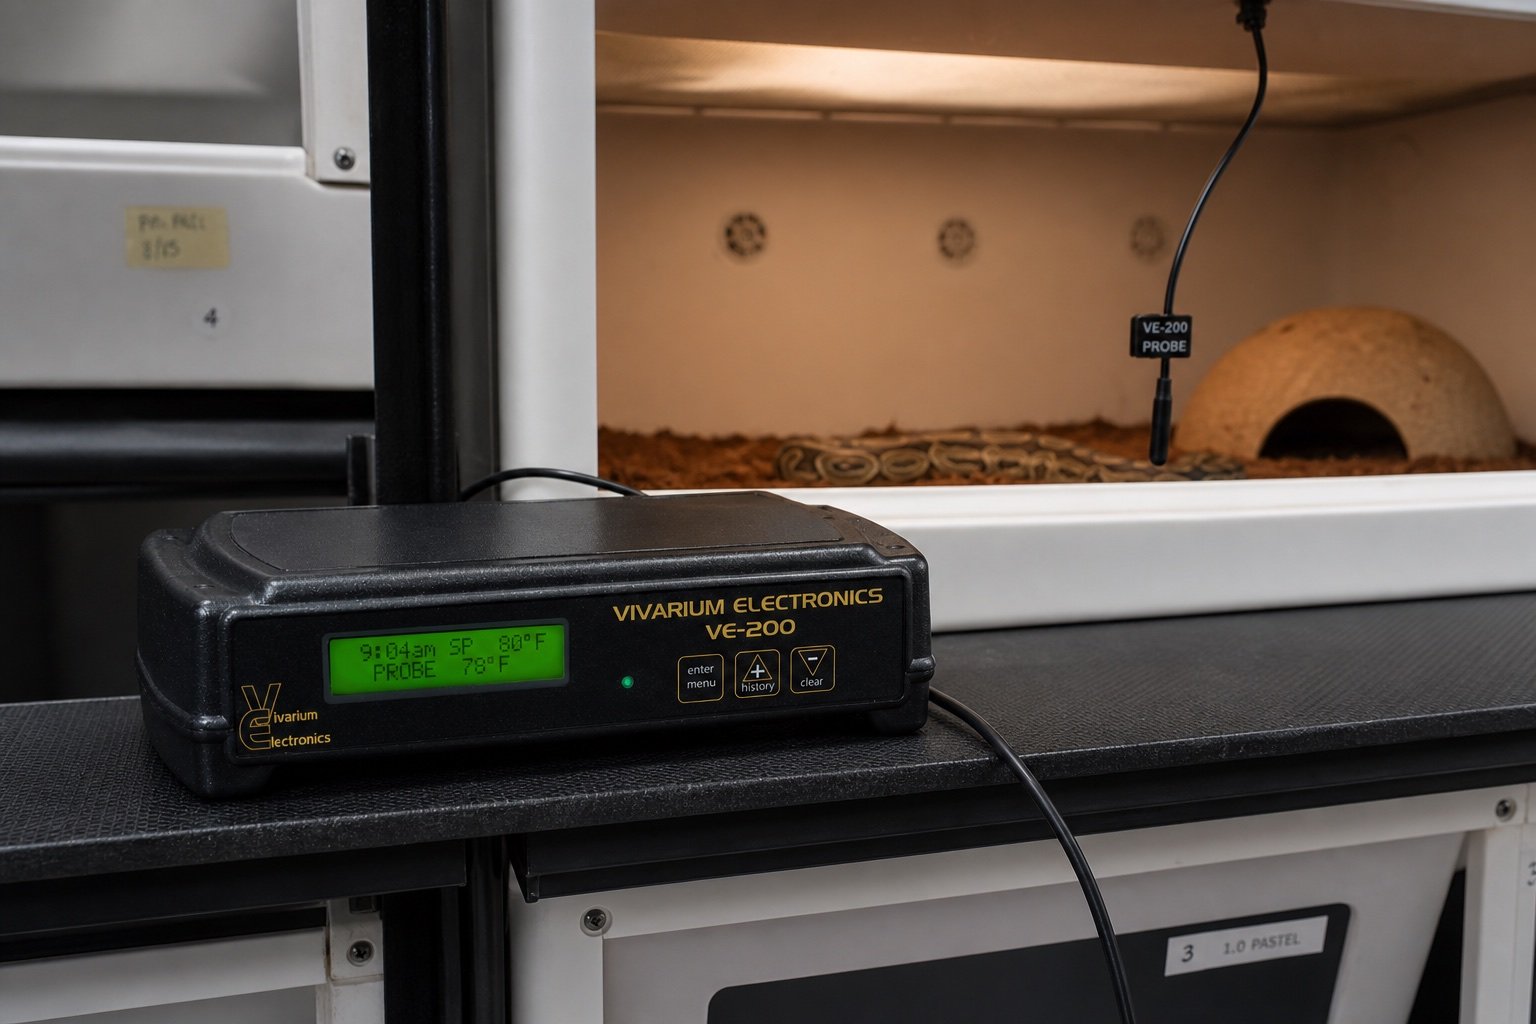
  • Vivarium Electronics VE-200 review: proportional control without extras

    Vivarium Electronics VE-200 review: proportional control without extras

    Quick verdict: The VE-200 is appealing when proportional heat control matters more than menus, Wi-Fi or multi-zone automation. Its backlit display, high and low history, night drop and safety shutoff cover the daily essentials, but owners still need independent monitoring.

    Vivarium Electronics VE-200 review: proportional control without extras is a narrow buying and setup question, so this guide stays focused on that job. It does not repeat our broader category pages. The aim is to help you choose, install and verify the equipment without turning one convenient device into a single point of failure.

    What matters in this comparison

    Factor Option or result Why it matters
    Control Proportional output Smooth regulation for suitable heaters
    Display Probe and set point Quick visual check
    History High and low values Useful for daily rounds
    Safety Shutoff relay Not a replacement for correct installation

    Specifications are useful for screening products, but enclosure performance depends on placement. Room temperature, ventilation, mesh, substrate moisture and animal access can move the result far from a brochure figure. Work from a measured baseline and change one variable at a time.

    How to set it up

    1. Select the correct model

    Regional voltage and outlet format matter. Test the result under normal enclosure conditions and write down what you observed. A setting that works on an empty bench can behave differently after decor, ventilation and daily room changes are added.

    2. Mount outside the enclosure

    Keep electronics dry and visible. Test the result under normal enclosure conditions and write down what you observed. A setting that works on an empty bench can behave differently after decor, ventilation and daily room changes are added.

    3. Secure the probe

    Use a mechanical restraint that survives cleaning. Test the result under normal enclosure conditions and write down what you observed. A setting that works on an empty bench can behave differently after decor, ventilation and daily room changes are added.

    4. Set a conservative first target

    Raise only after a stable trial. Test the result under normal enclosure conditions and write down what you observed. A setting that works on an empty bench can behave differently after decor, ventilation and daily room changes are added.

    5. Audit with another sensor

    Compare over a complete day-night cycle. Test the result under normal enclosure conditions and write down what you observed. A setting that works on an empty bench can behave differently after decor, ventilation and daily room changes are added.

    What ownership looks like after the first week

    The first week should be treated as commissioning, not proof that the system will remain stable. Check the morning minimum, daytime peak and the transition between them. Look for loose probes, wet connectors, drifting clocks, blocked vents and any behavior that suggests the animal cannot use the intended zone.

    After the setup settles, use a short written routine. A glance at the device is not enough. Compare it with an independent instrument, inspect cables and mounts, and review stored history when available. Replace consumable parts based on condition and verified performance rather than memory.

    Common mistakes

    • Choosing by wattage alone
    • Using night drop without checking the room minimum
    • Failing to test the shutoff response
    • Bundling probe wire against mains cables
    • Assuming displayed history explains when an event happened

    Who this approach suits

    This approach suits keepers who want a system that another person can understand during a holiday or emergency. It also scales better across several enclosures because labels, baseline readings and failure tests remove guesswork. If a device requires constant manual correction, the installation needs work even when its feature list looks impressive.

    How to verify the result in a real enclosure

    Test heat control during the room’s coldest and warmest ordinary periods. A setup tuned on a mild afternoon may run at full output overnight, while one tuned during winter may overshoot in summer. Review the heater duty cycle, surface temperature and cool-side air together. Each value answers a different question.

    Probe security deserves physical testing. Tug the cable gently, move nearby decor and perform the normal cleaning motion. If the probe can slip, be covered or pressed directly against the heater, the controller can receive a false reading. Add a second independent sensor where it will notice the resulting enclosure change rather than duplicate the same failure point.

    A practical seven-day check

    1. Day one: photograph positions, record room conditions and capture baseline readings.
    2. Day two: review the full day-night transition and check that schedules occurred at the intended local time.
    3. Day three: inspect mounts, probe restraints, plugs, tubing and any area exposed to moisture.
    4. Day four: compare the main reading with an independent instrument placed beside it long enough to stabilize.
    5. Day five: review animal access and behavior. Confirm that equipment does not block hides, climbing routes or the cool zone.
    6. Day six: simulate one safe failure, such as a short internet loss or power interruption, then check recovery.
    7. Day seven: save the final settings and observations in the enclosure record.

    Repeat the short version of this audit after major cleaning, seasonal room changes or equipment replacement. The point is not constant tinkering. It is catching the few changes that can quietly alter a previously stable habitat.

    Related Reptile Tech Lab guides

    Frequently asked questions

    Should I rely on the built-in display?

    No. Use a separate thermometer, hygrometer, light meter or logger appropriate to the job. Independent verification catches probe movement and controller errors.

    How long should I test before animals or eggs depend on it?

    At least one complete day-night cycle, and longer for equipment affected by room weather or water use. Incubation and emergency systems deserve several days plus a power-loss test.

    Can an app replace local control?

    An app is useful for history and alerts. Critical regulation should continue safely when the phone, router or cloud service is unavailable.

    What should I record?

    Record device model, installation date, set points, probe location, baseline readings and the result of outage or disconnection tests. Those notes make later troubleshooting much faster.

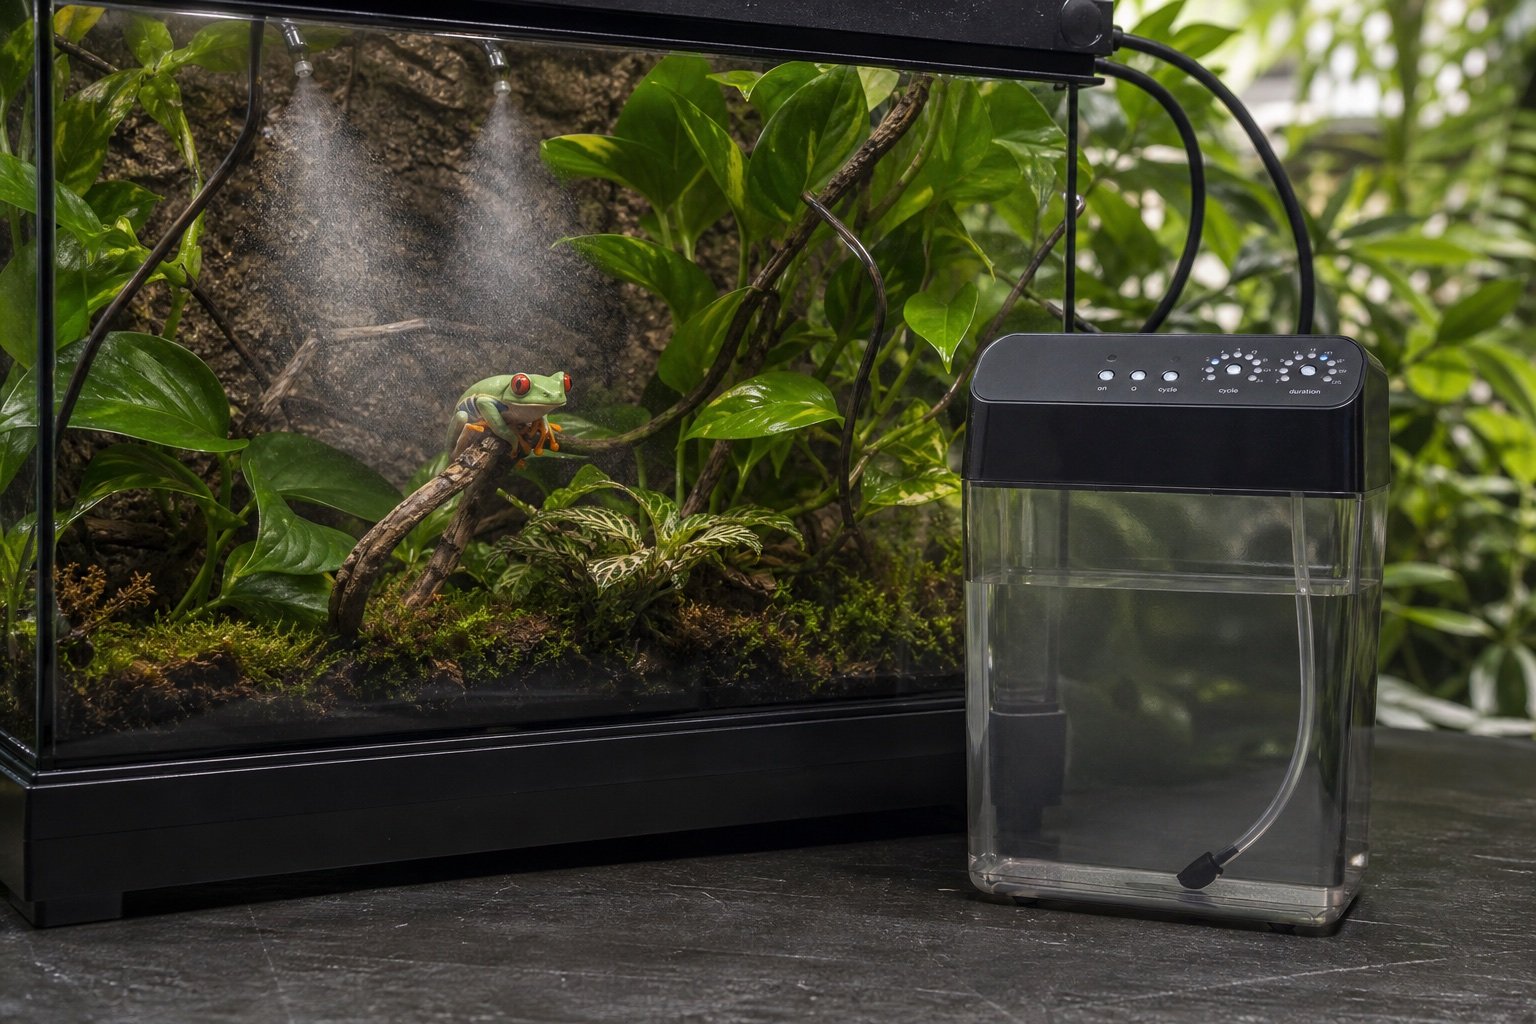
  • Exo Terra Monsoon Multi II review: pressure, programming and maintenance

    Exo Terra Monsoon Multi II review: pressure, programming and maintenance

    Quick verdict: The Monsoon Multi II is a tidy all-in-one option for one enclosure or a small group. Its 8 L reservoir, two included nozzles and expansion to six make setup approachable. Large racks and long lines expose the limits of an integrated consumer system.

    Exo Terra Monsoon Multi II review: pressure, programming and maintenance is a narrow buying and setup question, so this guide stays focused on that job. It does not repeat our broader category pages. The aim is to help you choose, install and verify the equipment without turning one convenient device into a single point of failure.

    What matters in this comparison

    Factor Option or result Why it matters
    Pressure 4.5 bar, 65.25 PSI Adequate for included fine nozzles
    Reservoir 8 L Convenient integrated tank
    Included nozzles Two Enough for a basic start
    Expansion Up to six nozzles Plan equal line lengths

    Specifications are useful for screening products, but enclosure performance depends on placement. Room temperature, ventilation, mesh, substrate moisture and animal access can move the result far from a brochure figure. Work from a measured baseline and change one variable at a time.

    How to set it up

    1. Rinse the reservoir

    Remove manufacturing dust. Test the result under normal enclosure conditions and write down what you observed. A setting that works on an empty bench can behave differently after decor, ventilation and daily room changes are added.

    2. Cut tubing square

    Poor cuts cause connector leaks. Test the result under normal enclosure conditions and write down what you observed. A setting that works on an empty bench can behave differently after decor, ventilation and daily room changes are added.

    3. Route a drip loop

    Keep water below electrical connections. Test the result under normal enclosure conditions and write down what you observed. A setting that works on an empty bench can behave differently after decor, ventilation and daily room changes are added.

    4. Prime with no animals inside

    Catch leaks before substrate is soaked. Test the result under normal enclosure conditions and write down what you observed. A setting that works on an empty bench can behave differently after decor, ventilation and daily room changes are added.

    5. Add drainage first

    Use our drainage guide. Test the result under normal enclosure conditions and write down what you observed. A setting that works on an empty bench can behave differently after decor, ventilation and daily room changes are added.

    What ownership looks like after the first week

    The first week should be treated as commissioning, not proof that the system will remain stable. Check the morning minimum, daytime peak and the transition between them. Look for loose probes, wet connectors, drifting clocks, blocked vents and any behavior that suggests the animal cannot use the intended zone.

    After the setup settles, use a short written routine. A glance at the device is not enough. Compare it with an independent instrument, inspect cables and mounts, and review stored history when available. Replace consumable parts based on condition and verified performance rather than memory.

    Common mistakes

    • Running the reservoir dry
    • Using mineral-heavy tap water
    • Pointing nozzles at electronics or sensors
    • Adding six nozzles without checking spray balance
    • Letting stagnant water sit between cleanings

    Who this approach suits

    This approach suits keepers who want a system that another person can understand during a holiday or emergency. It also scales better across several enclosures because labels, baseline readings and failure tests remove guesswork. If a device requires constant manual correction, the installation needs work even when its feature list looks impressive.

    How to verify the result in a real enclosure

    Water automation must be checked as a complete loop: clean reservoir, pump, tubing, nozzle, enclosure surfaces and drainage. Time one cycle into a measuring jug before installation. Multiply that volume by daily cycles and nozzle count, then compare it with drainage capacity. This simple calculation exposes undersized catch containers before they overflow.

    Observe how fast leaves and walls dry after spraying. The useful wet period depends on species and ventilation, but standing water that never clears is a maintenance warning. Adjust nozzle direction and cycle length before increasing frequency. Shorter cycles are not automatically safer if they occur so often that the habitat never dries.

    A practical seven-day check

    1. Day one: photograph positions, record room conditions and capture baseline readings.
    2. Day two: review the full day-night transition and check that schedules occurred at the intended local time.
    3. Day three: inspect mounts, probe restraints, plugs, tubing and any area exposed to moisture.
    4. Day four: compare the main reading with an independent instrument placed beside it long enough to stabilize.
    5. Day five: review animal access and behavior. Confirm that equipment does not block hides, climbing routes or the cool zone.
    6. Day six: simulate one safe failure, such as a short internet loss or power interruption, then check recovery.
    7. Day seven: save the final settings and observations in the enclosure record.

    Repeat the short version of this audit after major cleaning, seasonal room changes or equipment replacement. The point is not constant tinkering. It is catching the few changes that can quietly alter a previously stable habitat.

    Related Reptile Tech Lab guides

    Frequently asked questions

    Should I rely on the built-in display?

    No. Use a separate thermometer, hygrometer, light meter or logger appropriate to the job. Independent verification catches probe movement and controller errors.

    How long should I test before animals or eggs depend on it?

    At least one complete day-night cycle, and longer for equipment affected by room weather or water use. Incubation and emergency systems deserve several days plus a power-loss test.

    Can an app replace local control?

    An app is useful for history and alerts. Critical regulation should continue safely when the phone, router or cloud service is unavailable.

    What should I record?

    Record device model, installation date, set points, probe location, baseline readings and the result of outage or disconnection tests. Those notes make later troubleshooting much faster.

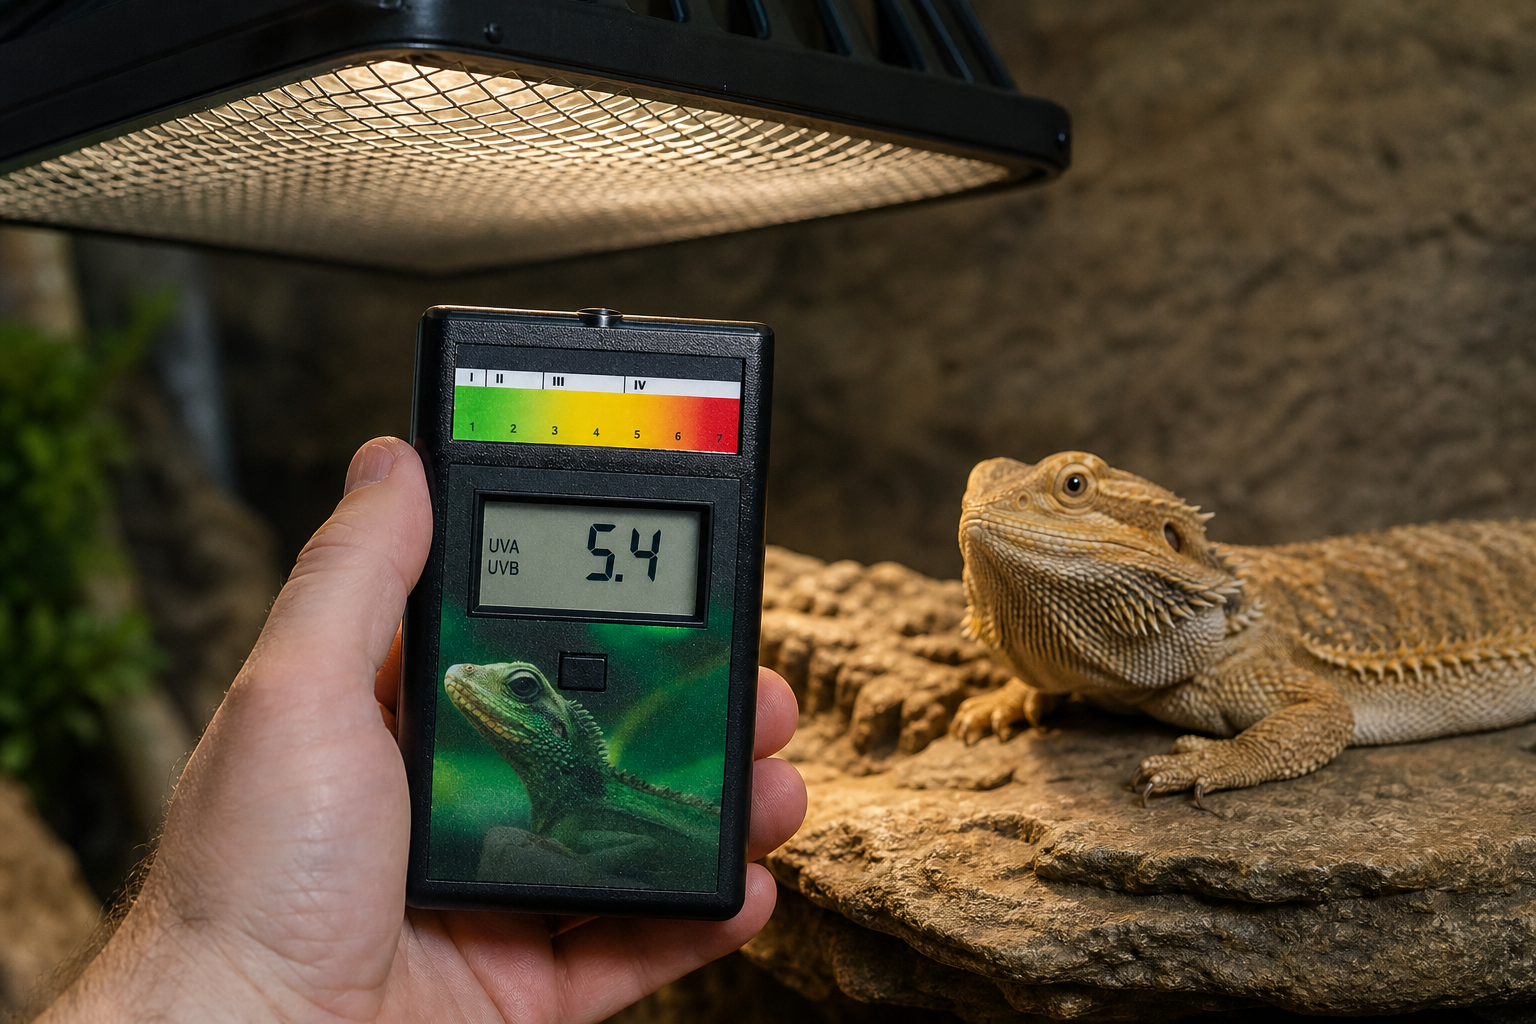
  • Solarmeter 6.5R review: measuring UV Index inside reptile enclosures

    Editorial note: this review covers the current manufacturer specification and repeatable enclosure technique. UV requirements vary by species, life stage and setup. Use qualified husbandry guidance and veterinary advice where health is involved.

    Verdict: Solarmeter 6.5R is the most useful handheld meter for reptile keepers who need to measure UV Index at the animal’s position. It does not tell you whether a lamp is good in every respect, and it does not measure visible brightness or heat. Its value comes from turning lamp distance, mesh loss and aging into repeatable numbers.

    Keeper measuring UV Index at a reptile basking position

    What the 6.5R measures

    OutputUV Index, resolution 0.1
    Published range0 to 199.9 UVI
    Spectral response280 to 400 nm with a Diffey erythemal response
    Reading rateThree readings per second
    Published accuracy±10% relative to NIST reference
    Power9-volt battery
    Operating range0 to 32.2°C and 5 to 80% RH

    The 6.5R is operationally the same as the established Model 6.5, with reptile-focused graphics. It reports an index weighted by biological effect. The number is more useful for enclosure planning than a raw microwatt reading when the question is the UV exposure available to the reptile.

    6.5R versus 6.2R

    Model 6.5R reports UV Index. Model 6.2R measures UVB irradiance in microwatts per square centimeter. They are not interchangeable scales and no universal conversion works across different lamp spectra.

    Most keepers choosing one meter should start with 6.5R because many modern reptile-lighting recommendations use UVI and Ferguson Zone concepts. Lamp manufacturers and researchers may use a 6.2R for additional output measurements. Buying both does not help unless you know how the second result changes a decision.

    How to take a useful reading

    1. Warm the lamp for the period specified by its manufacturer.
    2. Build the enclosure exactly as used, including reflector, mesh and guards.
    3. Hold the meter at the animal’s accessible body position.
    4. Aim the sensor toward the center of the lamp without shading it.
    5. Keep orientation and distance repeatable.
    6. Measure the basking center, edges, retreat and cool side.
    7. Record lamp model, age, fixture, mesh, distance, date and UVI.

    One reading directly under a bare lamp is not an enclosure map. The reptile encounters a gradient. Measure where its back, head or shell can actually sit, not the substrate when the animal’s body rises several inches above it.

    Mapping UV Index across marked basking positions in a reptile enclosure

    Mesh and distance can change the answer

    Screen mesh absorbs and scatters part of the output. The loss depends on wire thickness, spacing, coating and distance. A generic percentage from another enclosure is less reliable than a measurement above and below your own screen.

    Distance has an equally large effect. Move the meter in small, measured steps and create a table. Do not raise a branch after testing without checking the new animal position. A small construction change can matter more than the age printed on the lamp box.

    Use it to track lamp aging

    Record a baseline after a new lamp settles through its initial operating period. Repeat at the same locations monthly or at another sensible interval. Replace by measured performance and manufacturer guidance, not appearance. A lamp can continue producing visible light after useful UV output declines.

    Keep the reflector clean and note every change. A new fixture, different mesh or moved branch resets the baseline. The environmental monitoring guide uses the same principle: record the setup with the number.

    Repeatability matters more than chasing decimals

    The display resolves to 0.1 UVI, but hand position and angle can move the value. Make three readings at each point and record a stable value or short range. A cardboard jig or marked measuring stick can keep distance and orientation consistent.

    Do not compare readings taken through different glass, mesh or plastic. Ordinary glass blocks much of the relevant UV. Measure inside the actual barrier configuration while keeping the meter within its operating humidity and temperature range.

    Repeatable UVB lamp aging check with meter and notebook

    What the meter cannot tell you

    It cannot identify the correct UVI for an animal by itself. It cannot measure temperature, visible light quality, photoperiod or the size of the usable basking zone. It also cannot diagnose disease or prove adequate vitamin D status.

    A safe setup combines species-appropriate UVI guidance with a suitable heat gradient, bright visible light and places to escape exposure. The best number at one point does not rescue an enclosure with no shade.

    Cost and ownership

    The 6.5R is expensive compared with a thermometer because its filtered sensor and calibration solve a narrower measurement problem. The price is easier to justify across several UV-equipped enclosures, for a breeder, rescue or club that shares a meter.

    Store it dry, protect the sensor window, remove the battery for long storage and follow the manufacturer’s recalibration guidance. Do not touch or clean the optical surface with an aggressive product.

    A practical UV log

    DateLamp and ageFixture/meshPointDistanceUVI
    YYYY-MM-DDModel, hours/monthsReflector and screenBasking centerMeasured to sensorStable reading

    Photograph the measuring position. A number without position is hard to reproduce. Link the log to the animal or enclosure ID using the ideas in the QR record guide.

    Who should buy it?

    Buy the 6.5R if you run UVB lamps, change fixtures or screens, manage several enclosures, or want evidence for replacement timing. It is especially useful for tall arboreal setups and rescues where lamp history is uncertain.

    A keeper with one established enclosure may borrow or share a calibrated meter, provided readings are repeated after changes. Do not buy a cheaper unverified UV gadget only because its display has more digits.

    Build a measurement map, not a single number

    A useful UV check covers the places the reptile can actually occupy. Start at the highest point of the basking surface, then measure the center and both edges. Repeat at the animal’s normal head height. Finish with readings in shaded retreats and along the route between warm and cool areas. This creates a small map of choices instead of one impressive number directly under the lamp.

    Keep the meter in the same orientation for every point. Small changes in angle can matter under compact lamps and narrow reflectors. If the animal can climb, include branches, ledges and the top of hides. A branch that looked safely below the lamp can become the highest exposure point after the enclosure is rearranged.

    Commissioning a new UVB lamp

    Do not wait until the replacement date printed on a calendar. Measure a new lamp after it has settled into normal operation, with the final reflector, mesh and furnishing layout installed. Save that baseline with the lamp model, installation date, distance and meter position. Repeat the same map after one week, monthly for the first quarter and then on a schedule that fits the collection.

    A sudden change is often more useful than the absolute reading. It can reveal a moved fixture, dirty reflector, shifted branch or failing lamp. If the reading falls, clean and inspect the setup before replacing parts. The goal is to find the reason, not merely restore a favorite number.

    Care, storage and calibration

    The sensor window should stay clean, dry and protected from scratches. Store the meter away from misting equipment and do not leave it in a hot reptile room window. Before an important survey, check the display and battery, then take one reading at a familiar reference point. An unexpected reference reading is a reason to repeat the setup before making husbandry changes.

    Solarmeter offers calibration service, which matters for a tool used over many years. Note the service date in the same log as lamp measurements. For a multi-enclosure collection, label the meter case with a simple measurement routine so different keepers hold and position it consistently.

    Frequently asked questions

    Does Solarmeter 6.5R measure UVB?

    Its sensor responds across 280 to 400 nm and reports UV Index using an erythemal weighting. It does not display raw UVB irradiance like the 6.2R.

    Can I measure through glass?

    Measure the exposure inside the real enclosure barriers. Glass blocks much UV and a reading outside the glass does not represent the animal’s position.

    How often should I test a lamp?

    Record a new-lamp baseline, then repeat on a regular schedule and after any change to lamp, fixture, distance, mesh or basking furniture.

    Is one basking reading enough?

    No. Map the center, edges and escape areas to confirm the animal can choose a gradient.

  • Govee H5075 review for reptile enclosures: useful logger, real limits

    Verdict: Govee H5075 is a useful low-cost logger for a dry or moderately humid reptile enclosure. The local display, Bluetooth history, alert thresholds and CSV export cover more than a basic stick-on gauge. It is not a Wi-Fi monitor, the published open-air range is optimistic inside real rooms, and prolonged high humidity deserves caution.

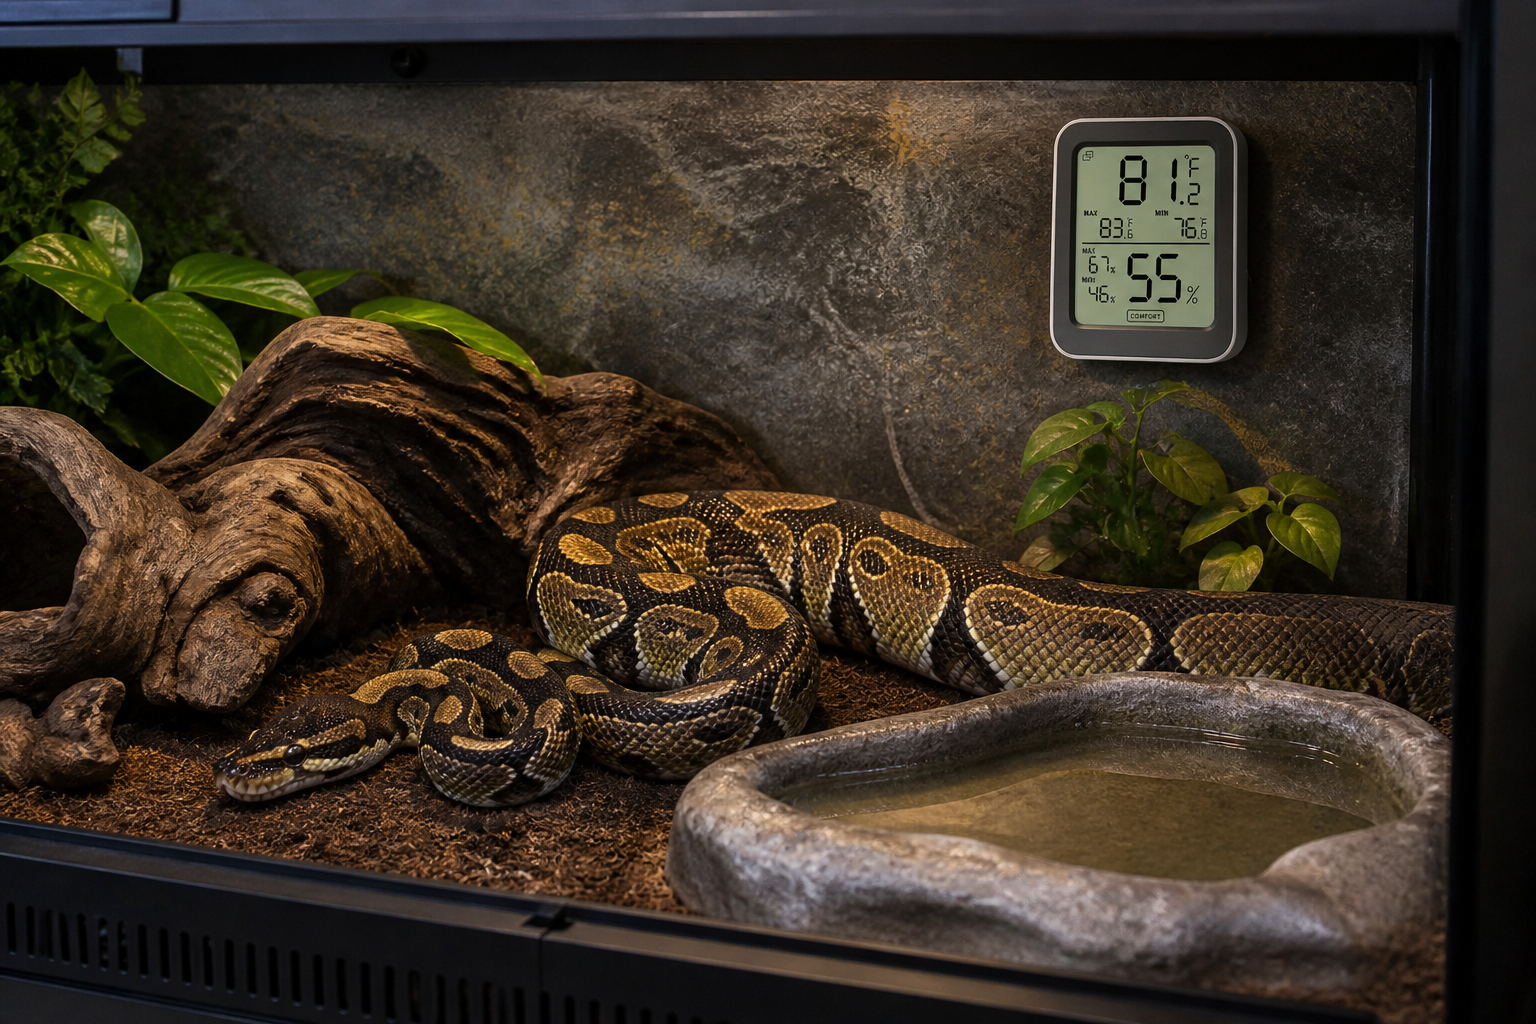
    Compact Bluetooth thermometer hygrometer mounted in a snake enclosure

    Govee H5075 at a glance

    ConnectionBluetooth only on the H5075
    DisplayLocal LCD for temperature and relative humidity
    Published rangeUp to 50 m or 164 ft in open, unobstructed conditions
    HistoryGovee Home app with CSV export
    PowerTwo AAA batteries, with about six months quoted battery life
    Best fitBudget trend logging in ordinary indoor humidity
    Main cautionNo native Wi-Fi and no claim that the body belongs in direct spray

    What it does better than a basic gauge

    The display makes a fast visual check possible, while the app preserves a trend. That combination matters. A gauge without history can look normal five minutes after a short heat spike. H5075 lets you review the curve and export the records instead of trusting memory.

    Alert ranges can warn while the phone is close enough and the app is functioning. Test them before relying on them. Put the sensor in the enclosure, close every door, walk to the place where you normally sit and trigger a temporary threshold. Bluetooth range through glass, PVC, walls and water will be shorter than the open-field figure.

    It is not a thermostat

    H5075 measures conditions but does not switch the heater safely. A proper thermostat still controls the heat source. The logger is independent evidence that the controlled enclosure behaves as expected.

    Pair it with the right controller from the reptile thermostat comparison. If the Govee and thermostat disagree, place their sensors together temporarily and investigate instead of changing the setpoint blindly.

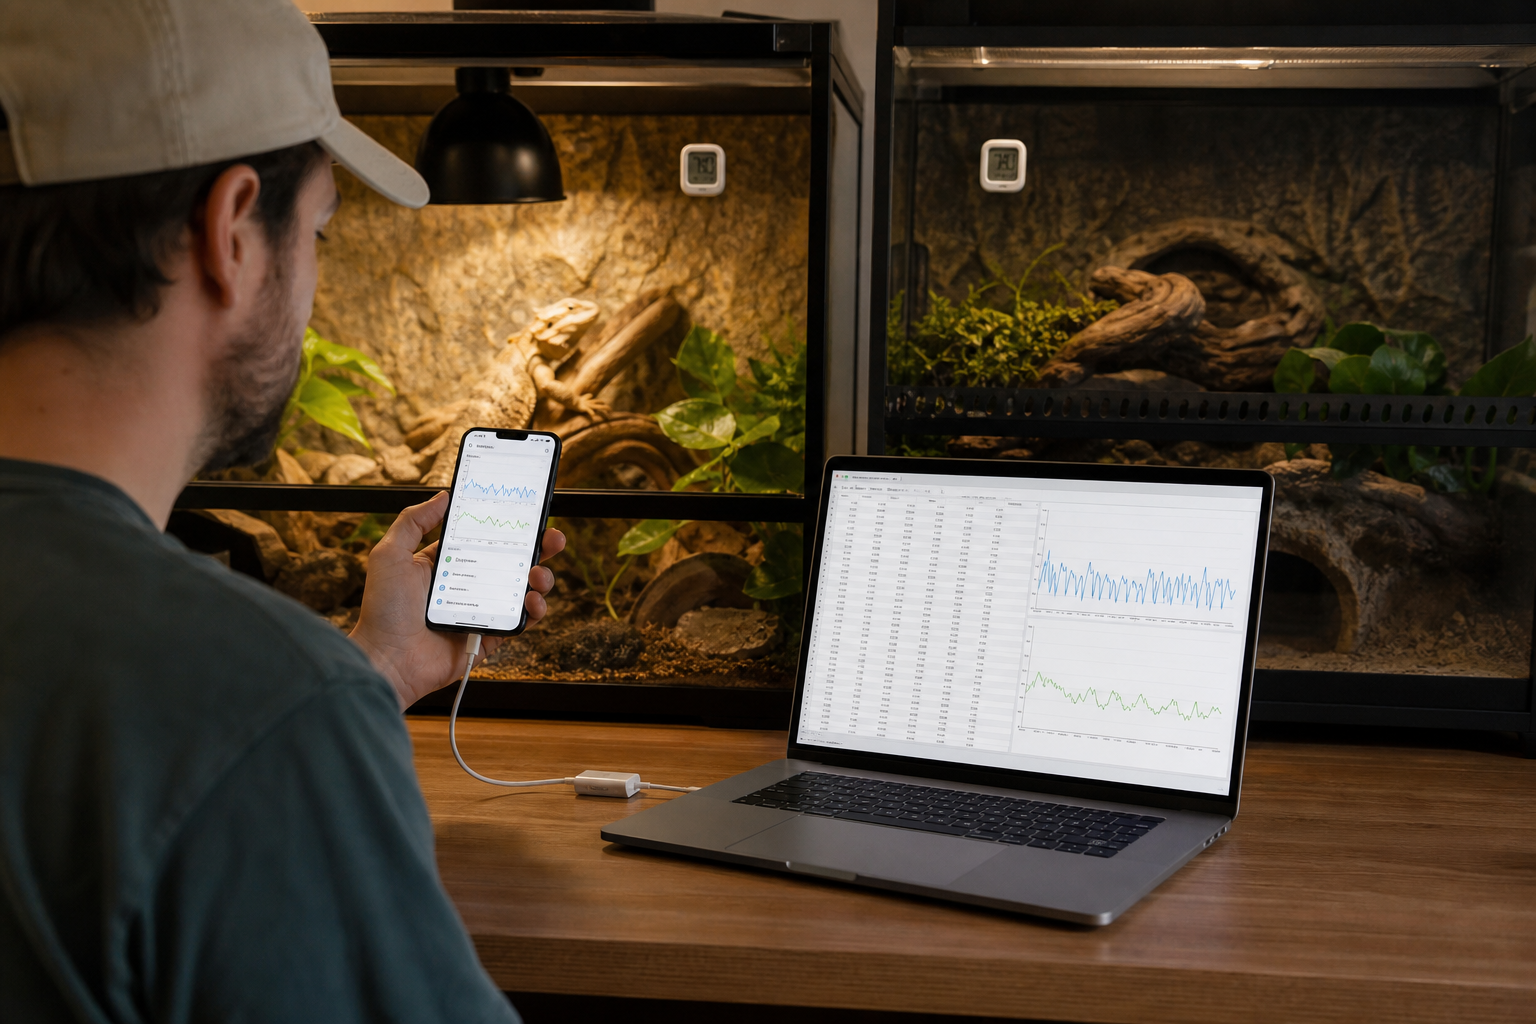
    Keeper exporting reptile enclosure temperature and humidity history

    Placement inside a reptile enclosure

    Mount the H5075 where air can circulate and the animal cannot knock it into water. Do not place it on the basking surface, against cold glass or directly beneath a lamp. Those positions measure local radiation or material temperature rather than representative air.

    For a snake enclosure, secure the unit mechanically without exposed sticky pads. Strong animals can move surprisingly heavy accessories. For a tropical vivarium, keep it outside the nozzle cone and watch whether the humidity reading returns smoothly after each misting cycle.

    One H5075 cannot describe a full gradient. Add a second air sensor at the opposite end or move a logger during setup. The thermometer and hygrometer guide covers placement by enclosure type.

    Temperature and humidity accuracy

    Govee markets the H5075 around a Swiss-made sensing component and fast readings. Treat any published accuracy as a tolerance, not a promise that two units will match digit for digit. Response time, airflow and radiant heat can create larger practical differences than the sensor specification.

    Compare a new unit with another trusted device in a stable room for several hours. Repeat at a second normal condition. If the offset stays consistent, document it. If it changes wildly, do not solve the problem with a single calibration value.

    Humidity becomes less reliable near extremes and after long exposure to saturation. A condensation-covered consumer sensor is being used outside the calm conditions in which most specifications are measured. Let it dry and compare again.

    Bluetooth, history and synchronization

    Bluetooth keeps the product inexpensive and avoids another Wi-Fi device, but remote monitoring stops when no phone or compatible gateway is present. The app may collect stored readings after reconnecting. Check the history gap yourself rather than assuming every sample survived.

    Name sensors by enclosure ID, not only animal name. Animals move. A label such as RACK-A-03 makes exported data easier to match with physical locations. When the animal moves, note the date in the husbandry record.

    Do not confuse Govee models. Some related sensors work with gateways or have Wi-Fi built in. The H5075 product page specifically says it is Bluetooth only. A seller title that says smart does not change the radio hardware.

    CSV export

    Govee states that H5075 history can be downloaded from the Home app. Export during the first week. Open the file and check timestamps, units, device name and sampling interval. A file is not a backup until another program can read it.

    Keep dated copies outside the app, especially before removing a device or changing accounts. The reptile app export and privacy checklist is equally relevant to environmental sensors.

    Battery and maintenance

    Govee quotes roughly six months from two AAA cells. Cold rooms, frequent synchronization, weak batteries and display use can change that. Replace both cells together and record the date. Rechargeable AAA cells may have a different voltage curve, so follow Govee’s battery guidance.

    After replacement, confirm time, units, thresholds and history synchronization. A display returning to life does not prove the app still recognizes the correct sensor.

    Dust the ventilation openings gently. Do not spray cleaner into the body. If the unit receives direct mist, remove power, allow it to dry and compare it with another sensor before returning it to service.

    How it compares with SwitchBot and SensorPush

    SwitchBot Meter Plus offers a larger display, longer onboard history and an optional hub ecosystem. SensorPush HT.w is a better physical choice for splash-prone conditions and provides a purpose-built gateway. Govee H5075 wins on simple, inexpensive local logging when Bluetooth is enough.

    The decision is less about claimed accuracy than the room. A sensor that cannot stay connected or tolerate the humidity is a poor buy even if its laboratory tolerance looks better.

    Seven-day evaluation

    1. Install fresh batteries and give the sensor a stable device name.
    2. Compare it beside another trusted sensor for several hours.
    3. Place it in the final enclosure and test Bluetooth from normal locations.
    4. Set temporary thresholds and confirm alerts.
    5. Watch a complete heat and misting cycle.
    6. Export a CSV and open it on a computer.
    7. Check mounting, condensation and battery status at the end of the week.

    Who should buy the H5075?

    Buy it for a modest collection where you want trends and exports without purchasing a hub. It works particularly well as a room logger or as one point in a dry-enclosure gradient.

    Choose a water-resistant sensor for consistently wet vivaria. Choose a gateway system when alerts must reach you away from home. Choose a wired probe display when wireless radios struggle through rack material.

    Turn the first week into a baseline

    Place the H5075 in its final location and leave the enclosure routine unchanged for seven days. Mark feeding, misting, doors-open cleaning and room heating changes in a simple log. When the graph rises or falls, those notes give the curve a cause. Without them, the app is just a collection of unexplained peaks.

    Review daily minimums and maximums, but also look at how quickly the enclosure recovers. A humidity spike after misting may be normal, while a slow return to baseline can signal reduced ventilation or wet substrate. Temperature recovery after a door opening can reveal whether the heat source has enough reserve.

    Alarm limits that produce useful alerts

    Set initial limits outside the normal measured range, not directly on an ideal target copied from a care sheet. Tight limits can create repeated notifications during ordinary cycles, and users eventually ignore them. After the baseline week, narrow the limits around conditions that genuinely require investigation.

    Bluetooth reach is part of the alarm system. Walk through the home with the phone and note where the sensor stops updating. If an alert matters while nobody is nearby, the H5075 alone is the wrong architecture. Use a compatible gateway product or a networked alternative, then test internet and power failures.

    Using several H5075 sensors

    Give each device a name that identifies room, enclosure and position, such as Rack A, Ball Python 3, Cool Side. Avoid names based only on species when several animals share the room. Put the same label on the physical sensor so exported data can be traced after devices are moved.

    Synchronize and export on a fixed schedule. A monthly CSV archive is usually enough for routine husbandry, while a new enclosure may justify weekly review. Store the file beside feeding and health records. The methods in our spreadsheet-to-app migration guide help keep identifiers consistent.

    Frequently asked questions

    Does Govee H5075 have Wi-Fi?

    No. Govee describes H5075 as a Bluetooth device. Other Govee models and gateway combinations offer remote connectivity.

    Can it export data?

    Yes. The current product FAQ says historical data can be downloaded through the Govee Home app. Test the CSV before depending on it.

    Can it sit inside a tropical vivarium?

    Keep it away from direct spray and condensation. For persistently wet conditions, a water-resistant sensor is a safer choice.

    Will alerts work when I leave home?

    Not through the H5075’s Bluetooth connection by itself. Remote alerts require compatible network hardware or a different model.

  • Herpstat 1 SpyderWeb review: control, alarms and remote monitoring

    Editorial note: this review covers the current Herpstat 1 SpyderWeb model using its published manual and product specifications. It does not invent bench-test results. Verify the exact regional model, firmware and electrical rating before setup.

    Verdict: Herpstat 1 SpyderWeb is expensive for a single output, yet its control and safety design explains the price better than its Wi-Fi features do. Proportional heating, a removable probe, an internal safety relay, audible alarms, outage tracking and retained settings make it a serious controller before the network is even configured. Remote status and graphs are useful extras, not the foundation.

    It is best suited to a keeper who wants one carefully controlled heat zone and will spend time testing probe placement. Someone running several enclosures should price the appropriate multi-output Herpstat rather than buying a row of single-channel units. A simple heat mat in a stable room may not need this much control.

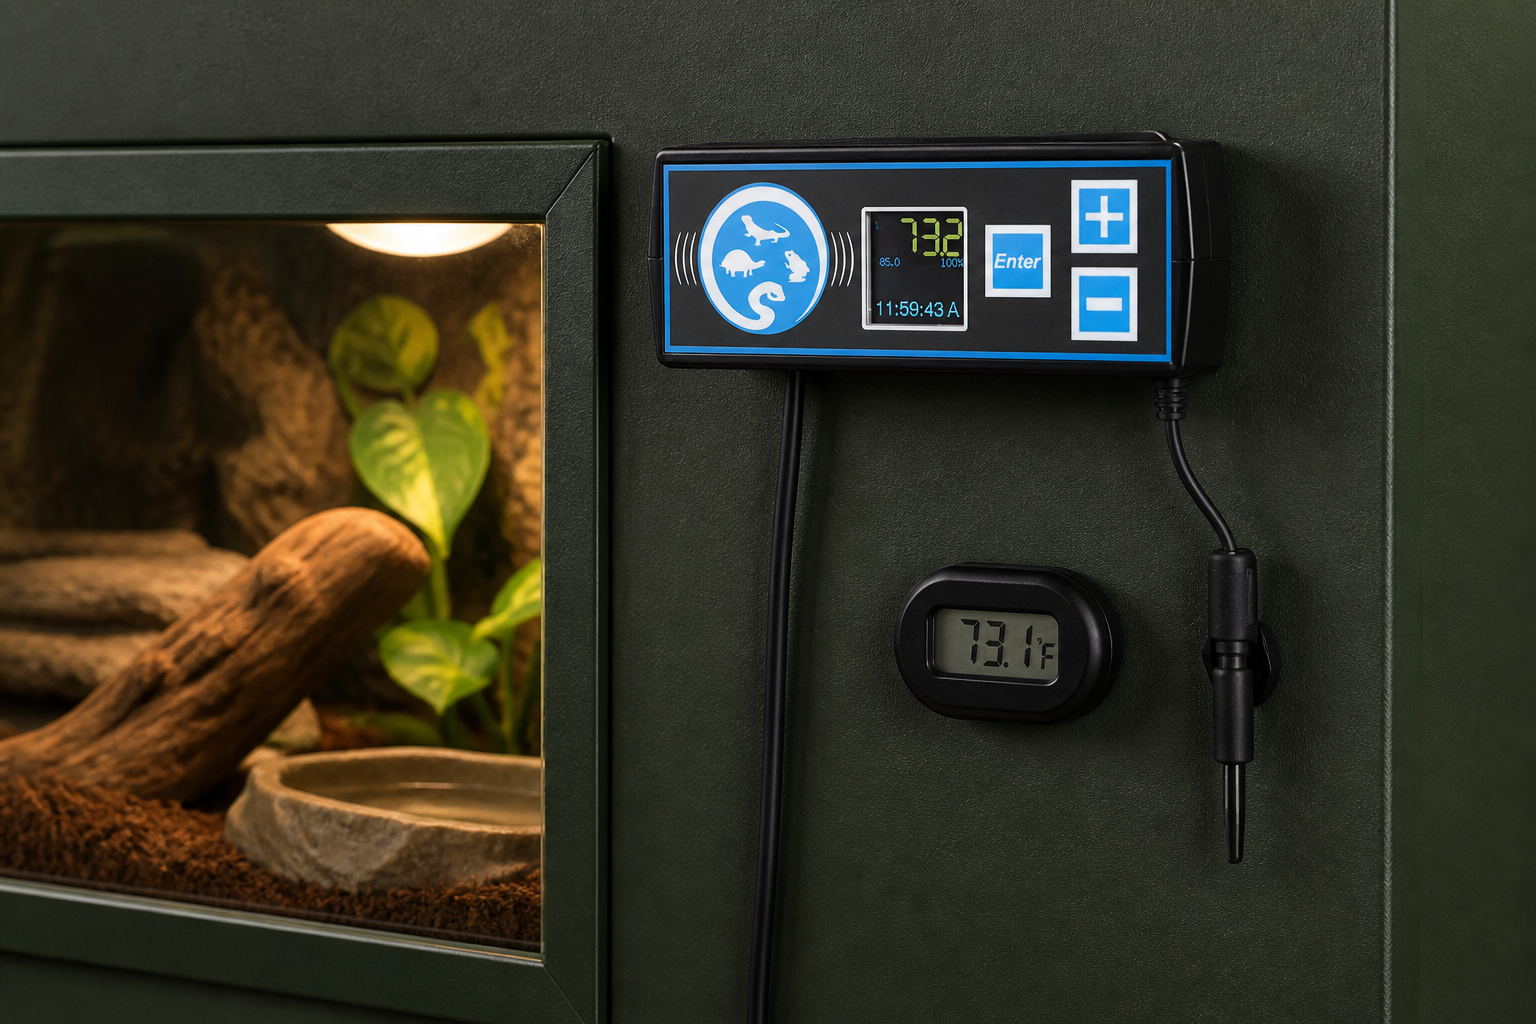
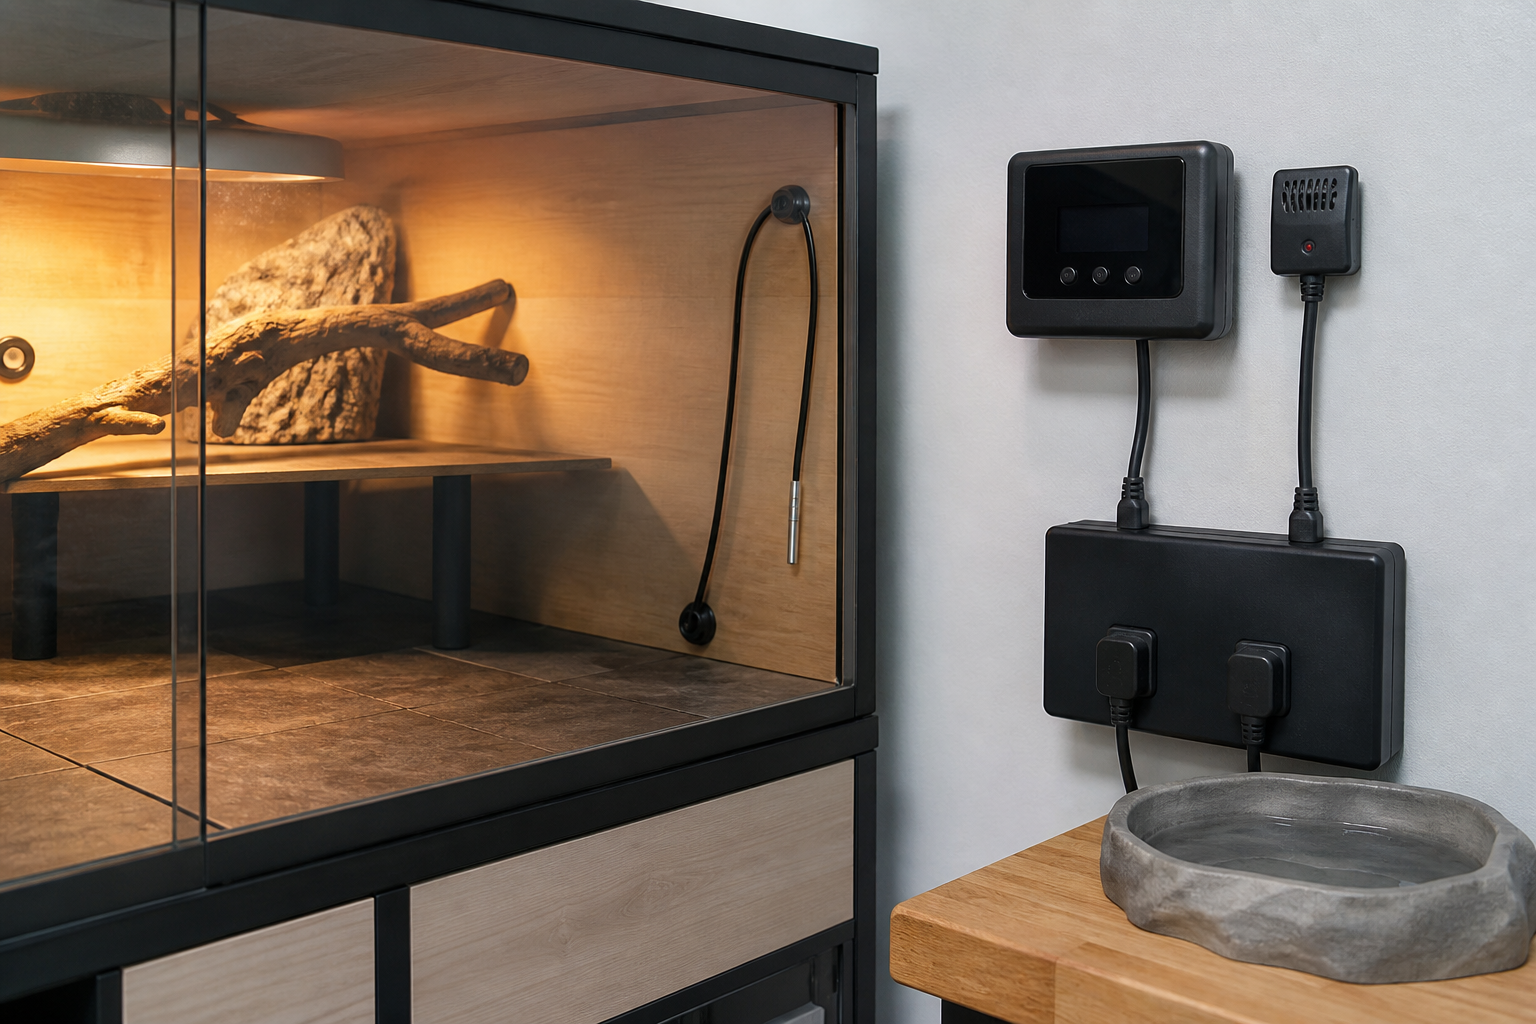
    Single-output proportional thermostat installed outside a reptile enclosure

    Herpstat 1 specifications that matter

    Outputs One controlled output
    Published load 700 watts total on the current SpyderWeb product page
    Temperature range 40 to 150°F, or 4 to 65°C
    Control options Heating, cooling, lighting or humidity configuration; proportional heating support
    Scheduling Up to four temperature periods per day
    Probe Removable steel-tipped temperature probe; optional humidity probe
    Network tools Local browser view, remote monitoring, graphing, status and emergency email options
    Safety Sensor-failure shutdown, audible alarm, thresholds, replaceable fuse and internal safety relay

    Why proportional control feels different

    A basic thermostat waits for the probe to cross a threshold, turns the heater fully off, then applies full power after the temperature falls. Herpstat can reduce output as the enclosure approaches the target. The heater spends less time lurching between zero and full power, although the final stability still depends on heater type, enclosure mass, room temperature and probe location.

    Soft startup applies power gradually during an initial warmup. Auto Power Matching then adjusts the output curve to the enclosure’s behavior. Neither feature removes the need for an empty-enclosure test. A large stone hide may continue releasing heat after the controller cuts output, while a light PVC enclosure can respond quickly.

    The comparison of the best reptile thermostats explains when dimming, pulse and on/off control fit different heaters. Never assume proportional means compatible with every lamp.

    Four daily periods are useful when they stay simple

    Herpstat permits up to four scheduled settings each day. That can create a gradual morning warmup, daytime target, evening decline and overnight level. It is more flexible than a single day/night switch, but four periods are not automatically more natural.

    Start with two temperatures. Add another period only when it solves a measured problem, such as preventing a sharp transition caused by the room’s HVAC schedule. Record the actual enclosure response for several days. The temperature at the probe can follow the program while the basking surface lags behind.

    Lighting mode can simulate sunrise, sunset and moonlight, but an animal’s lighting plan also depends on UVB, visible illumination and darkness. Do not let one controller screen turn several separate husbandry decisions into a single number.

    Safe reptile thermostat control station during an empty-enclosure test

    Probe placement and sensor matching

    The removable probe is one of the strongest ownership details. Cables get pinched, chewed and pulled. Replacement is easier when the sensor is not permanently attached to the controller. Secure the tip at a repeatable point where the animal cannot drag it under a hide or press it against the heater.

    Sensor Matching lets the displayed temperature be adjusted against another instrument. Calibration should not be used to make an inconvenient reading disappear. Put the Herpstat probe and a trusted reference together in a stable environment, wait for both to settle, compare several points and document any offset. A single reading beside an active lamp is a poor calibration test.

    Use independent monitoring after calibration. The thermometer and hygrometer guide covers response time, sensor placement and data logging. An infrared thermometer is useful for surfaces but does not calibrate an air probe by itself.

    The safety system is the real reason to upgrade

    Spyder Robotics lists internal error detection that shuts off heat when the sensor fails or disconnects. The controller also has selectable high and low thresholds, an audible alarm and a separate internal safety relay that can remove power under user-defined conditions. Those layers address different faults.

    Test alarms with the enclosure empty. Set a temporary threshold close to room temperature, confirm the audible alert, then restore the proper value. If the manual permits, disconnect the probe and verify the output turns off. Do not improvise a short circuit or open the controller.

    All settings are retained after power loss, and the unit tracks outages. Pulling power for a controlled test tells you more than the feature list. Confirm the clock, schedule, setpoint, output mode and Wi-Fi behavior after restart. A thermostat that resumes heat correctly but forgets its clock can still run the wrong temperature period.

    SpyderWeb remote monitoring

    The controller can expose status through a local web view and upload data for remote access. It also supports history graphs, scheduled status emails and emergency emails. This is useful for spotting a slow room-temperature drift or checking whether an outage happened while nobody was present.

    Remote monitoring has several independent failure points: router, internet service, email delivery, cloud account and phone notification settings. Keep local audible alarms enabled. If remote alerts are important, deliberately interrupt Wi-Fi and learn what the controller shows and what message, if any, arrives.

    Use a unique network password and install firmware only through the manufacturer’s supported process. Do not expose a local controller interface directly to the public internet. Remote access is convenient, but the device’s safe local behavior matters more.

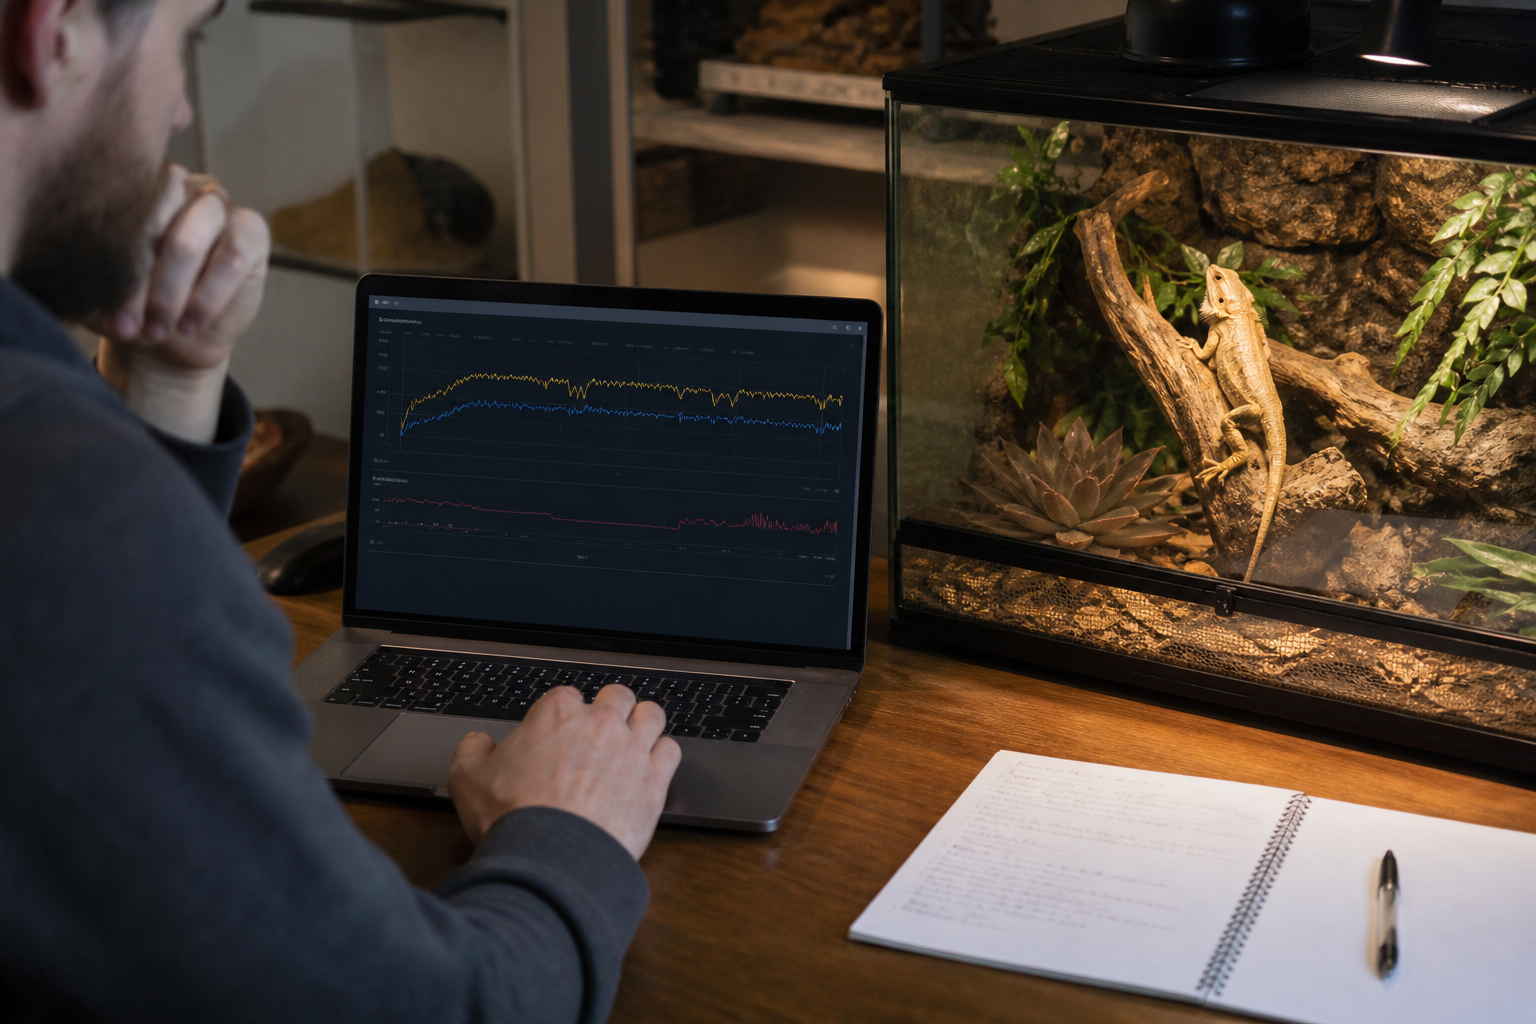
    Keeper reviewing reptile enclosure temperature history on a laptop

    History graphs: useful evidence, limited diagnosis

    A graph can reveal cycling, overshoot, room-driven drift and warmup time. It cannot explain every change. A moved probe, open door, misting cycle and fresh substrate can produce similar-looking dips. Keep short notes when the enclosure changes so the graph has context.

    Compare the controller history with an independent logger for several days. The two sensors should not be expected to match perfectly if they occupy different points. The goal is to understand the gradient and catch sudden disagreement, not force every display to show the same decimal.

    Installation workflow

    1. Mount the controller and all mains connections outside the enclosure and away from spray.
    2. Install the heat source in its final guarded fixture.
    3. Secure the Herpstat probe at the control point with a cable route the animal cannot disturb.
    4. Connect only a compatible load below the regional unit’s rating.
    5. Set control mode, target, alarms and a simple schedule.
    6. Place independent sensors at the controlled point and cool end.
    7. Run the finished enclosure empty for at least a complete day/night cycle.
    8. Test outage recovery and the supported sensor-failure response.
    9. Configure remote access only after local control is proven.

    Keep sockets raised and use drip loops. A misting nozzle should never spray the controller, receptacle or cable entry. The misting system comparison includes electrical separation and leak checks.

    Where Herpstat 1 falls short

    The first limitation is obvious: one output. It cannot independently control two enclosures or two heat zones. A splitter lets one probe switch several devices together, which is not the same thing. Choose a multi-output controller when the zones need separate feedback.

    The interface asks more from the owner than a basic plug-in thermostat. Four periods, several modes, matching, thresholds and network settings create more places for a configuration mistake. Write down the final setup and keep the manual nearby.

    Price also matters. If the heater works safely with simple on/off control and an independent alarm already covers the room, the upgrade may add little. The Herpstat vs Inkbird ITC-308 guide compares the two control classes without pretending they are equivalent products.

    Who should buy it?

    Herpstat 1 makes sense for a high-value animal, a temperature-sensitive setup, a fast-heating enclosure or any keeper who wants local safety layers plus a readable history. It also suits people who will test alerts and power recovery instead of assuming the network makes the enclosure safe.

    Choose something simpler when the heating load is modest, on/off behavior is acceptable and remote data will not be used. Choose a larger Herpstat when multiple independent zones are already planned. Buying the correct number of channels at the start is usually cleaner than stacking adapters later.

    Frequently asked questions

    Does Herpstat 1 work without Wi-Fi?

    Yes. Spyder Robotics states that network features are not required for thermostat operation. Configure and test local control first.

    Can Herpstat 1 control humidity?

    The current SpyderWeb model can be configured for humidity with an optional humidity probe. Check compatibility and do not assume one output can heat and humidify independently at the same time.

    What happens if the temperature probe fails?

    The manufacturer describes internal detection that shuts off heat if the probe fails or disconnects. Test only by the safe method in the manual.

    Can it control two heaters?

    It has one controlled output. Two devices on that output would share one probe and one control signal. Independent zones need independent outputs and probes.

  • Reptile temperature monitoring tools: sensors, probes and apps

    Verdict: Reptile temperature monitoring tools answer different questions. A fixed probe shows conditions at one point, an infrared thermometer checks surfaces and a wireless sensor can reveal trends. None of them replaces a correctly configured thermostat.

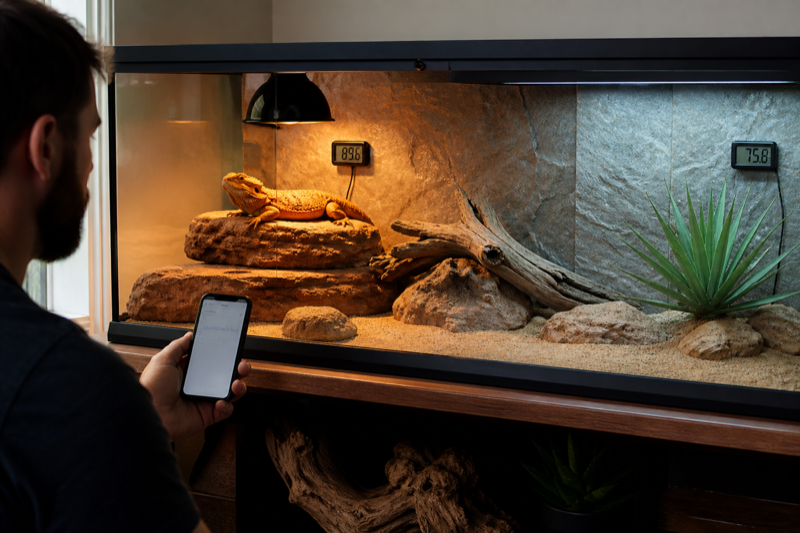
    Keeper checking temperature readings in a bearded dragon enclosure

    Monitoring is not control

    A thermometer reports temperature. A thermostat controls a heat source. Keeping those jobs separate prevents a common and dangerous misunderstanding. An app alert may warn you, but it cannot guarantee that heating equipment will switch safely.

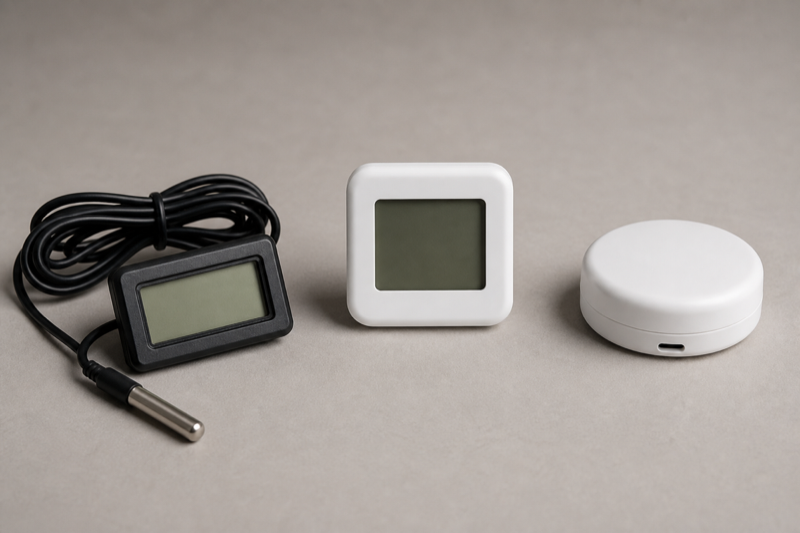
    Generic probe thermometer hygrometer and wireless sensor

    Choose the tool for the measurement

    • Probe thermometers are useful for continuous readings at a fixed location.
    • Digital hygrometers track humidity where the sensor sits.
    • Infrared thermometers check surface temperature at the moment of use.
    • Wireless sensors can store trends and send remote alerts.

    Placement changes the reading

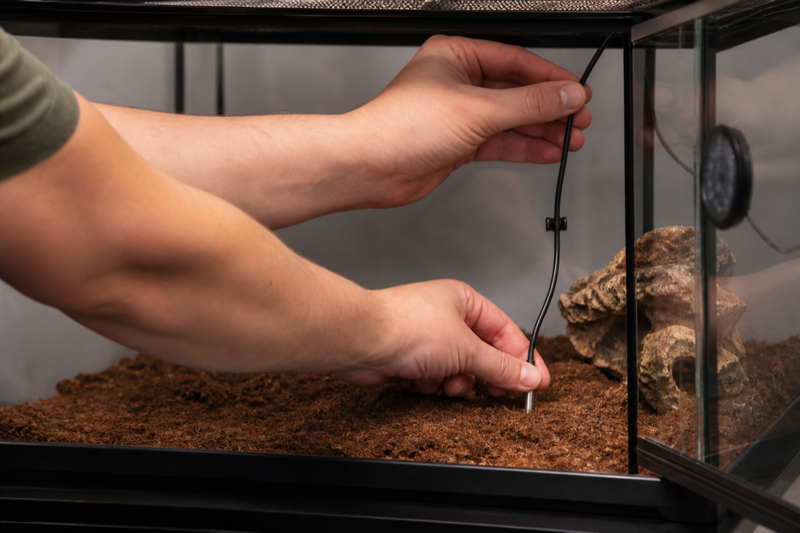
    A sensor near a vent, water bowl or heat source may not represent the area the animal uses. Secure cables and probes so they cannot shift or create a hazard. Compare devices in the same position before blaming a difference on accuracy.

    Keeper placing a temperature probe inside an empty terrarium

    Monitoring and control are separate jobs

    A thermometer tells you what happened at its sensor. A thermostat changes power to a heat source. An app may store readings or send alerts, but it does not make an uncontrolled heater safe. Every heat source that needs regulation should use an appropriate thermostat, with independent thermometers used to verify the enclosure.

    Surface and air temperatures are not interchangeable. An infrared thermometer reads a surface at that moment. A digital probe or sensor reads the air or the point around the probe over time. The readings can differ while both instruments are working correctly.

    What to buy first

    • Digital thermometers for the warm and cool areas
    • An infrared thermometer for basking surfaces and spot checks
    • A suitable thermostat for each controlled heat source
    • A remote sensor or alarm if off-site warnings matter to you

    Wireless sensors add graphs and alerts, but their connection type matters. Bluetooth usually requires you to stay nearby. Wi-Fi or a separate gateway can support remote access, provided the home internet and power are working. An offline alert inside the room and a backup thermometer still have value.

    Placement changes the reading

    Put monitoring sensors where the animal experiences the environment, not wherever the display looks tidy. Use more than one point to understand the gradient. Secure cables and probes so the animal cannot pull them into a different location or become tangled.

    A thermostat probe has a different purpose and its placement depends on the heat source and enclosure. Follow the thermostat and heater instructions. If the probe can be covered, moved or detached, the controller may respond to the wrong temperature.

    A simple accuracy check

    Place comparable sensors together for several hours and note their spread. Check them again at a stable room temperature and after a battery change. Large disagreements, slow response or impossible jumps deserve investigation. Do not “calibrate” a sensor merely to match the reading you hoped to see.

    FAQ

    Can one sensor cover a large enclosure?

    One point cannot describe a gradient. Warm and cool side readings are a sensible minimum for many setups.

    Do app alerts work during an outage?

    Often they do not. The sensor, gateway, router and internet connection all need power unless the system has a separate backup path.

    Connect readings to routine care: Use the guide to managing a large reptile collection to schedule equipment checks, and review app export and privacy before storing long-term sensor history.