Author: lasipton@gmail.com

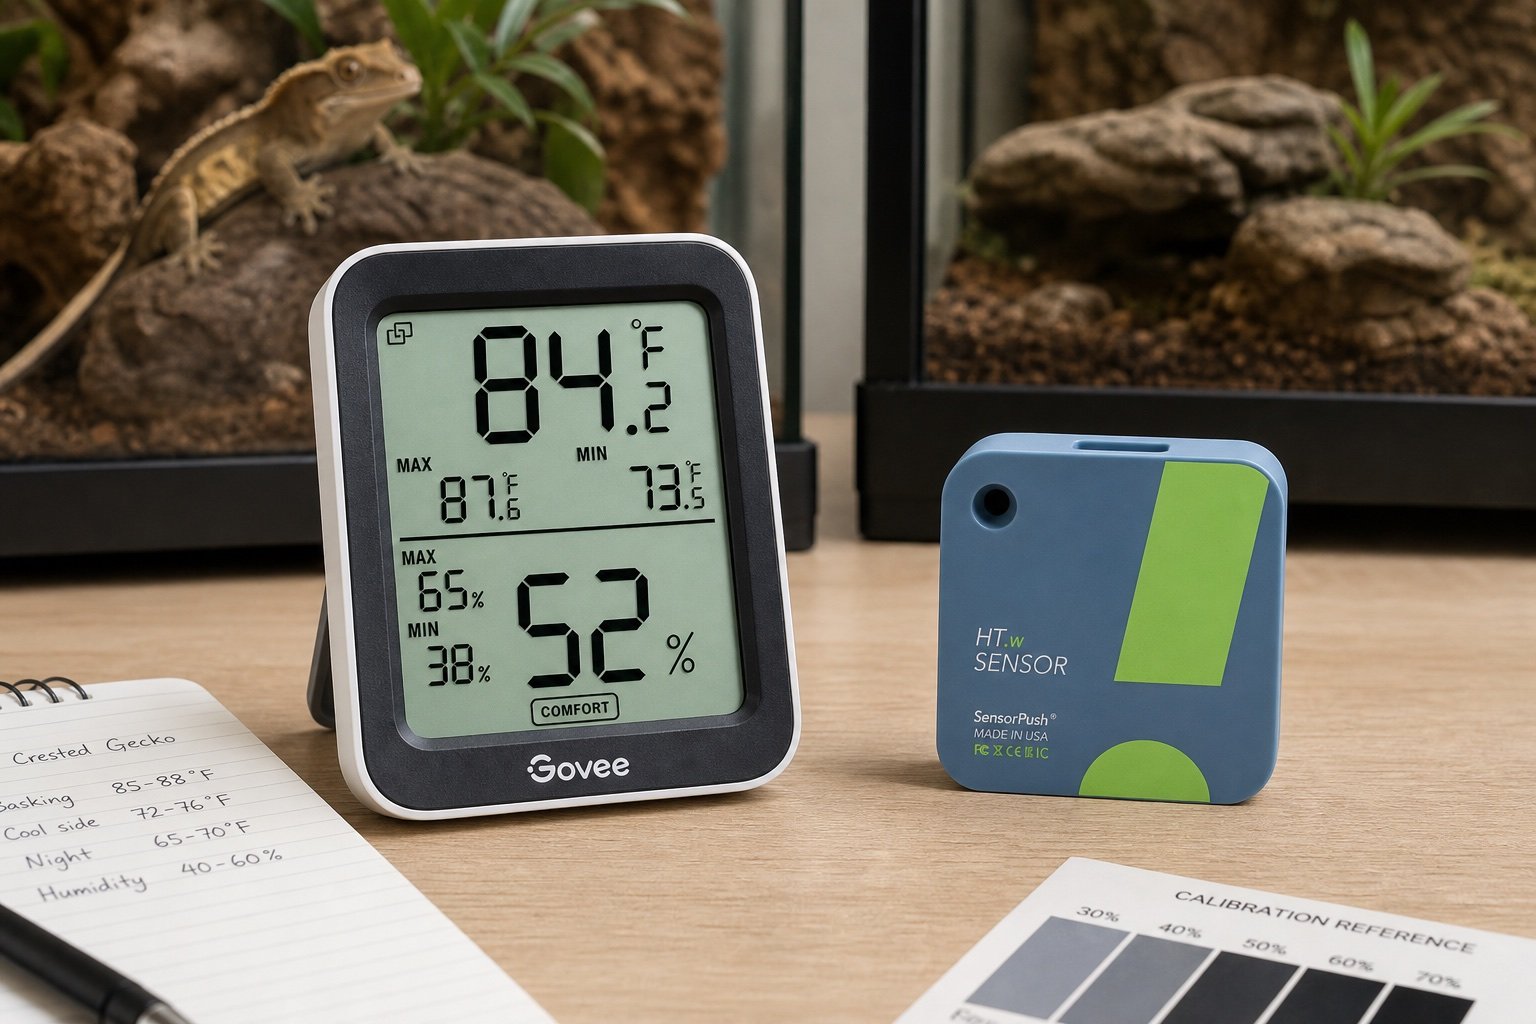
  • Govee vs SensorPush for reptile enclosures: logs, alerts and real cost

    Govee vs SensorPush for reptile enclosures: logs, alerts and real cost

    Quick verdict: Choose Govee when low entry cost and an on-device display are the priorities. Choose SensorPush HT.w when compact placement, longer stated battery life and a more measurement-focused workflow justify the higher system cost. Remote access adds a gateway or Wi-Fi model in either ecosystem.

    Govee vs SensorPush for reptile enclosures: logs, alerts and real cost is a narrow buying and setup question, so this guide stays focused on that job. It does not repeat our broader category pages. The aim is to help you choose, install and verify the equipment without turning one convenient device into a single point of failure.

    What matters in this comparison

    Factor Option or result Why it matters
    Entry cost Usually lower Usually higher
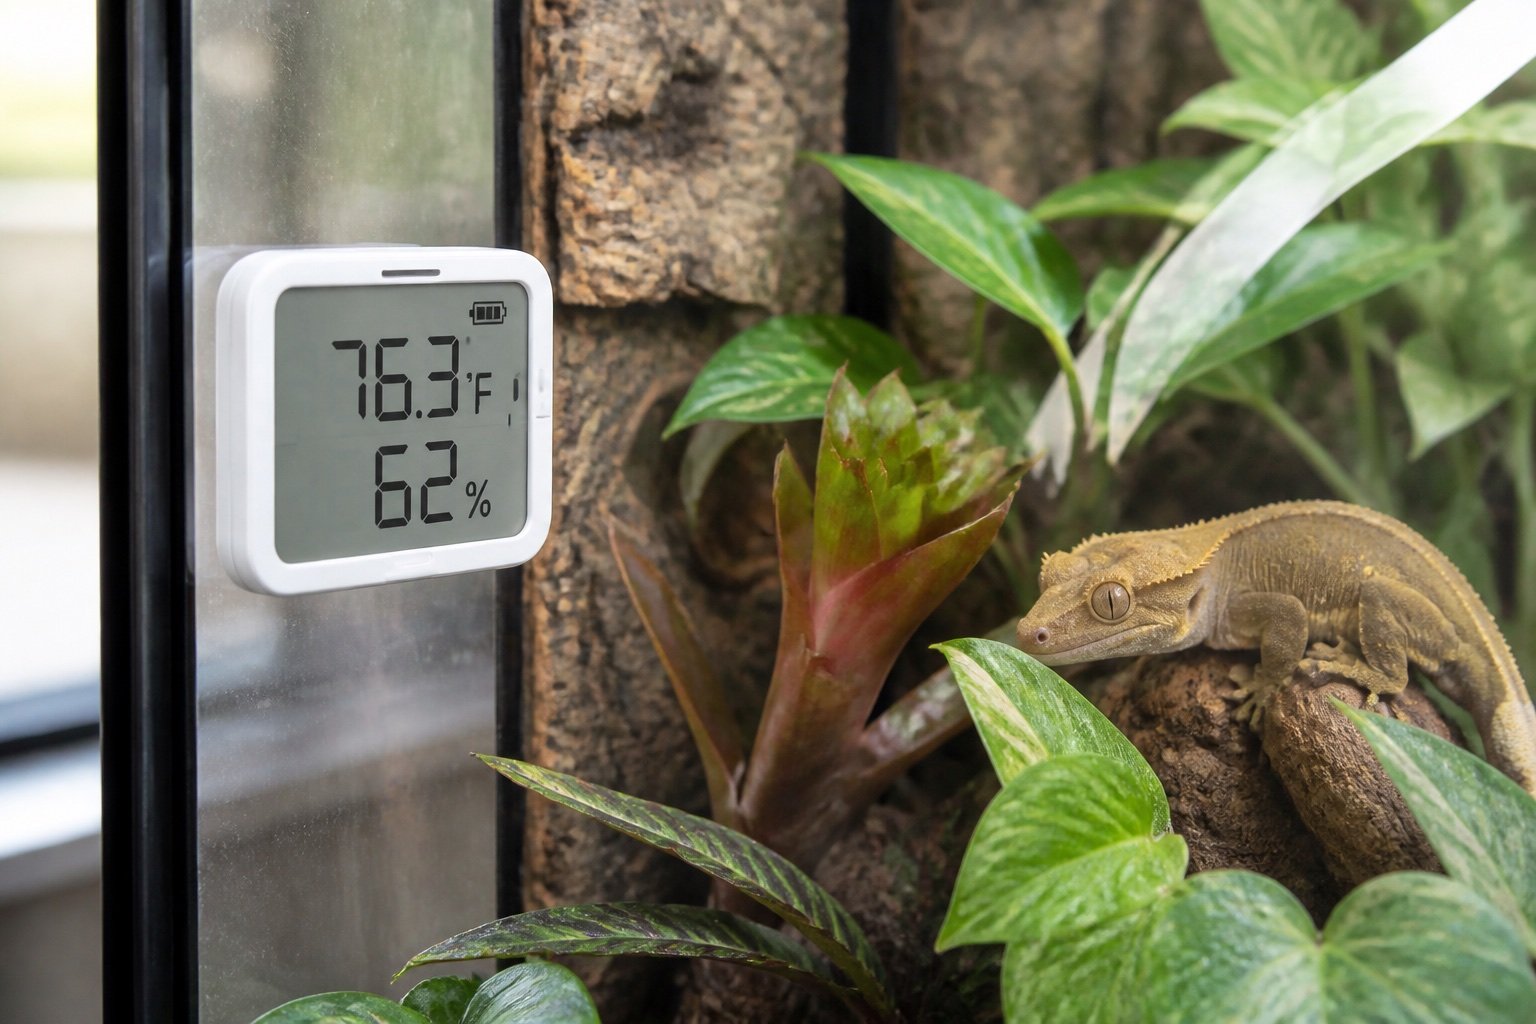
    Local display Common on Govee models None on HT.w
    Battery Model dependent CR2477, typical over two years
    Remote access Wi-Fi model or gateway G1 gateway

    Specifications are useful for screening products, but enclosure performance depends on placement. Room temperature, ventilation, mesh, substrate moisture and animal access can move the result far from a brochure figure. Work from a measured baseline and change one variable at a time.

    How to set it up

    1. List required zones

    Basking, cool and humid zones may need separate sensors. Test the result under normal enclosure conditions and write down what you observed. A setting that works on an empty bench can behave differently after decor, ventilation and daily room changes are added.

    2. Price the whole system

    Include gateways and replacement batteries. Test the result under normal enclosure conditions and write down what you observed. A setting that works on an empty bench can behave differently after decor, ventilation and daily room changes are added.

    3. Test export

    Download data before committing to an ecosystem. Test the result under normal enclosure conditions and write down what you observed. A setting that works on an empty bench can behave differently after decor, ventilation and daily room changes are added.

    4. Check alert delivery

    Lock-screen permissions often fail silently. Test the result under normal enclosure conditions and write down what you observed. A setting that works on an empty bench can behave differently after decor, ventilation and daily room changes are added.

    5. Run side by side

    Compare sensors for a full week. Test the result under normal enclosure conditions and write down what you observed. A setting that works on an empty bench can behave differently after decor, ventilation and daily room changes are added.

    What ownership looks like after the first week

    The first week should be treated as commissioning, not proof that the system will remain stable. Check the morning minimum, daytime peak and the transition between them. Look for loose probes, wet connectors, drifting clocks, blocked vents and any behavior that suggests the animal cannot use the intended zone.

    After the setup settles, use a short written routine. A glance at the device is not enough. Compare it with an independent instrument, inspect cables and mounts, and review stored history when available. Replace consumable parts based on condition and verified performance rather than memory.

    Common mistakes

    • Comparing one Govee model with the whole SensorPush range
    • Ignoring gateway cost
    • Putting unlike sensors in different microclimates
    • Choosing by app screenshots alone
    • Assuming a phone connection is an alarm system

    Who this approach suits

    This approach suits keepers who want a system that another person can understand during a holiday or emergency. It also scales better across several enclosures because labels, baseline readings and failure tests remove guesswork. If a device requires constant manual correction, the installation needs work even when its feature list looks impressive.

    How to verify the result in a real enclosure

    A logger earns its place by showing patterns that a spot check misses. Review at least a week that includes misting, heating transitions and a normal room-temperature swing. Look for repeatable timing, not isolated spikes. A brief peak immediately after spray may be expected; a rising overnight baseline can point to restricted ventilation or wet substrate.

    Before trusting alerts, force a harmless test. Warm the sensor in your hand, move it briefly to a drier room and confirm the notification arrives when the phone is locked. Then document Bluetooth or gateway coverage at the actual enclosure. Thick cabinets, foil insulation and distant rooms can shorten the advertised ideal range substantially.

    A practical seven-day check

    1. Day one: photograph positions, record room conditions and capture baseline readings.
    2. Day two: review the full day-night transition and check that schedules occurred at the intended local time.
    3. Day three: inspect mounts, probe restraints, plugs, tubing and any area exposed to moisture.
    4. Day four: compare the main reading with an independent instrument placed beside it long enough to stabilize.
    5. Day five: review animal access and behavior. Confirm that equipment does not block hides, climbing routes or the cool zone.
    6. Day six: simulate one safe failure, such as a short internet loss or power interruption, then check recovery.
    7. Day seven: save the final settings and observations in the enclosure record.

    Repeat the short version of this audit after major cleaning, seasonal room changes or equipment replacement. The point is not constant tinkering. It is catching the few changes that can quietly alter a previously stable habitat.

    Related Reptile Tech Lab guides

    Frequently asked questions

    Should I rely on the built-in display?

    No. Use a separate thermometer, hygrometer, light meter or logger appropriate to the job. Independent verification catches probe movement and controller errors.

    How long should I test before animals or eggs depend on it?

    At least one complete day-night cycle, and longer for equipment affected by room weather or water use. Incubation and emergency systems deserve several days plus a power-loss test.

    Can an app replace local control?

    An app is useful for history and alerts. Critical regulation should continue safely when the phone, router or cloud service is unavailable.

    What should I record?

    Record device model, installation date, set points, probe location, baseline readings and the result of outage or disconnection tests. Those notes make later troubleshooting much faster.
  • SwitchBot Meter Plus reptile review: readable display and useful history

    SwitchBot Meter Plus reptile review: readable display and useful history

    Quick verdict: SwitchBot Meter Plus is a practical choice when a large local display and downloadable history matter. It offers good stated accuracy and CSV export, but remote notifications require a SwitchBot hub and the case should stay away from direct spray.

    SwitchBot Meter Plus reptile review: readable display and useful history is a narrow buying and setup question, so this guide stays focused on that job. It does not repeat our broader category pages. The aim is to help you choose, install and verify the equipment without turning one convenient device into a single point of failure.

    What matters in this comparison

    Factor Option or result Why it matters
    Display 3 inch Readable during rounds
    Typical accuracy ±0.2 C, ±2% RH in core range Suitable for trend monitoring
    Bluetooth range Up to 120 m in ideal conditions Walls reduce it
    Battery Two AAA, about one year Easy to replace

    Specifications are useful for screening products, but enclosure performance depends on placement. Room temperature, ventilation, mesh, substrate moisture and animal access can move the result far from a brochure figure. Work from a measured baseline and change one variable at a time.

    How to set it up

    1. Pair and label first

    Use enclosure and zone in the name. Test the result under normal enclosure conditions and write down what you observed. A setting that works on an empty bench can behave differently after decor, ventilation and daily room changes are added.

    2. Mount in free air

    Leave space around vents. Test the result under normal enclosure conditions and write down what you observed. A setting that works on an empty bench can behave differently after decor, ventilation and daily room changes are added.

    3. Compare two positions

    A single wall reading may miss the basking gradient. Test the result under normal enclosure conditions and write down what you observed. A setting that works on an empty bench can behave differently after decor, ventilation and daily room changes are added.

    4. Check app history

    Confirm the phone actually syncs. Test the result under normal enclosure conditions and write down what you observed. A setting that works on an empty bench can behave differently after decor, ventilation and daily room changes are added.

    5. Export a trial CSV

    Do it before relying on long records. Test the result under normal enclosure conditions and write down what you observed. A setting that works on an empty bench can behave differently after decor, ventilation and daily room changes are added.

    What ownership looks like after the first week

    The first week should be treated as commissioning, not proof that the system will remain stable. Check the morning minimum, daytime peak and the transition between them. Look for loose probes, wet connectors, drifting clocks, blocked vents and any behavior that suggests the animal cannot use the intended zone.

    After the setup settles, use a short written routine. A glance at the device is not enough. Compare it with an independent instrument, inspect cables and mounts, and review stored history when available. Replace consumable parts based on condition and verified performance rather than memory.

    Common mistakes

    • Mounting next to a mist nozzle
    • Reading the screen but never checking history
    • Expecting hub features without buying a hub
    • Using adhesive that releases in humidity
    • Treating humidity accuracy as constant at extremes

    Who this approach suits

    This approach suits keepers who want a system that another person can understand during a holiday or emergency. It also scales better across several enclosures because labels, baseline readings and failure tests remove guesswork. If a device requires constant manual correction, the installation needs work even when its feature list looks impressive.

    How to verify the result in a real enclosure

    A logger earns its place by showing patterns that a spot check misses. Review at least a week that includes misting, heating transitions and a normal room-temperature swing. Look for repeatable timing, not isolated spikes. A brief peak immediately after spray may be expected; a rising overnight baseline can point to restricted ventilation or wet substrate.

    Before trusting alerts, force a harmless test. Warm the sensor in your hand, move it briefly to a drier room and confirm the notification arrives when the phone is locked. Then document Bluetooth or gateway coverage at the actual enclosure. Thick cabinets, foil insulation and distant rooms can shorten the advertised ideal range substantially.

    A practical seven-day check

    1. Day one: photograph positions, record room conditions and capture baseline readings.
    2. Day two: review the full day-night transition and check that schedules occurred at the intended local time.
    3. Day three: inspect mounts, probe restraints, plugs, tubing and any area exposed to moisture.
    4. Day four: compare the main reading with an independent instrument placed beside it long enough to stabilize.
    5. Day five: review animal access and behavior. Confirm that equipment does not block hides, climbing routes or the cool zone.
    6. Day six: simulate one safe failure, such as a short internet loss or power interruption, then check recovery.
    7. Day seven: save the final settings and observations in the enclosure record.

    Repeat the short version of this audit after major cleaning, seasonal room changes or equipment replacement. The point is not constant tinkering. It is catching the few changes that can quietly alter a previously stable habitat.

    Related Reptile Tech Lab guides

    Frequently asked questions

    Should I rely on the built-in display?

    No. Use a separate thermometer, hygrometer, light meter or logger appropriate to the job. Independent verification catches probe movement and controller errors.

    How long should I test before animals or eggs depend on it?

    At least one complete day-night cycle, and longer for equipment affected by room weather or water use. Incubation and emergency systems deserve several days plus a power-loss test.

    Can an app replace local control?

    An app is useful for history and alerts. Critical regulation should continue safely when the phone, router or cloud service is unavailable.

    What should I record?

    Record device model, installation date, set points, probe location, baseline readings and the result of outage or disconnection tests. Those notes make later troubleshooting much faster.
  • SensorPush HT.w reptile review: accurate logging without a screen

    SensorPush HT.w reptile review: accurate logging without a screen

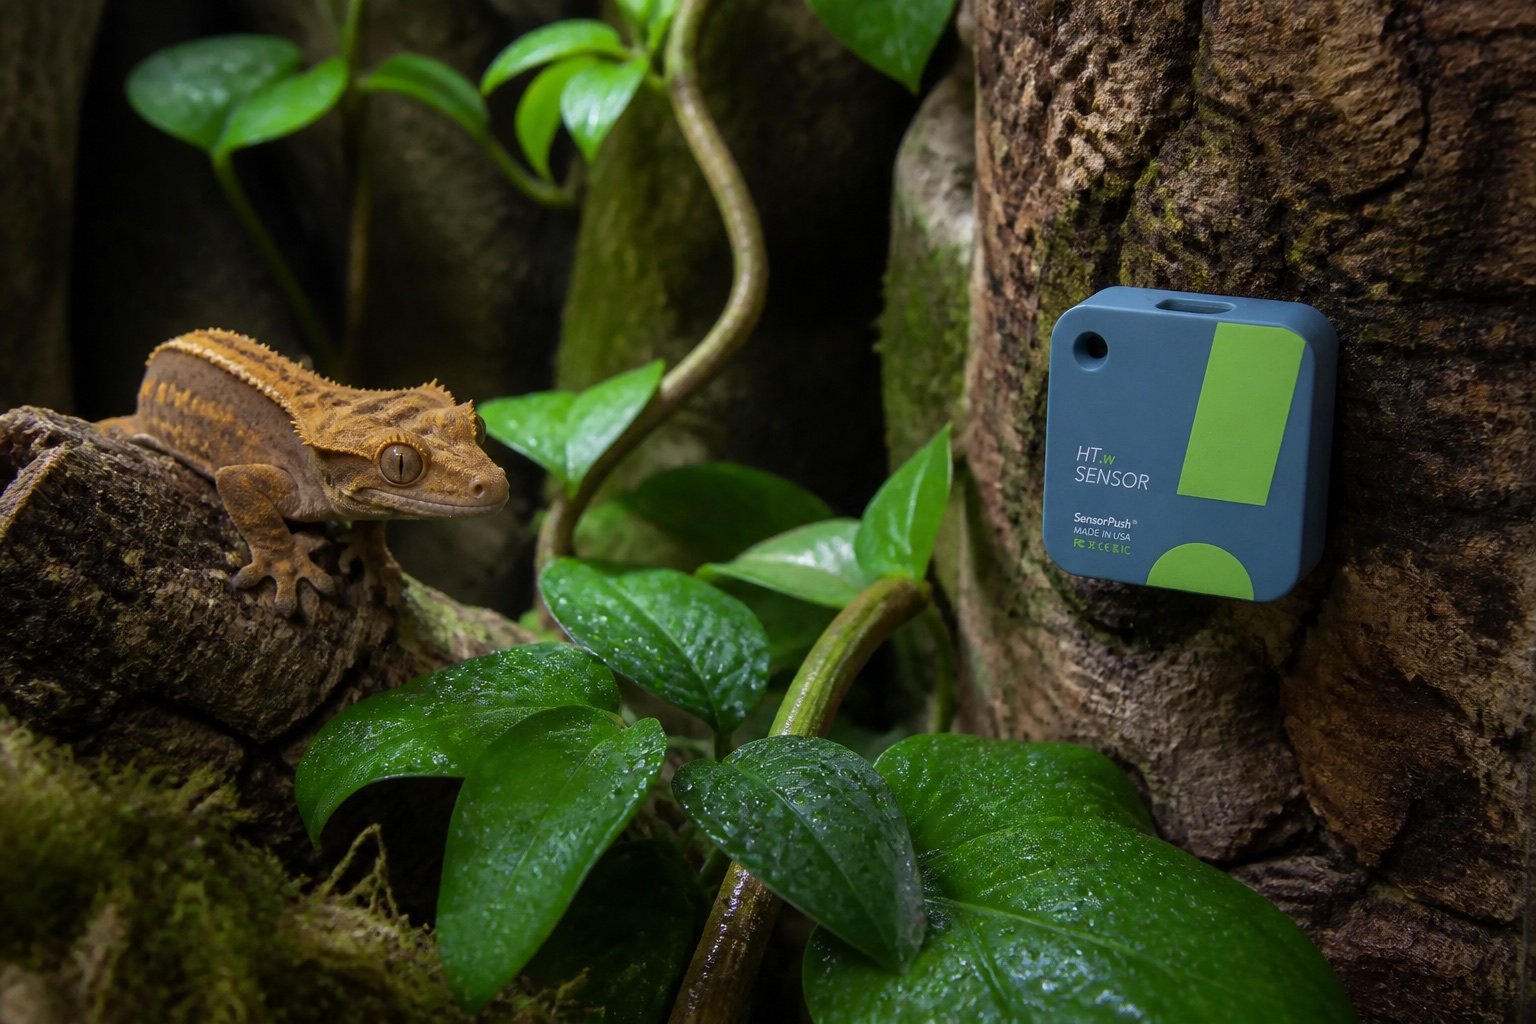
    Quick verdict: SensorPush HT.w is a strong logger for keepers who value sensor accuracy, long battery life and exportable history more than an enclosure display. Remote access needs the separate G1 gateway, and direct misting is still a poor placement choice despite splash resistance.

    SensorPush HT.w reptile review: accurate logging without a screen is a narrow buying and setup question, so this guide stays focused on that job. It does not repeat our broader category pages. The aim is to help you choose, install and verify the equipment without turning one convenient device into a single point of failure.

    What matters in this comparison

    Factor Option or result Why it matters
    Typical accuracy ±0.2 C and ±2% RH Strong for husbandry trends
    Sampling Once per minute Useful event detail
    Local storage About 45 days Sync before long gaps
    Battery CR2477, typical over two years Conditions affect life

    Specifications are useful for screening products, but enclosure performance depends on placement. Room temperature, ventilation, mesh, substrate moisture and animal access can move the result far from a brochure figure. Work from a measured baseline and change one variable at a time.

    How to set it up

    1. Place in representative air

    Not against glass, substrate or a heat source. Test the result under normal enclosure conditions and write down what you observed. A setting that works on an empty bench can behave differently after decor, ventilation and daily room changes are added.

    2. Pair before installation

    Name the enclosure clearly. Test the result under normal enclosure conditions and write down what you observed. A setting that works on an empty bench can behave differently after decor, ventilation and daily room changes are added.

    3. Compare with a reference

    Check offset at stable room conditions. Test the result under normal enclosure conditions and write down what you observed. A setting that works on an empty bench can behave differently after decor, ventilation and daily room changes are added.

    4. Test Bluetooth range

    Closed cabinets and masonry reduce it. Test the result under normal enclosure conditions and write down what you observed. A setting that works on an empty bench can behave differently after decor, ventilation and daily room changes are added.

    5. Set alert bands thoughtfully

    Avoid constant alarms from normal cycles. Test the result under normal enclosure conditions and write down what you observed. A setting that works on an empty bench can behave differently after decor, ventilation and daily room changes are added.

    What ownership looks like after the first week

    The first week should be treated as commissioning, not proof that the system will remain stable. Check the morning minimum, daytime peak and the transition between them. Look for loose probes, wet connectors, drifting clocks, blocked vents and any behavior that suggests the animal cannot use the intended zone.

    After the setup settles, use a short written routine. A glance at the device is not enough. Compare it with an independent instrument, inspect cables and mounts, and review stored history when available. Replace consumable parts based on condition and verified performance rather than memory.

    Common mistakes

    • Putting the sensor in the spray cone
    • Expecting remote alerts without a gateway
    • Using one sensor to describe a tall enclosure
    • Ignoring prolonged high-humidity offset
    • Failing to export before changing phones or accounts

    Who this approach suits

    This approach suits keepers who want a system that another person can understand during a holiday or emergency. It also scales better across several enclosures because labels, baseline readings and failure tests remove guesswork. If a device requires constant manual correction, the installation needs work even when its feature list looks impressive.

    How to verify the result in a real enclosure

    A logger earns its place by showing patterns that a spot check misses. Review at least a week that includes misting, heating transitions and a normal room-temperature swing. Look for repeatable timing, not isolated spikes. A brief peak immediately after spray may be expected; a rising overnight baseline can point to restricted ventilation or wet substrate.

    Before trusting alerts, force a harmless test. Warm the sensor in your hand, move it briefly to a drier room and confirm the notification arrives when the phone is locked. Then document Bluetooth or gateway coverage at the actual enclosure. Thick cabinets, foil insulation and distant rooms can shorten the advertised ideal range substantially.

    A practical seven-day check

    1. Day one: photograph positions, record room conditions and capture baseline readings.
    2. Day two: review the full day-night transition and check that schedules occurred at the intended local time.
    3. Day three: inspect mounts, probe restraints, plugs, tubing and any area exposed to moisture.
    4. Day four: compare the main reading with an independent instrument placed beside it long enough to stabilize.
    5. Day five: review animal access and behavior. Confirm that equipment does not block hides, climbing routes or the cool zone.
    6. Day six: simulate one safe failure, such as a short internet loss or power interruption, then check recovery.
    7. Day seven: save the final settings and observations in the enclosure record.

    Repeat the short version of this audit after major cleaning, seasonal room changes or equipment replacement. The point is not constant tinkering. It is catching the few changes that can quietly alter a previously stable habitat.

    Related Reptile Tech Lab guides

    Frequently asked questions

    Should I rely on the built-in display?

    No. Use a separate thermometer, hygrometer, light meter or logger appropriate to the job. Independent verification catches probe movement and controller errors.

    How long should I test before animals or eggs depend on it?

    At least one complete day-night cycle, and longer for equipment affected by room weather or water use. Incubation and emergency systems deserve several days plus a power-loss test.

    Can an app replace local control?

    An app is useful for history and alerts. Critical regulation should continue safely when the phone, router or cloud service is unavailable.

    What should I record?

    Record device model, installation date, set points, probe location, baseline readings and the result of outage or disconnection tests. Those notes make later troubleshooting much faster.
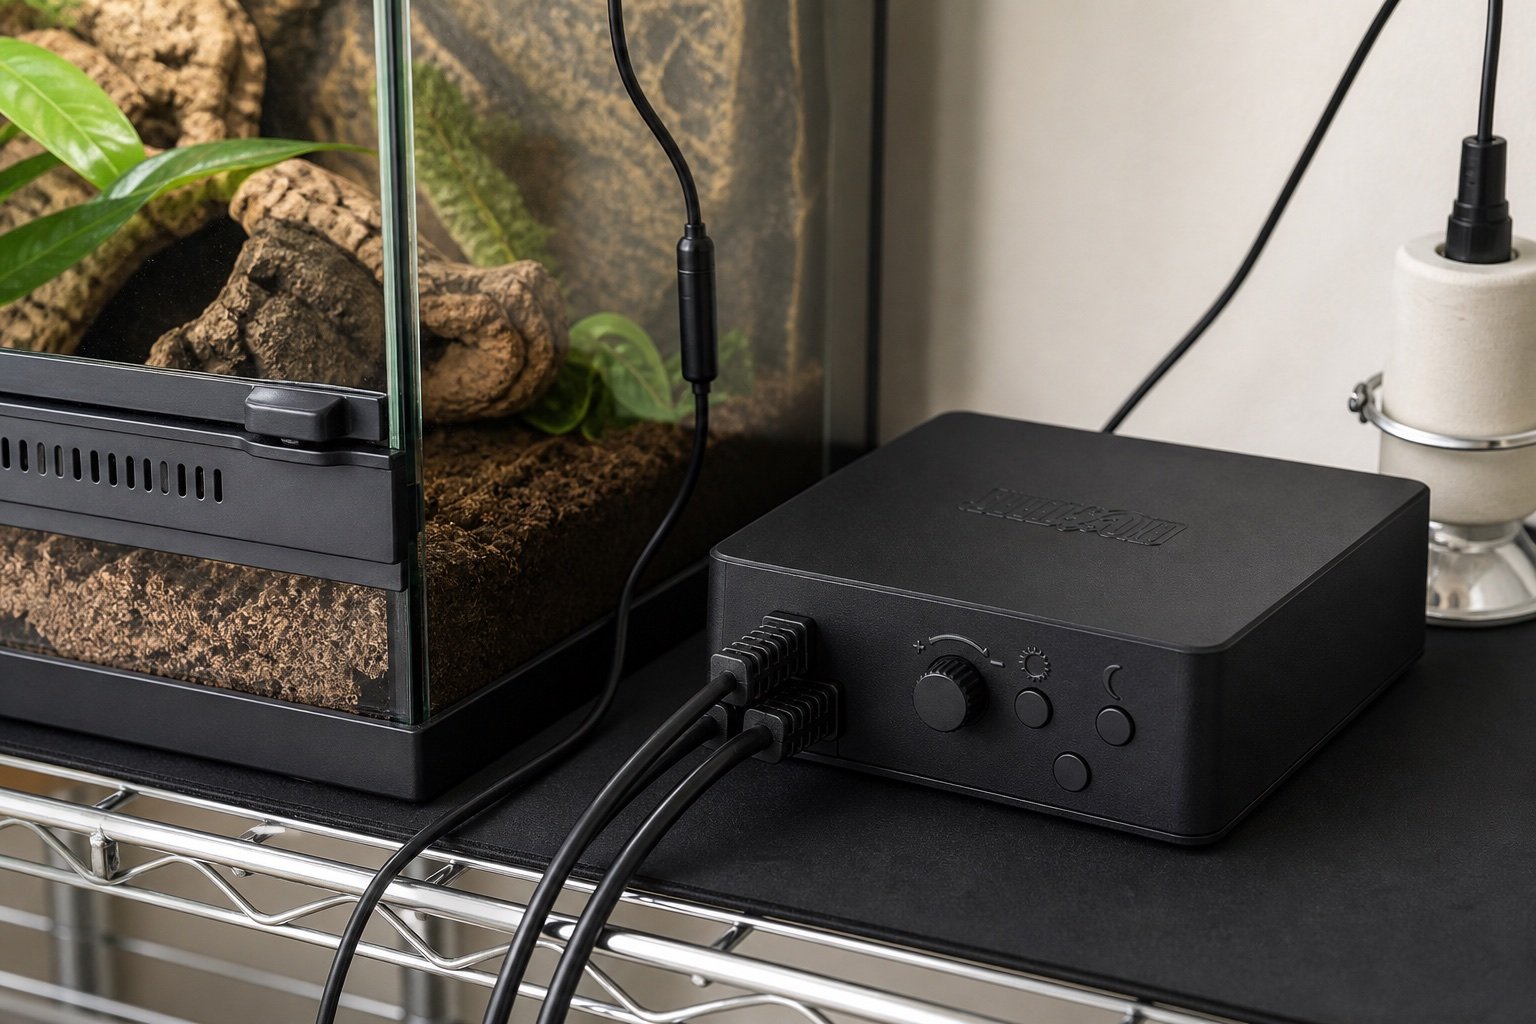
  • Vivarium Electronics VE-200 review: proportional control without extras

    Vivarium Electronics VE-200 review: proportional control without extras

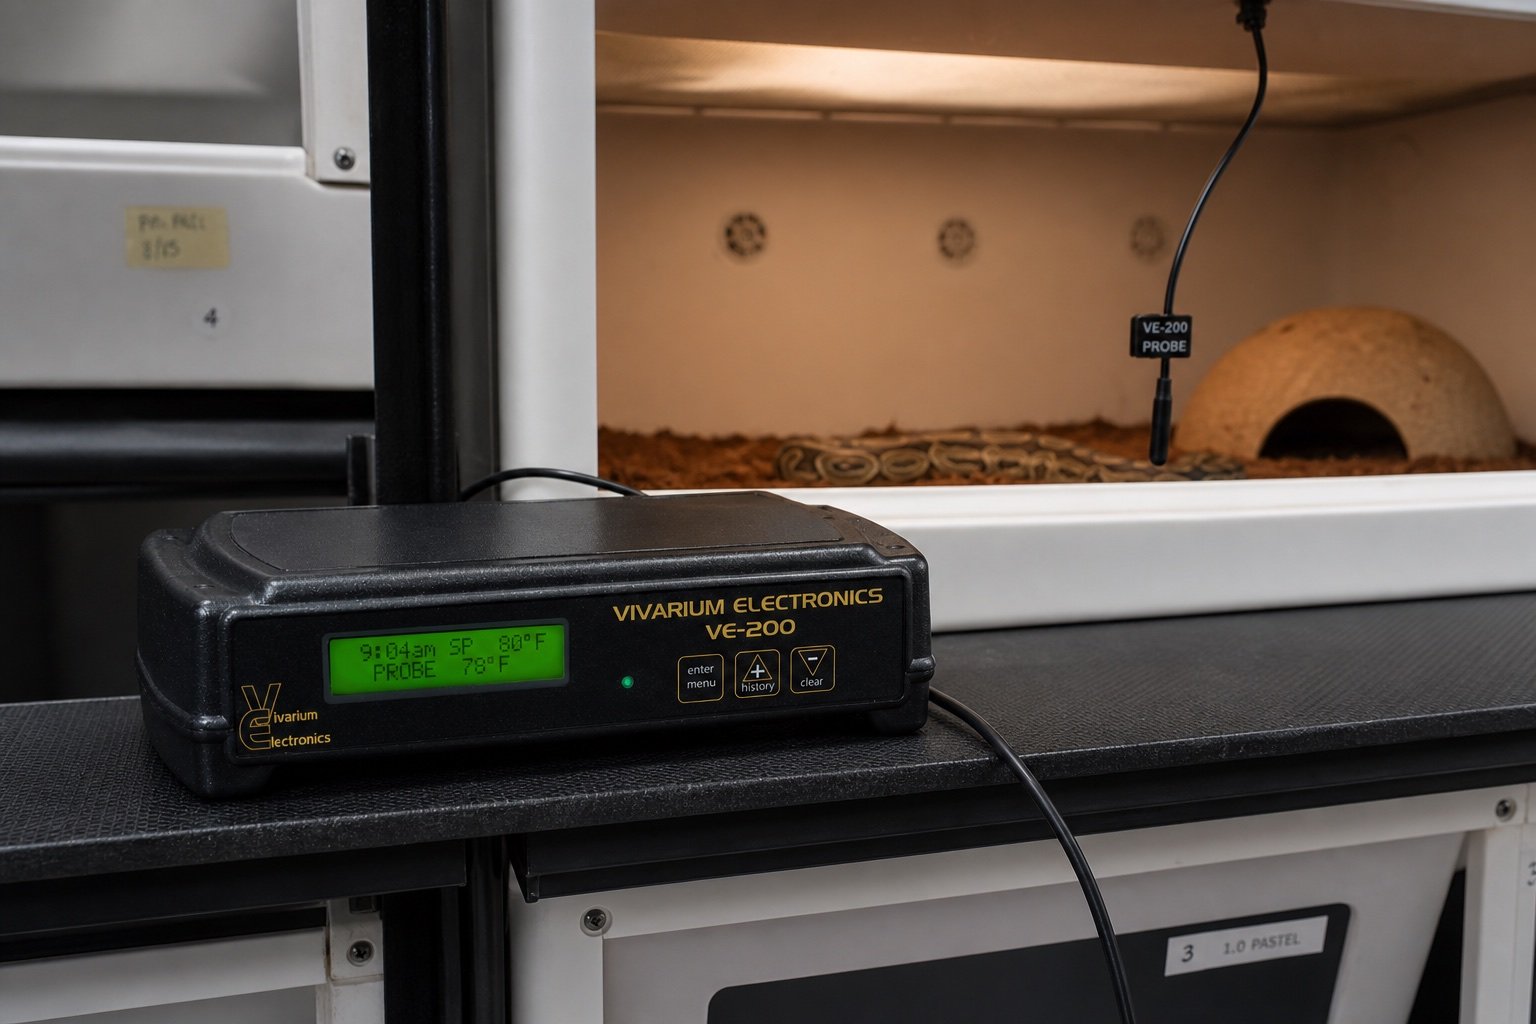
    Quick verdict: The VE-200 is appealing when proportional heat control matters more than menus, Wi-Fi or multi-zone automation. Its backlit display, high and low history, night drop and safety shutoff cover the daily essentials, but owners still need independent monitoring.

    Vivarium Electronics VE-200 review: proportional control without extras is a narrow buying and setup question, so this guide stays focused on that job. It does not repeat our broader category pages. The aim is to help you choose, install and verify the equipment without turning one convenient device into a single point of failure.

    What matters in this comparison

    Factor Option or result Why it matters
    Control Proportional output Smooth regulation for suitable heaters
    Display Probe and set point Quick visual check
    History High and low values Useful for daily rounds
    Safety Shutoff relay Not a replacement for correct installation

    Specifications are useful for screening products, but enclosure performance depends on placement. Room temperature, ventilation, mesh, substrate moisture and animal access can move the result far from a brochure figure. Work from a measured baseline and change one variable at a time.

    How to set it up

    1. Select the correct model

    Regional voltage and outlet format matter. Test the result under normal enclosure conditions and write down what you observed. A setting that works on an empty bench can behave differently after decor, ventilation and daily room changes are added.

    2. Mount outside the enclosure

    Keep electronics dry and visible. Test the result under normal enclosure conditions and write down what you observed. A setting that works on an empty bench can behave differently after decor, ventilation and daily room changes are added.

    3. Secure the probe

    Use a mechanical restraint that survives cleaning. Test the result under normal enclosure conditions and write down what you observed. A setting that works on an empty bench can behave differently after decor, ventilation and daily room changes are added.

    4. Set a conservative first target

    Raise only after a stable trial. Test the result under normal enclosure conditions and write down what you observed. A setting that works on an empty bench can behave differently after decor, ventilation and daily room changes are added.

    5. Audit with another sensor

    Compare over a complete day-night cycle. Test the result under normal enclosure conditions and write down what you observed. A setting that works on an empty bench can behave differently after decor, ventilation and daily room changes are added.

    What ownership looks like after the first week

    The first week should be treated as commissioning, not proof that the system will remain stable. Check the morning minimum, daytime peak and the transition between them. Look for loose probes, wet connectors, drifting clocks, blocked vents and any behavior that suggests the animal cannot use the intended zone.

    After the setup settles, use a short written routine. A glance at the device is not enough. Compare it with an independent instrument, inspect cables and mounts, and review stored history when available. Replace consumable parts based on condition and verified performance rather than memory.

    Common mistakes

    • Choosing by wattage alone
    • Using night drop without checking the room minimum
    • Failing to test the shutoff response
    • Bundling probe wire against mains cables
    • Assuming displayed history explains when an event happened

    Who this approach suits

    This approach suits keepers who want a system that another person can understand during a holiday or emergency. It also scales better across several enclosures because labels, baseline readings and failure tests remove guesswork. If a device requires constant manual correction, the installation needs work even when its feature list looks impressive.

    How to verify the result in a real enclosure

    Test heat control during the room’s coldest and warmest ordinary periods. A setup tuned on a mild afternoon may run at full output overnight, while one tuned during winter may overshoot in summer. Review the heater duty cycle, surface temperature and cool-side air together. Each value answers a different question.

    Probe security deserves physical testing. Tug the cable gently, move nearby decor and perform the normal cleaning motion. If the probe can slip, be covered or pressed directly against the heater, the controller can receive a false reading. Add a second independent sensor where it will notice the resulting enclosure change rather than duplicate the same failure point.

    A practical seven-day check

    1. Day one: photograph positions, record room conditions and capture baseline readings.
    2. Day two: review the full day-night transition and check that schedules occurred at the intended local time.
    3. Day three: inspect mounts, probe restraints, plugs, tubing and any area exposed to moisture.
    4. Day four: compare the main reading with an independent instrument placed beside it long enough to stabilize.
    5. Day five: review animal access and behavior. Confirm that equipment does not block hides, climbing routes or the cool zone.
    6. Day six: simulate one safe failure, such as a short internet loss or power interruption, then check recovery.
    7. Day seven: save the final settings and observations in the enclosure record.

    Repeat the short version of this audit after major cleaning, seasonal room changes or equipment replacement. The point is not constant tinkering. It is catching the few changes that can quietly alter a previously stable habitat.

    Related Reptile Tech Lab guides

    Frequently asked questions

    Should I rely on the built-in display?

    No. Use a separate thermometer, hygrometer, light meter or logger appropriate to the job. Independent verification catches probe movement and controller errors.

    How long should I test before animals or eggs depend on it?

    At least one complete day-night cycle, and longer for equipment affected by room weather or water use. Incubation and emergency systems deserve several days plus a power-loss test.

    Can an app replace local control?

    An app is useful for history and alerts. Critical regulation should continue safely when the phone, router or cloud service is unavailable.

    What should I record?

    Record device model, installation date, set points, probe location, baseline readings and the result of outage or disconnection tests. Those notes make later troubleshooting much faster.
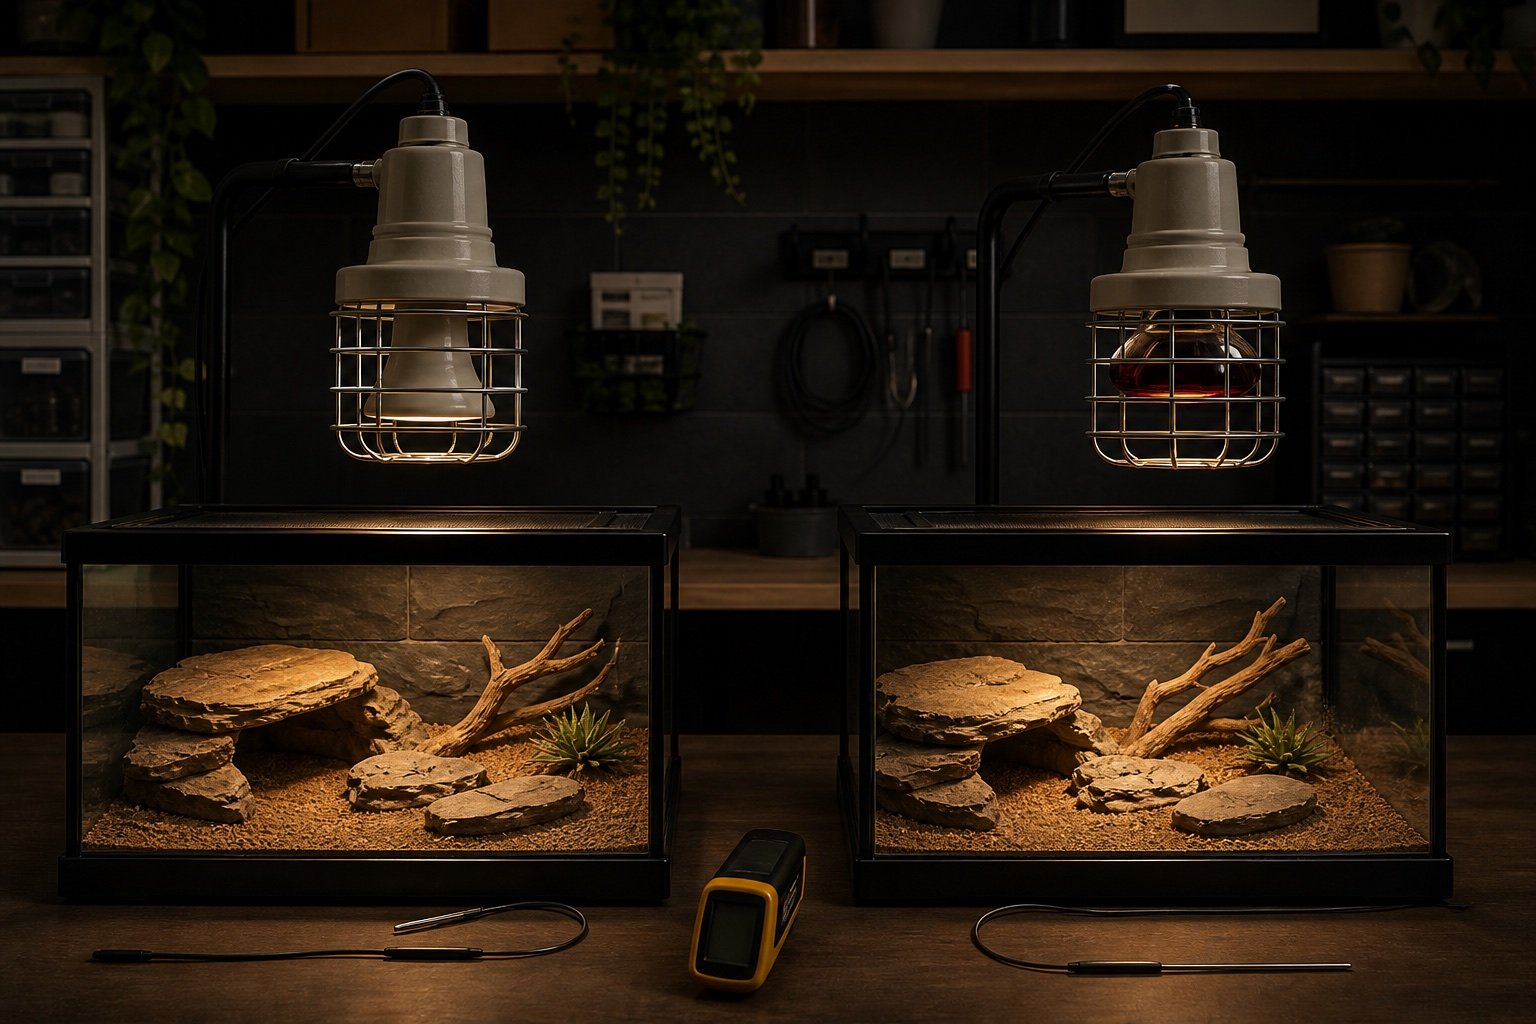
  • Exo Terra Thermostat 600W review: dimming, pulse and day-night control

    Exo Terra Thermostat 600W review: dimming, pulse and day-night control

    Quick verdict: The Exo Terra Thermostat 600W is a capable single-zone controller for keepers who want dimming and pulse modes plus separate day and night targets. The main caveat is regional hardware: receptacles and package details differ, so check the exact model before purchase.

    Exo Terra Thermostat 600W review: dimming, pulse and day-night control is a narrow buying and setup question, so this guide stays focused on that job. It does not repeat our broader category pages. The aim is to help you choose, install and verify the equipment without turning one convenient device into a single point of failure.

    What matters in this comparison

    Factor Option or result Why it matters
    Maximum stated load 600 W Confirm regional manual
    Control modes Dimming and pulse proportional Match to heat source
    Set range 10 to 60 C Species target still comes from husbandry plan
    Probe Waterproof remote probe Secure against movement

    Specifications are useful for screening products, but enclosure performance depends on placement. Room temperature, ventilation, mesh, substrate moisture and animal access can move the result far from a brochure figure. Work from a measured baseline and change one variable at a time.

    How to set it up

    1. Match the mode

    Use the heat-source maker recommendation. Test the result under normal enclosure conditions and write down what you observed. A setting that works on an empty bench can behave differently after decor, ventilation and daily room changes are added.

    2. Place the light sensor

    Avoid shadows that cause false day-night switching. Test the result under normal enclosure conditions and write down what you observed. A setting that works on an empty bench can behave differently after decor, ventilation and daily room changes are added.

    3. Fix the temperature probe

    Do not let the animal move it. Test the result under normal enclosure conditions and write down what you observed. A setting that works on an empty bench can behave differently after decor, ventilation and daily room changes are added.

    4. Test the safety response

    Warm the probe gently and confirm output falls. Test the result under normal enclosure conditions and write down what you observed. A setting that works on an empty bench can behave differently after decor, ventilation and daily room changes are added.

    5. Simulate power loss

    Verify stored settings and recovery. Test the result under normal enclosure conditions and write down what you observed. A setting that works on an empty bench can behave differently after decor, ventilation and daily room changes are added.

    What ownership looks like after the first week

    The first week should be treated as commissioning, not proof that the system will remain stable. Check the morning minimum, daytime peak and the transition between them. Look for loose probes, wet connectors, drifting clocks, blocked vents and any behavior that suggests the animal cannot use the intended zone.

    After the setup settles, use a short written routine. A glance at the device is not enough. Compare it with an independent instrument, inspect cables and mounts, and review stored history when available. Replace consumable parts based on condition and verified performance rather than memory.

    Common mistakes

    • Buying the wrong regional version
    • Putting the probe directly under an intense lamp without a control plan
    • Using the day-night sensor where room lights confuse it
    • Loading several heaters near the maximum
    • Treating the display as independent verification

    Who this approach suits

    This approach suits keepers who want a system that another person can understand during a holiday or emergency. It also scales better across several enclosures because labels, baseline readings and failure tests remove guesswork. If a device requires constant manual correction, the installation needs work even when its feature list looks impressive.

    How to verify the result in a real enclosure

    Test heat control during the room’s coldest and warmest ordinary periods. A setup tuned on a mild afternoon may run at full output overnight, while one tuned during winter may overshoot in summer. Review the heater duty cycle, surface temperature and cool-side air together. Each value answers a different question.

    Probe security deserves physical testing. Tug the cable gently, move nearby decor and perform the normal cleaning motion. If the probe can slip, be covered or pressed directly against the heater, the controller can receive a false reading. Add a second independent sensor where it will notice the resulting enclosure change rather than duplicate the same failure point.

    A practical seven-day check

    1. Day one: photograph positions, record room conditions and capture baseline readings.
    2. Day two: review the full day-night transition and check that schedules occurred at the intended local time.
    3. Day three: inspect mounts, probe restraints, plugs, tubing and any area exposed to moisture.
    4. Day four: compare the main reading with an independent instrument placed beside it long enough to stabilize.
    5. Day five: review animal access and behavior. Confirm that equipment does not block hides, climbing routes or the cool zone.
    6. Day six: simulate one safe failure, such as a short internet loss or power interruption, then check recovery.
    7. Day seven: save the final settings and observations in the enclosure record.

    Repeat the short version of this audit after major cleaning, seasonal room changes or equipment replacement. The point is not constant tinkering. It is catching the few changes that can quietly alter a previously stable habitat.

    Related Reptile Tech Lab guides

    Frequently asked questions

    Should I rely on the built-in display?

    No. Use a separate thermometer, hygrometer, light meter or logger appropriate to the job. Independent verification catches probe movement and controller errors.

    How long should I test before animals or eggs depend on it?

    At least one complete day-night cycle, and longer for equipment affected by room weather or water use. Incubation and emergency systems deserve several days plus a power-loss test.

    Can an app replace local control?

    An app is useful for history and alerts. Critical regulation should continue safely when the phone, router or cloud service is unavailable.

    What should I record?

    Record device model, installation date, set points, probe location, baseline readings and the result of outage or disconnection tests. Those notes make later troubleshooting much faster.
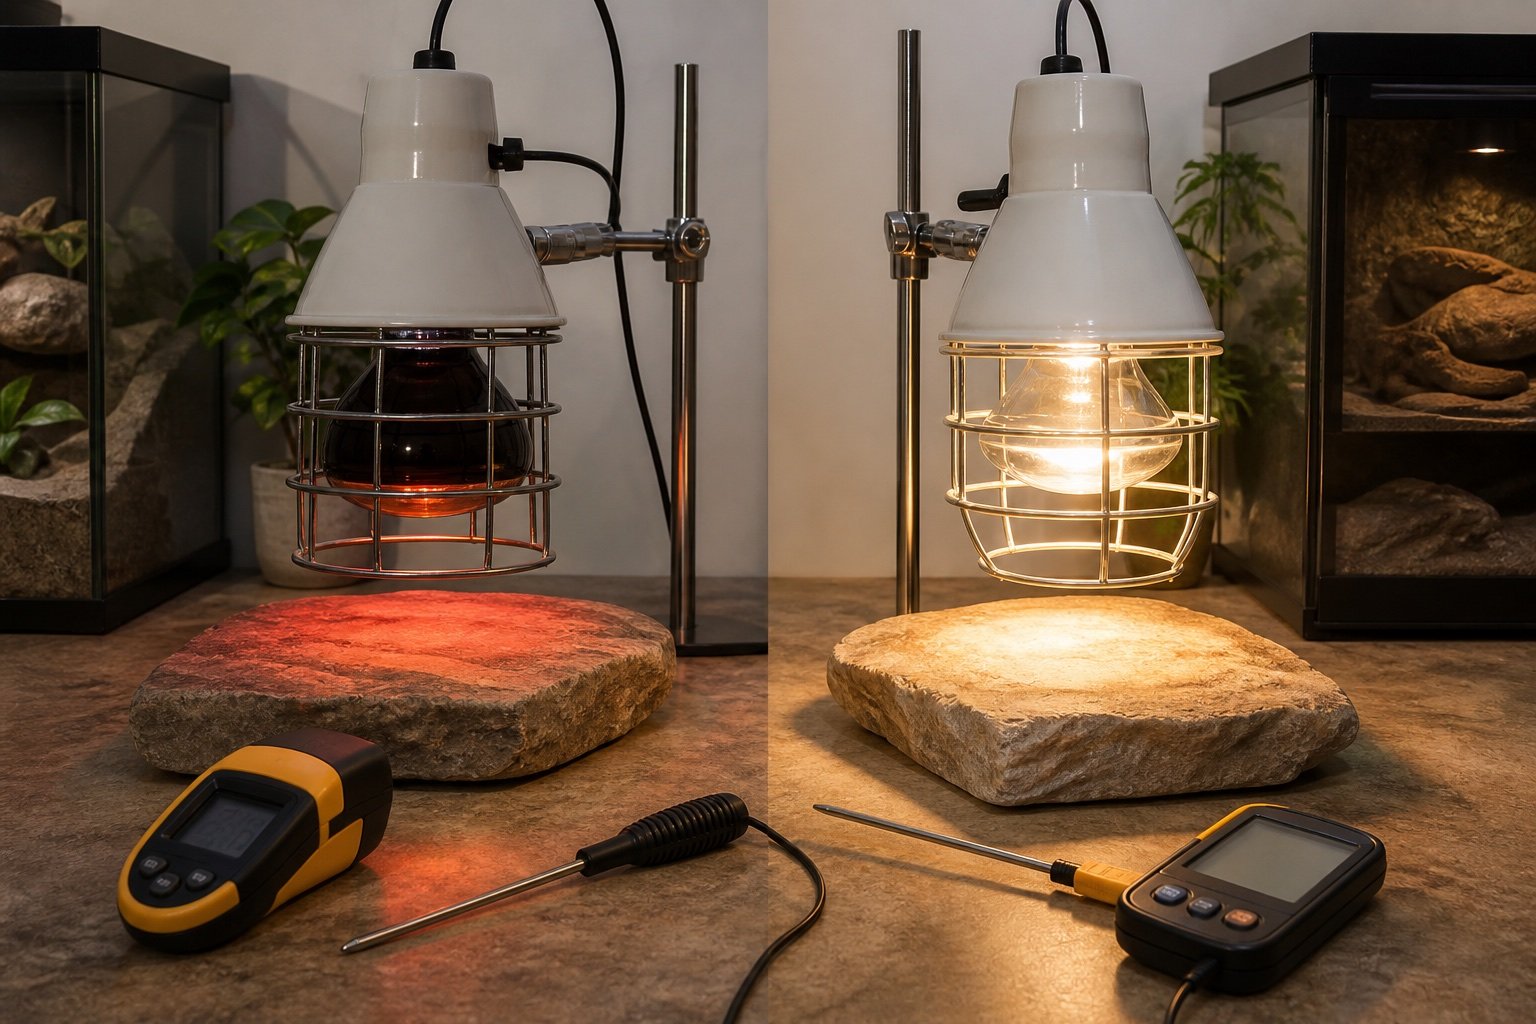
  • Ceramic heat emitter vs deep heat projector: a practical comparison

    Ceramic heat emitter vs deep heat projector: a practical comparison

    Quick verdict: Both sources provide heat without visible light, but they do different work. A ceramic heat emitter is effective for raising surrounding air in a ventilated enclosure. A deep heat projector is usually better when a directed warm surface is needed without light.

    Ceramic heat emitter vs deep heat projector: a practical comparison is a narrow buying and setup question, so this guide stays focused on that job. It does not repeat our broader category pages. The aim is to help you choose, install and verify the equipment without turning one convenient device into a single point of failure.

    What matters in this comparison

    Factor Option or result Why it matters
    Primary effect Raises air and nearby surfaces More directed radiant heating
    Visible light None None
    Drying tendency Often stronger Usually more localized
    Typical control Pulse or dimming thermostat Dimming thermostat

    Specifications are useful for screening products, but enclosure performance depends on placement. Room temperature, ventilation, mesh, substrate moisture and animal access can move the result far from a brochure figure. Work from a measured baseline and change one variable at a time.

    How to set it up

    1. Measure the cold room

    Night heat should solve an actual deficit. Test the result under normal enclosure conditions and write down what you observed. A setting that works on an empty bench can behave differently after decor, ventilation and daily room changes are added.

    2. Choose wattage conservatively

    More power is not a substitute for placement. Test the result under normal enclosure conditions and write down what you observed. A setting that works on an empty bench can behave differently after decor, ventilation and daily room changes are added.

    3. Use a ceramic holder

    Plastic lamp holders are not suitable. Test the result under normal enclosure conditions and write down what you observed. A setting that works on an empty bench can behave differently after decor, ventilation and daily room changes are added.

    4. Fit a guard

    Prevent animal and keeper contact. Test the result under normal enclosure conditions and write down what you observed. A setting that works on an empty bench can behave differently after decor, ventilation and daily room changes are added.

    5. Run a full-day test

    Check warm and cool zones before occupancy. Test the result under normal enclosure conditions and write down what you observed. A setting that works on an empty bench can behave differently after decor, ventilation and daily room changes are added.

    What ownership looks like after the first week

    The first week should be treated as commissioning, not proof that the system will remain stable. Check the morning minimum, daytime peak and the transition between them. Look for loose probes, wet connectors, drifting clocks, blocked vents and any behavior that suggests the animal cannot use the intended zone.

    After the setup settles, use a short written routine. A glance at the device is not enough. Compare it with an independent instrument, inspect cables and mounts, and review stored history when available. Replace consumable parts based on condition and verified performance rather than memory.

    Common mistakes

    • Adding night heat when the room already stays suitable
    • Using a CHE to create a tiny basking point
    • Mounting above flammable decor
    • Letting a probe dangle
    • Assuming no light means no burn risk

    Who this approach suits

    This approach suits keepers who want a system that another person can understand during a holiday or emergency. It also scales better across several enclosures because labels, baseline readings and failure tests remove guesswork. If a device requires constant manual correction, the installation needs work even when its feature list looks impressive.

    How to verify the result in a real enclosure

    Test heat control during the room’s coldest and warmest ordinary periods. A setup tuned on a mild afternoon may run at full output overnight, while one tuned during winter may overshoot in summer. Review the heater duty cycle, surface temperature and cool-side air together. Each value answers a different question.

    Probe security deserves physical testing. Tug the cable gently, move nearby decor and perform the normal cleaning motion. If the probe can slip, be covered or pressed directly against the heater, the controller can receive a false reading. Add a second independent sensor where it will notice the resulting enclosure change rather than duplicate the same failure point.

    A practical seven-day check

    1. Day one: photograph positions, record room conditions and capture baseline readings.
    2. Day two: review the full day-night transition and check that schedules occurred at the intended local time.
    3. Day three: inspect mounts, probe restraints, plugs, tubing and any area exposed to moisture.
    4. Day four: compare the main reading with an independent instrument placed beside it long enough to stabilize.
    5. Day five: review animal access and behavior. Confirm that equipment does not block hides, climbing routes or the cool zone.
    6. Day six: simulate one safe failure, such as a short internet loss or power interruption, then check recovery.
    7. Day seven: save the final settings and observations in the enclosure record.

    Repeat the short version of this audit after major cleaning, seasonal room changes or equipment replacement. The point is not constant tinkering. It is catching the few changes that can quietly alter a previously stable habitat.

    Related Reptile Tech Lab guides

    Frequently asked questions

    Should I rely on the built-in display?

    No. Use a separate thermometer, hygrometer, light meter or logger appropriate to the job. Independent verification catches probe movement and controller errors.

    How long should I test before animals or eggs depend on it?

    At least one complete day-night cycle, and longer for equipment affected by room weather or water use. Incubation and emergency systems deserve several days plus a power-loss test.

    Can an app replace local control?

    An app is useful for history and alerts. Critical regulation should continue safely when the phone, router or cloud service is unavailable.

    What should I record?

    Record device model, installation date, set points, probe location, baseline readings and the result of outage or disconnection tests. Those notes make later troubleshooting much faster.
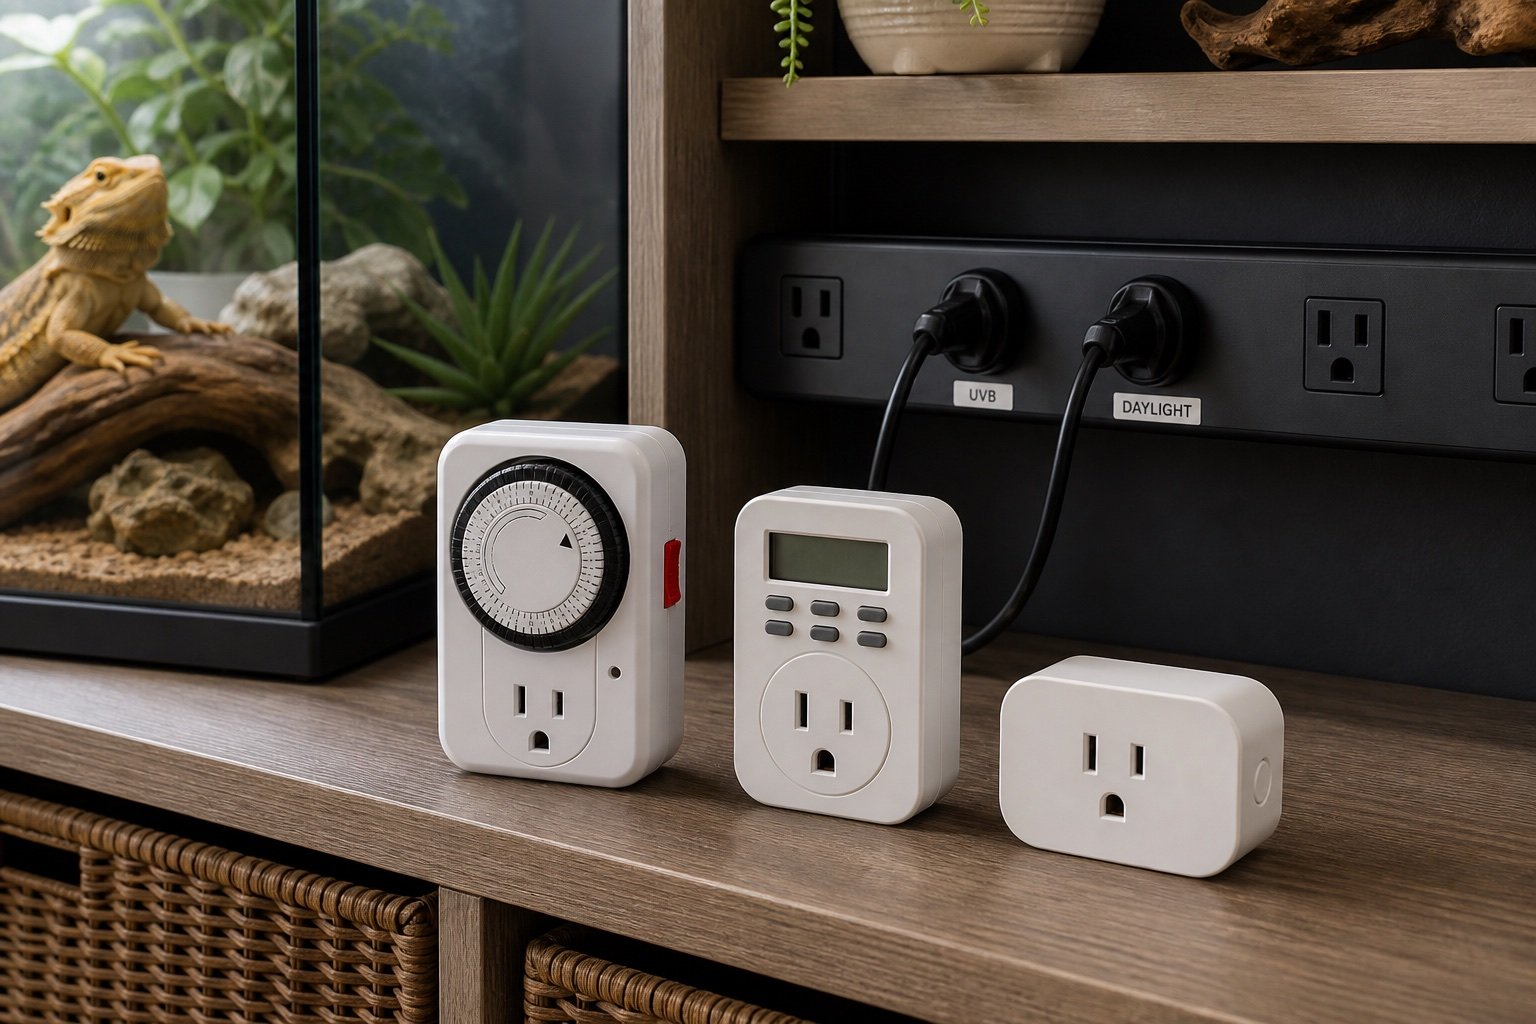
  • Deep heat projector vs halogen: which heat source fits the job?

    Deep heat projector vs halogen: which heat source fits the job?

    Quick verdict: Halogen is usually the better daytime basking source because it combines bright visible light with focused surface heat. A deep heat projector is useful when heat is needed without visible light, but it still needs proportional thermostat control and a guarded ceramic holder.

    Deep heat projector vs halogen: which heat source fits the job? is a narrow buying and setup question, so this guide stays focused on that job. It does not repeat our broader category pages. The aim is to help you choose, install and verify the equipment without turning one convenient device into a single point of failure.

    What matters in this comparison

    Factor Option or result Why it matters
    Light Bright visible output No visible light
    Best period Daytime Day or night
    Heat pattern Focused basking beam Broader dark radiant zone
    Control Dimming thermostat Dimming thermostat

    Specifications are useful for screening products, but enclosure performance depends on placement. Room temperature, ventilation, mesh, substrate moisture and animal access can move the result far from a brochure figure. Work from a measured baseline and change one variable at a time.

    How to set it up

    1. Define the job

    Decide whether the source is for basking or background support. Test the result under normal enclosure conditions and write down what you observed. A setting that works on an empty bench can behave differently after decor, ventilation and daily room changes are added.

    2. Size the zone

    A larger animal needs a wider usable area, not one hot point. Test the result under normal enclosure conditions and write down what you observed. A setting that works on an empty bench can behave differently after decor, ventilation and daily room changes are added.

    3. Install the probe

    Secure it where it cannot be moved or covered. Test the result under normal enclosure conditions and write down what you observed. A setting that works on an empty bench can behave differently after decor, ventilation and daily room changes are added.

    4. Measure surfaces

    Use an infrared thermometer plus ambient probes. Test the result under normal enclosure conditions and write down what you observed. A setting that works on an empty bench can behave differently after decor, ventilation and daily room changes are added.

    5. Observe behavior

    A technically correct number can still create poor access. Test the result under normal enclosure conditions and write down what you observed. A setting that works on an empty bench can behave differently after decor, ventilation and daily room changes are added.

    What ownership looks like after the first week

    The first week should be treated as commissioning, not proof that the system will remain stable. Check the morning minimum, daytime peak and the transition between them. Look for loose probes, wet connectors, drifting clocks, blocked vents and any behavior that suggests the animal cannot use the intended zone.

    After the setup settles, use a short written routine. A glance at the device is not enough. Compare it with an independent instrument, inspect cables and mounts, and review stored history when available. Replace consumable parts based on condition and verified performance rather than memory.

    Common mistakes

    • Using a DHP as a complete lighting plan
    • Running halogen after dark
    • Controlling either source with a simple on-off thermostat
    • Reading only air temperature
    • Allowing contact with the lamp or holder

    Who this approach suits

    This approach suits keepers who want a system that another person can understand during a holiday or emergency. It also scales better across several enclosures because labels, baseline readings and failure tests remove guesswork. If a device requires constant manual correction, the installation needs work even when its feature list looks impressive.

    How to verify the result in a real enclosure

    Test heat control during the room’s coldest and warmest ordinary periods. A setup tuned on a mild afternoon may run at full output overnight, while one tuned during winter may overshoot in summer. Review the heater duty cycle, surface temperature and cool-side air together. Each value answers a different question.

    Probe security deserves physical testing. Tug the cable gently, move nearby decor and perform the normal cleaning motion. If the probe can slip, be covered or pressed directly against the heater, the controller can receive a false reading. Add a second independent sensor where it will notice the resulting enclosure change rather than duplicate the same failure point.

    A practical seven-day check

    1. Day one: photograph positions, record room conditions and capture baseline readings.
    2. Day two: review the full day-night transition and check that schedules occurred at the intended local time.
    3. Day three: inspect mounts, probe restraints, plugs, tubing and any area exposed to moisture.
    4. Day four: compare the main reading with an independent instrument placed beside it long enough to stabilize.
    5. Day five: review animal access and behavior. Confirm that equipment does not block hides, climbing routes or the cool zone.
    6. Day six: simulate one safe failure, such as a short internet loss or power interruption, then check recovery.
    7. Day seven: save the final settings and observations in the enclosure record.

    Repeat the short version of this audit after major cleaning, seasonal room changes or equipment replacement. The point is not constant tinkering. It is catching the few changes that can quietly alter a previously stable habitat.

    Related Reptile Tech Lab guides

    Frequently asked questions

    Should I rely on the built-in display?

    No. Use a separate thermometer, hygrometer, light meter or logger appropriate to the job. Independent verification catches probe movement and controller errors.

    How long should I test before animals or eggs depend on it?

    At least one complete day-night cycle, and longer for equipment affected by room weather or water use. Incubation and emergency systems deserve several days plus a power-loss test.

    Can an app replace local control?

    An app is useful for history and alerts. Critical regulation should continue safely when the phone, router or cloud service is unavailable.

    What should I record?

    Record device model, installation date, set points, probe location, baseline readings and the result of outage or disconnection tests. Those notes make later troubleshooting much faster.
  • Best reptile light timers: simple controls that keep the day consistent

    Best reptile light timers: simple controls that keep the day consistent

    Quick verdict: A dependable timer should run the light schedule locally, recover predictably after an outage and handle the connected load with margin. For a simple UVB and daylight circuit, reliability matters more than a crowded app.

    Best reptile light timers: simple controls that keep the day consistent is a narrow buying and setup question, so this guide stays focused on that job. It does not repeat our broader category pages. The aim is to help you choose, install and verify the equipment without turning one convenient device into a single point of failure.

    What matters in this comparison

    Factor Option or result Why it matters
    Analog timer Simple and local Can drift and loses position during long outages
    Digital timer Precise weekly schedules Small controls and battery behavior vary
    Smart plug Remote status and energy data Wi-Fi and app add failure points
    Terrarium power center Several labeled outlets Bulky and load limits still apply

    Specifications are useful for screening products, but enclosure performance depends on placement. Room temperature, ventilation, mesh, substrate moisture and animal access can move the result far from a brochure figure. Work from a measured baseline and change one variable at a time.

    How to set it up

    1. Choose the circuit

    Keep thermostat-controlled heat separate from lighting. Test the result under normal enclosure conditions and write down what you observed. A setting that works on an empty bench can behave differently after decor, ventilation and daily room changes are added.

    2. Check the rating

    Add actual watts and leave margin for startup current. Test the result under normal enclosure conditions and write down what you observed. A setting that works on an empty bench can behave differently after decor, ventilation and daily room changes are added.

    3. Program off-enclosure

    Test with a desk lamp before connecting habitat lights. Test the result under normal enclosure conditions and write down what you observed. A setting that works on an empty bench can behave differently after decor, ventilation and daily room changes are added.

    4. Simulate an outage

    Unplug for ten minutes and confirm clock and schedule recovery. Test the result under normal enclosure conditions and write down what you observed. A setting that works on an empty bench can behave differently after decor, ventilation and daily room changes are added.

    5. Label manual override

    Anyone caring for the animal should understand it. Test the result under normal enclosure conditions and write down what you observed. A setting that works on an empty bench can behave differently after decor, ventilation and daily room changes are added.

    What ownership looks like after the first week

    The first week should be treated as commissioning, not proof that the system will remain stable. Check the morning minimum, daytime peak and the transition between them. Look for loose probes, wet connectors, drifting clocks, blocked vents and any behavior that suggests the animal cannot use the intended zone.

    After the setup settles, use a short written routine. A glance at the device is not enough. Compare it with an independent instrument, inspect cables and mounts, and review stored history when available. Replace consumable parts based on condition and verified performance rather than memory.

    Common mistakes

    • Putting critical heat on a cloud-only schedule
    • Connecting more load than the outlet or timer rating
    • Using a timer where a thermostat is required
    • Hiding the unit where water can reach it
    • Changing seasonal hours without recording the date

    Who this approach suits

    This approach suits keepers who want a system that another person can understand during a holiday or emergency. It also scales better across several enclosures because labels, baseline readings and failure tests remove guesswork. If a device requires constant manual correction, the installation needs work even when its feature list looks impressive.

    How to verify the result in a real enclosure

    Lighting work becomes much easier when the enclosure is treated as a map rather than a box with one reading. Mark the basking center, both edges of the perch, the warm hide entrance and the darkest retreat. Take measurements at the height of the animal’s back. This reveals whether the reptile can make small choices instead of moving between two extremes.

    Visible light, UVB and heat overlap during the day, but each should be evaluated separately. A bright enclosure can still have weak UVB, and a strong UVB fixture does not create the correct basking surface temperature. Keep the lighting schedule consistent, control heat with suitable hardware, and change only one part before repeating the map.

    A practical seven-day check

    1. Day one: photograph positions, record room conditions and capture baseline readings.
    2. Day two: review the full day-night transition and check that schedules occurred at the intended local time.
    3. Day three: inspect mounts, probe restraints, plugs, tubing and any area exposed to moisture.
    4. Day four: compare the main reading with an independent instrument placed beside it long enough to stabilize.
    5. Day five: review animal access and behavior. Confirm that equipment does not block hides, climbing routes or the cool zone.
    6. Day six: simulate one safe failure, such as a short internet loss or power interruption, then check recovery.
    7. Day seven: save the final settings and observations in the enclosure record.

    Repeat the short version of this audit after major cleaning, seasonal room changes or equipment replacement. The point is not constant tinkering. It is catching the few changes that can quietly alter a previously stable habitat.

    Related Reptile Tech Lab guides

    Frequently asked questions

    Should I rely on the built-in display?

    No. Use a separate thermometer, hygrometer, light meter or logger appropriate to the job. Independent verification catches probe movement and controller errors.

    How long should I test before animals or eggs depend on it?

    At least one complete day-night cycle, and longer for equipment affected by room weather or water use. Incubation and emergency systems deserve several days plus a power-loss test.

    Can an app replace local control?

    An app is useful for history and alerts. Critical regulation should continue safely when the phone, router or cloud service is unavailable.

    What should I record?

    Record device model, installation date, set points, probe location, baseline readings and the result of outage or disconnection tests. Those notes make later troubleshooting much faster.
  • UVB through mesh: how screens change distance and usable output

    UVB through mesh: how screens change distance and usable output

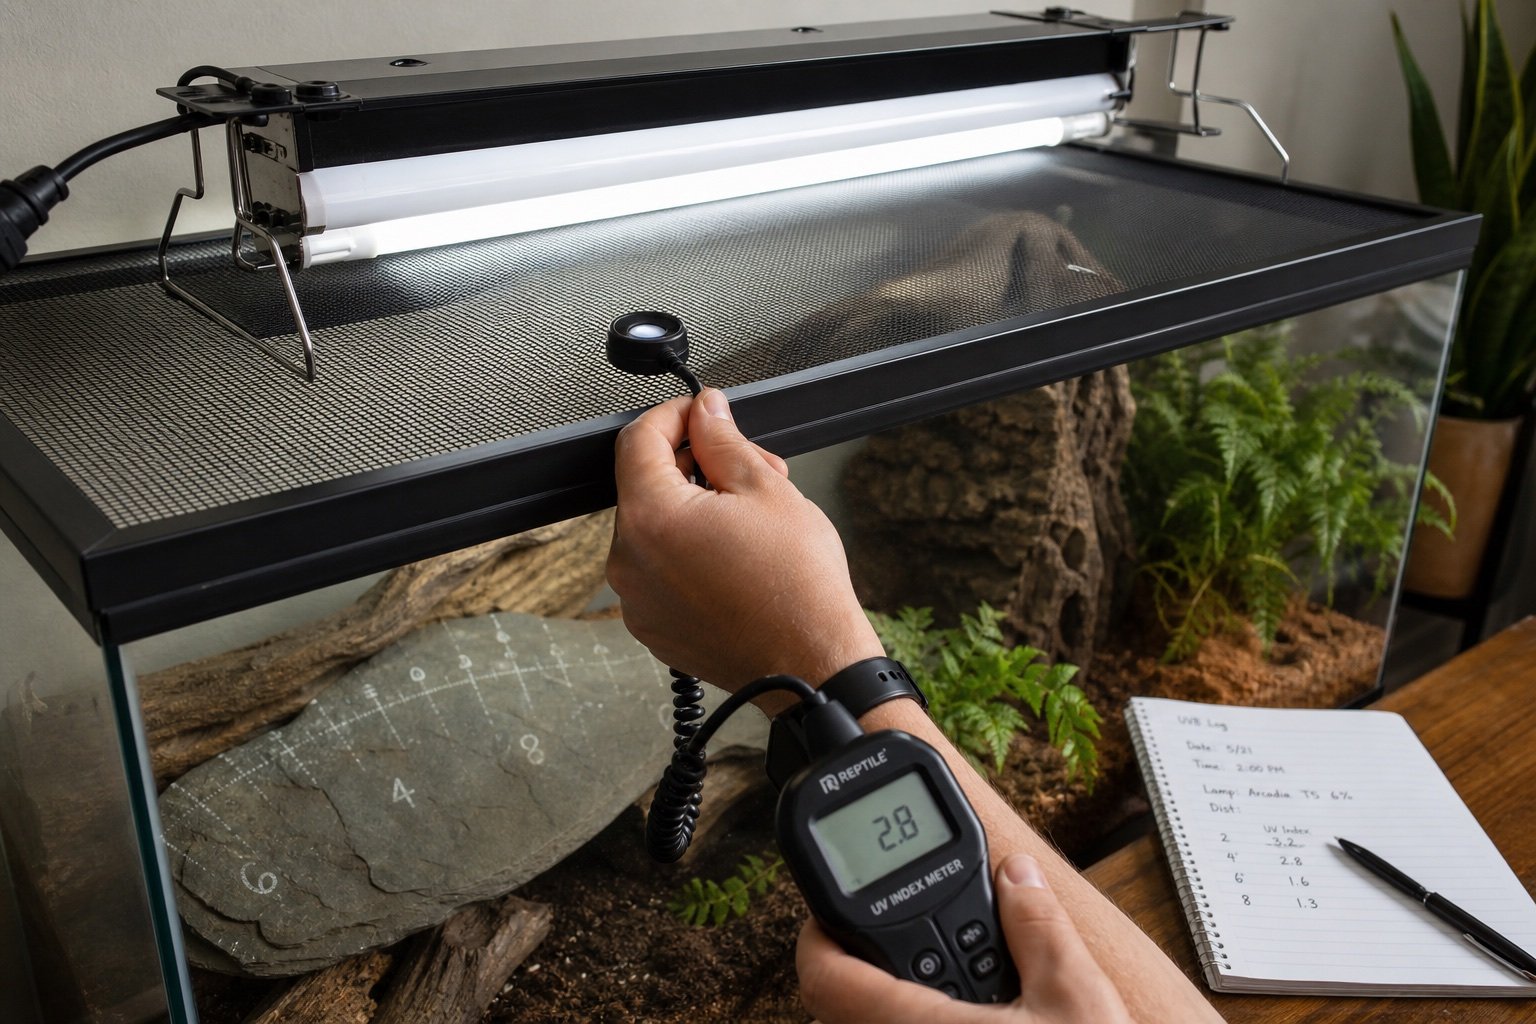
    Quick verdict: UVB through mesh cannot be corrected with a universal percentage. Screens differ too much. Measure the same lamp at the same point above and below the lid, then map the basking area below the final installation.

    Fine dark mesh, thick wire and oblique lamp angles usually block more radiation than an open, thin screen. Distance compounds the loss because the beam has already spread before it reaches the animal.

    Setup or factor Published or practical value Use
    Lamp and reflector Keep unchanged Prevents a false comparison
    Meter angle Point at lamp center Controls cosine error
    Distance Mark exact positions Separates screen loss from distance loss
    Warm-up Use the same interval Keeps lamp output comparable

    A repeatable test

    Warm the lamp for the manufacturer-recommended period. Take three readings at a marked point without the screen, replace the screen without moving the lamp or meter, then take three more. Divide the lower average by the open average to find transmission.

    Map the animal zone

    The loss percentage is only the first step. Put the enclosure back together and measure the basking surface, nearby branches and the shaded edge. This final map is what guides husbandry.

    Why online percentages disagree

    Mesh products use different wire thickness, pitch, paint and open area. Lamp angle also changes how much wire the radiation encounters. A result from another lid is a rough warning, not a calibration value.

    Safe corrections

    First improve lamp alignment or reduce unnecessary separation. If output remains low, choose a more suitable fixture. Do not remove a secure lid or create a burn route simply to chase a number.

    Keep a record

    Photograph the meter position and write down tube age, distance and screen model. Retest after replacing the top, moving decor or changing to a different UVB lamp.

    A commissioning routine that catches mistakes

    Assemble and run the system before the animal depends on it. Photograph the final positions, label cables, and compare the working zone with an independent instrument. Test one normal day, one night transition and a short power interruption. The goal is not a perfectly flat chart. It is a stable, understandable gradient with safe recovery.

    Recheck after cleaning because fixtures, probes and branches rarely return to the exact same position by accident. A two-minute baseline check is cheaper than troubleshooting weeks of unexplained behavior.

    Common mistakes

    • Comparing readings taken at different distances
    • Holding the meter by hand at changing angles
    • Testing a cold lamp against a warm lamp
    • Using one center reading for the whole enclosure
    • Assuming mesh affects visible light and UVB equally

    How to verify the result in a real enclosure

    Lighting work becomes much easier when the enclosure is treated as a map rather than a box with one reading. Mark the basking center, both edges of the perch, the warm hide entrance and the darkest retreat. Take measurements at the height of the animal’s back. This reveals whether the reptile can make small choices instead of moving between two extremes.

    Visible light, UVB and heat overlap during the day, but each should be evaluated separately. A bright enclosure can still have weak UVB, and a strong UVB fixture does not create the correct basking surface temperature. Keep the lighting schedule consistent, control heat with suitable hardware, and change only one part before repeating the map.

    A practical seven-day check

    1. Day one: photograph positions, record room conditions and capture baseline readings.
    2. Day two: review the full day-night transition and check that schedules occurred at the intended local time.
    3. Day three: inspect mounts, probe restraints, plugs, tubing and any area exposed to moisture.
    4. Day four: compare the main reading with an independent instrument placed beside it long enough to stabilize.
    5. Day five: review animal access and behavior. Confirm that equipment does not block hides, climbing routes or the cool zone.
    6. Day six: simulate one safe failure, such as a short internet loss or power interruption, then check recovery.
    7. Day seven: save the final settings and observations in the enclosure record.

    Repeat the short version of this audit after major cleaning, seasonal room changes or equipment replacement. The point is not constant tinkering. It is catching the few changes that can quietly alter a previously stable habitat.

    Related Reptile Tech Lab guides

    Frequently asked questions

    Does black mesh block more UVB?

    Color alone is not enough to predict it. Open area, thickness and coating all matter.

    Can I estimate loss from a photo?

    No reliable husbandry decision should rest on a photo estimate.

    Which meter is appropriate?

    A meter designed to read UV Index, such as the model discussed in our Solarmeter 6.5R review.

    Should the lamp touch the mesh?

    Follow fixture clearances and keep heat, electrical and animal-contact safety ahead of output.

  • T5 vs T8 UVB for reptiles: output, coverage and replacement cost

    T5 vs T8 UVB for reptiles: output, coverage and replacement cost

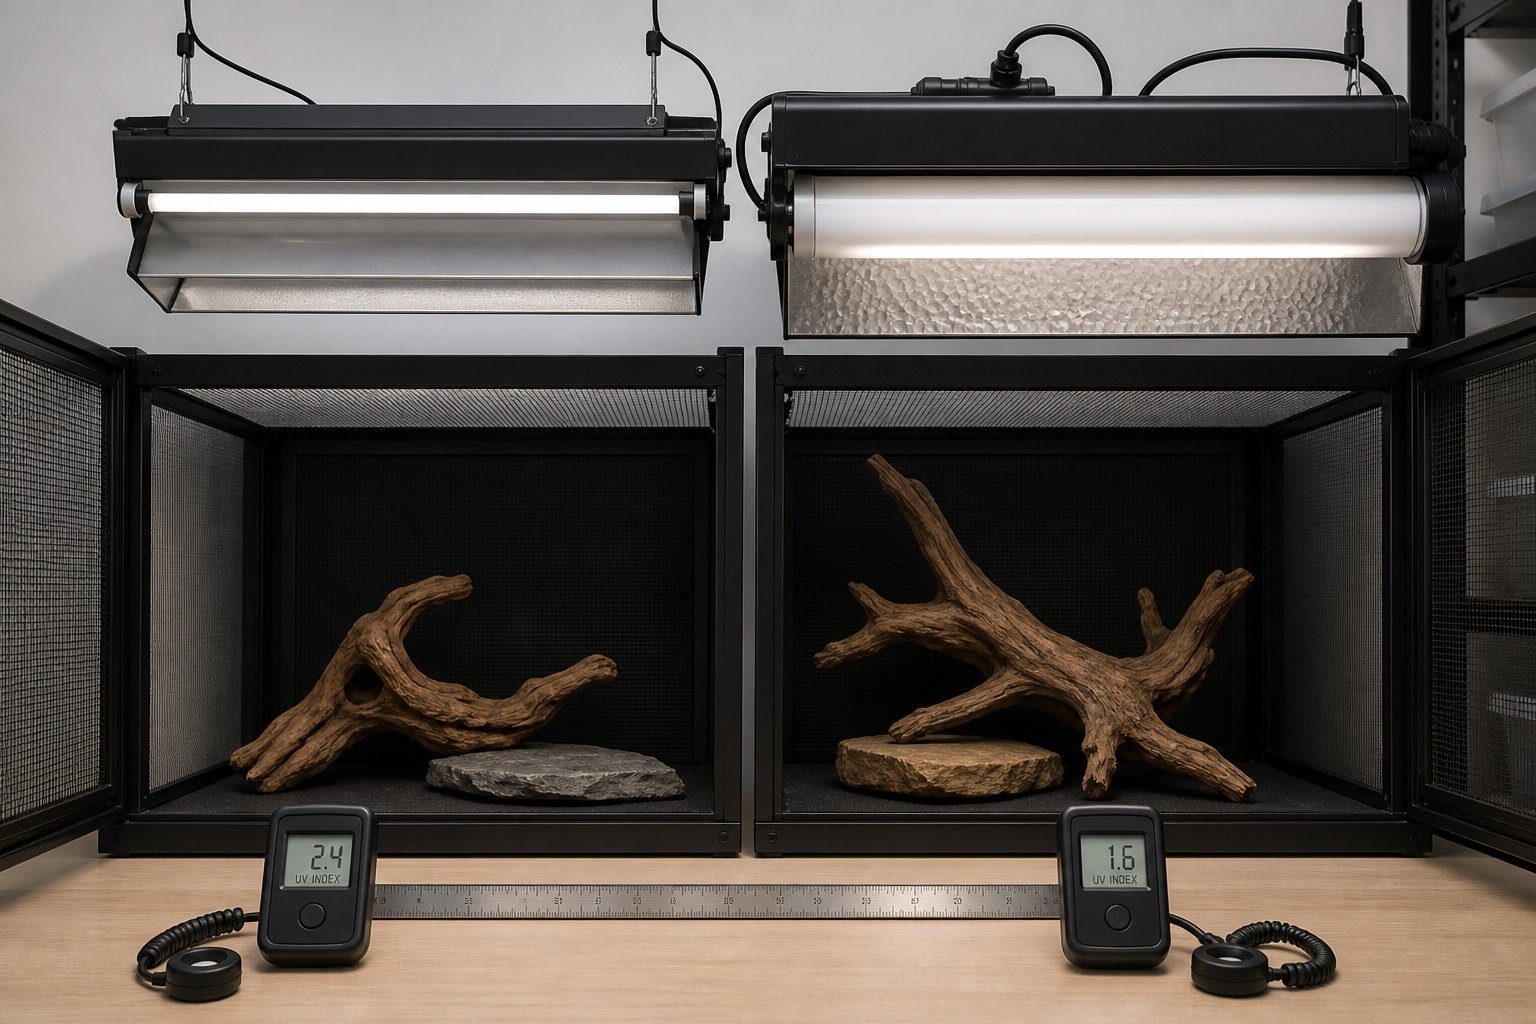
    Quick verdict: T5 HO is the practical default for most modern reptile enclosures because it provides wider coverage and more distance headroom. T8 remains useful in shallow, unobstructed habitats where a gentler lamp can sit close to the basking area.

    Tube diameter is only part of the comparison. Ballast, reflector, lamp chemistry and mounting distance decide what reaches the animal. Treat T5 and T8 as two systems, not interchangeable tubes.

    Setup or factor Published or practical value Use
    Output Generally higher Generally lower
    Useful distance More headroom Best at shorter distance
    Tube diameter 16 mm 26 mm
    Common use Medium and tall enclosures Shallow legacy or low-output setups

    Why T5 gained ground

    A T5 HO fixture can create a broad zone without being mounted immediately above the animal. That helps when there is a guard, mesh lid or deep enclosure. The smaller tube also works with efficient shaped reflectors.

    Where T8 still makes sense

    A T8 can be easier to control in a shallow wooden vivarium with internal mounting and no mesh. It may also be the least disruptive replacement when a proven setup already hits the required UVI.

    Do not mix parts

    A T5 tube does not belong in a T8 fixture. Length, pins, electrical requirements and ballast are different. Replace the fixture and tube as a matched system.

    Compare measured zones

    Use the method in our UVB buying guide: set the fixture, map UVI at the basking surface, confirm a shaded route, then record the baseline.

    Cost over time

    T5 fixtures often cost more initially. The useful comparison includes replacement tubes, availability, electricity and whether the old fixture can reach the target without unsafe proximity.

    A commissioning routine that catches mistakes

    Assemble and run the system before the animal depends on it. Photograph the final positions, label cables, and compare the working zone with an independent instrument. Test one normal day, one night transition and a short power interruption. The goal is not a perfectly flat chart. It is a stable, understandable gradient with safe recovery.

    Recheck after cleaning because fixtures, probes and branches rarely return to the exact same position by accident. A two-minute baseline check is cheaper than troubleshooting weeks of unexplained behavior.

    Common mistakes

    • Calling every T5 lamp high output
    • Assuming tube length guarantees wider usable coverage
    • Putting a new T5 at the old T8 distance without testing
    • Reusing an incompatible ballast
    • Ignoring mesh transmission

    How to verify the result in a real enclosure

    Lighting work becomes much easier when the enclosure is treated as a map rather than a box with one reading. Mark the basking center, both edges of the perch, the warm hide entrance and the darkest retreat. Take measurements at the height of the animal’s back. This reveals whether the reptile can make small choices instead of moving between two extremes.

    Visible light, UVB and heat overlap during the day, but each should be evaluated separately. A bright enclosure can still have weak UVB, and a strong UVB fixture does not create the correct basking surface temperature. Keep the lighting schedule consistent, control heat with suitable hardware, and change only one part before repeating the map.

    A practical seven-day check

    1. Day one: photograph positions, record room conditions and capture baseline readings.
    2. Day two: review the full day-night transition and check that schedules occurred at the intended local time.
    3. Day three: inspect mounts, probe restraints, plugs, tubing and any area exposed to moisture.
    4. Day four: compare the main reading with an independent instrument placed beside it long enough to stabilize.
    5. Day five: review animal access and behavior. Confirm that equipment does not block hides, climbing routes or the cool zone.
    6. Day six: simulate one safe failure, such as a short internet loss or power interruption, then check recovery.
    7. Day seven: save the final settings and observations in the enclosure record.

    Repeat the short version of this audit after major cleaning, seasonal room changes or equipment replacement. The point is not constant tinkering. It is catching the few changes that can quietly alter a previously stable habitat.

    Related Reptile Tech Lab guides

    Frequently asked questions

    Is T5 hotter than T8?

    Fixture and ballast temperatures vary. Neither should be used as the primary controlled heat source.

    Can T8 pass through mesh?

    Some output passes, but a low-output system has less margin. Measure below the actual screen.

    Should I upgrade a working T8?

    Not automatically. Keep it if measured coverage and UVI remain suitable.

    Which T5 fixture is a useful benchmark?

    Our Arcadia ProT5 review includes published distance data and mounting checks.