Author: lasipton@gmail.com

  • Inkbird ITC-306T review for reptile heating: useful timer, hard limits

    Inkbird ITC-306T review for reptile heating: useful timer, hard limits

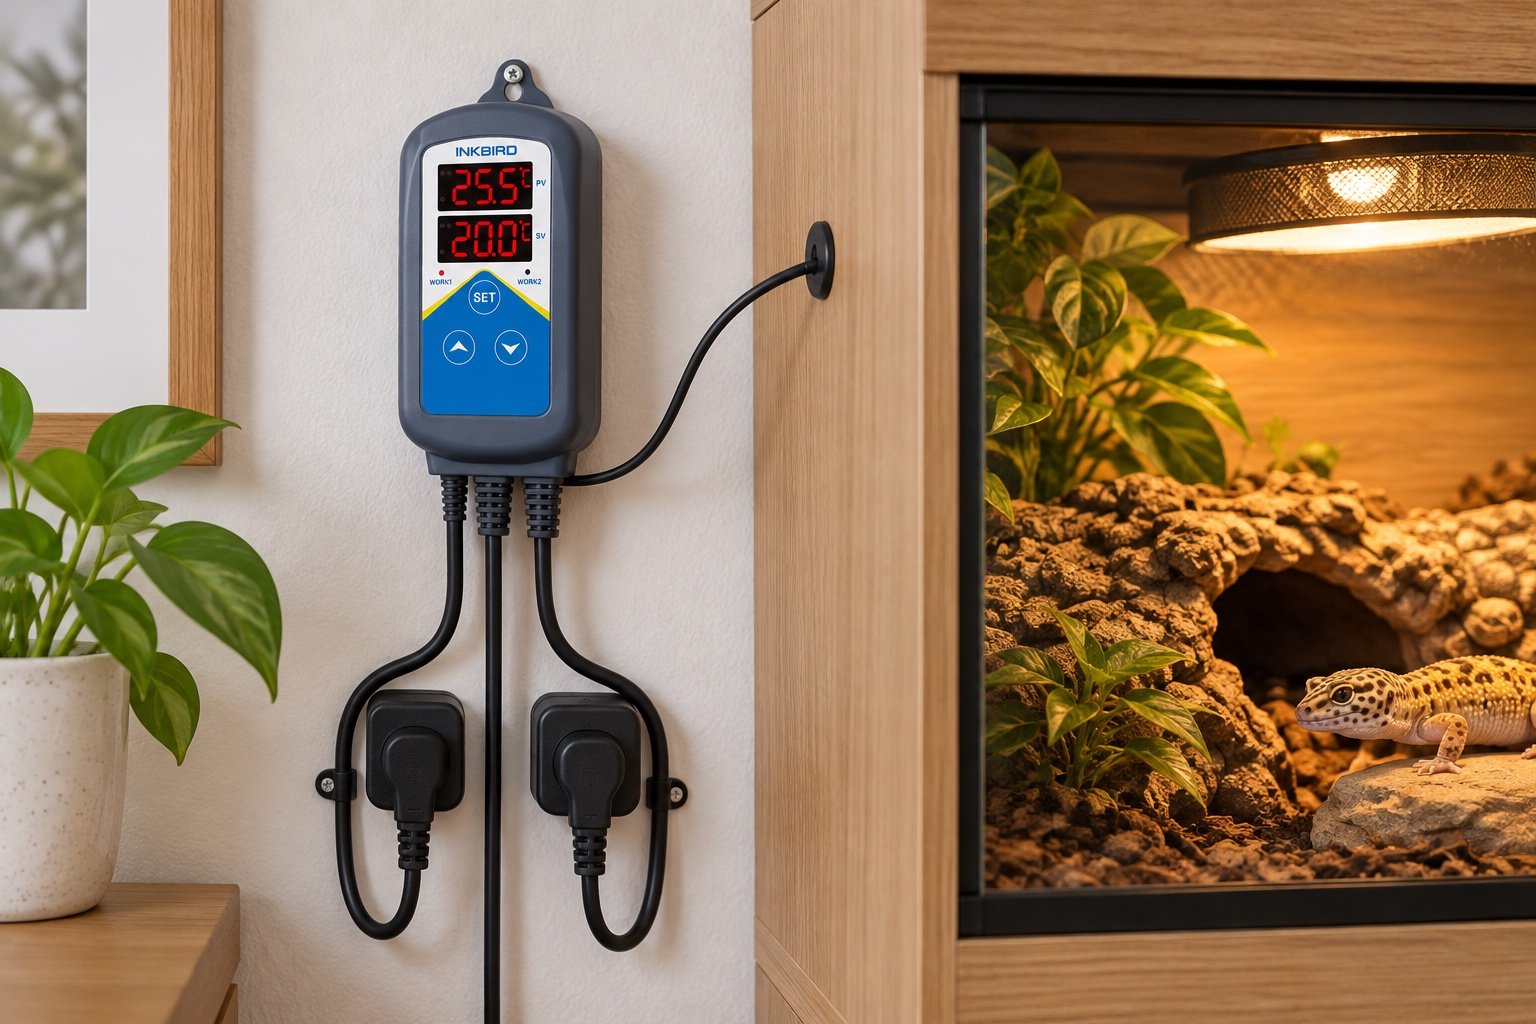
    Quick verdict: The ITC-306T is a straightforward heating-only, on/off controller with two sockets on one relay. It can suit non-light heaters that tolerate cycling. It is a poor match for a halogen basking lamp and should not be mistaken for two independently controlled zones.

    The useful comparison is the complete enclosure, not the number on the display. Our reptile thermostat guide and ceramic emitter vs deep heat projector provide the surrounding checks.

    Point What to know
    Control type Heating only, on/off
    Load Up to 10 A, regional wattage varies
    Schedule Two timed temperature periods
    Probe 2 m NTC probe, IP67 probe body

    Two sockets do not mean two thermostats

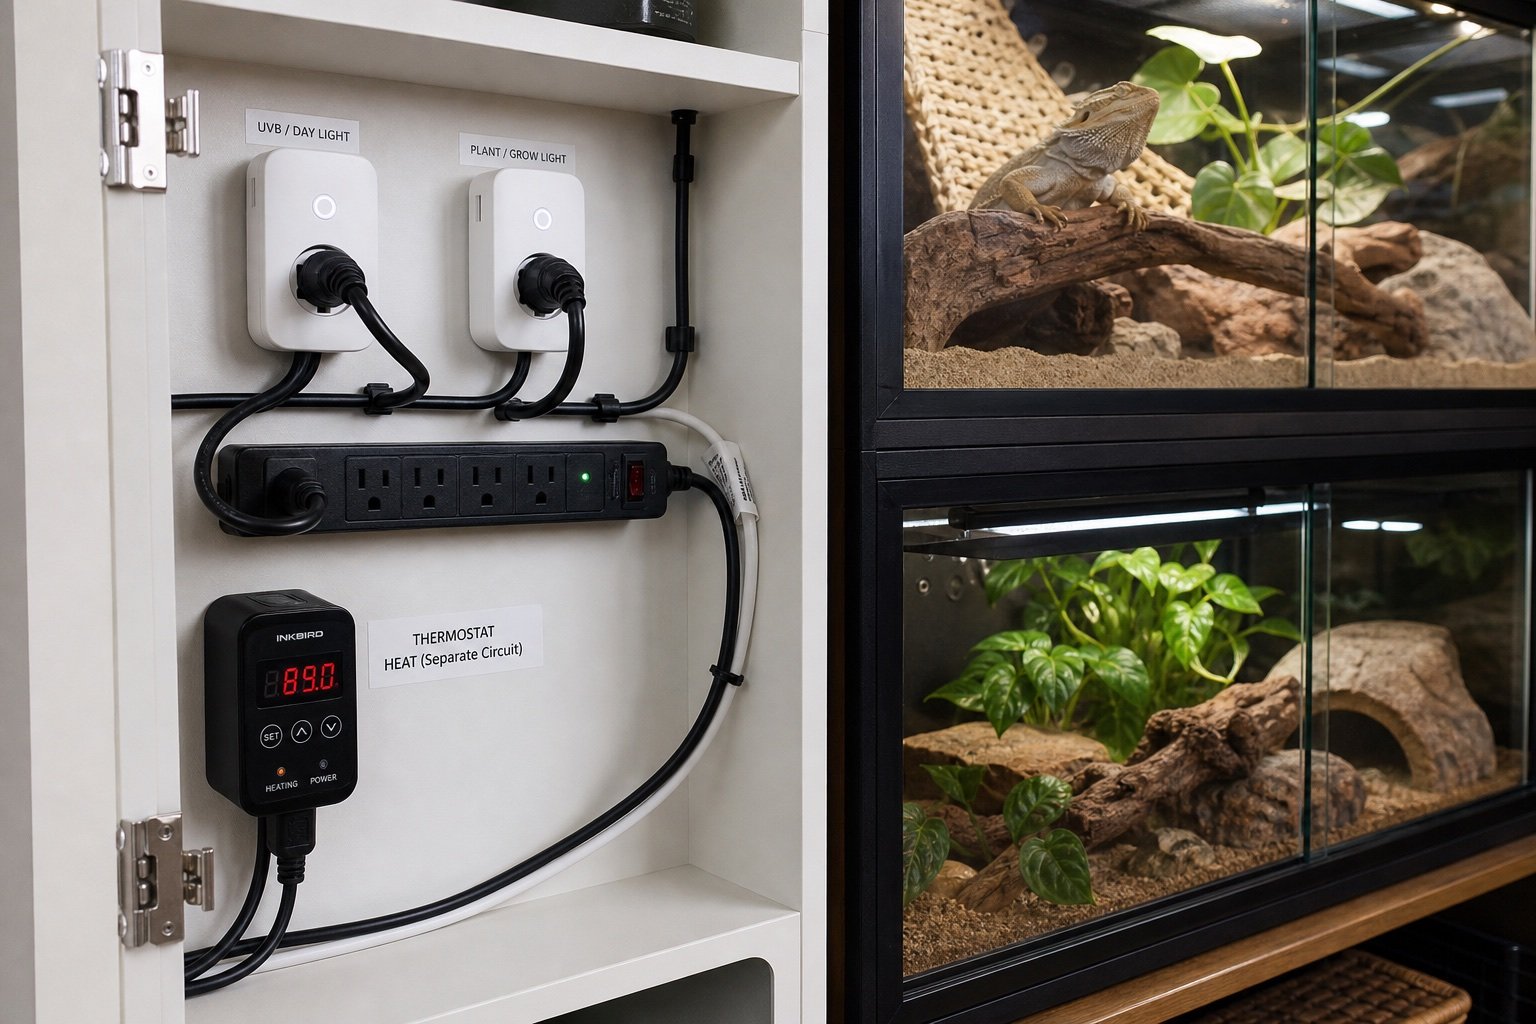
    Both outlets follow the same control decision. That can run two compatible heaters, but it cannot maintain separate temperatures or protect two unrelated enclosures. Combined load still matters. If the heaters serve different habitats, one displaced probe can affect both. The Herpstat vs Inkbird comparison explains the gap between a shared relay controller and a proportional reptile thermostat.

    The day and night schedule is basic but useful

    The controller stores two temperature periods across a 24-hour cycle. That is enough for a modest night drop without adding a separate timer. It is not a gradual sunrise routine. At the changeover, the target changes and the relay reacts. Measure the enclosure through several transitions because stored heat can make the first night reading look better than the rest of the night.

    Choose a heater that can be switched

    The ITC-306T turns power fully on and off. Ceramic emitters and some mats can tolerate that pattern when installed correctly. A bright lamp will visibly blink and its life may suffer. For light-emitting heat, a dimming controller is usually the cleaner choice. Read the heater instructions, stay below the controller and socket ratings, and keep a safety margin rather than treating 10 A as a daily target.

    Water resistance stops at the probe

    Inkbird rates the probe body IP67, not the display, plugs or cable junctions. Keep the controller and outlets outside the wet zone. Add drip loops and position the probe where mist cannot run along the cable into a socket. In a humid enclosure, inspect the cable entry and any protective sleeve during every deep clean.

    A sensible acceptance test

    Set a deliberately low target with no animal present and confirm both sockets switch together. Raise the target, watch the warm-up, and compare the controller with a separate logger placed beside the probe. Unplug power long enough to test memory, then check the schedule clock. Finally, loosen nothing: tug the probe restraint gently and make sure normal animal movement cannot change the reading.

    What a good installation looks like after one week

    The equipment should be boring. Cables remain where they were fixed, schedules occur at the expected local time and the animal can use the enclosure without touching a probe or blocking a sensor. Charts show ordinary cycles rather than unexplained steps. Alerts are rare enough that someone will act on them.

    Repeat the acceptance check after major cleaning, seasonal room changes or firmware updates. If the system cannot recover cleanly from a routine interruption, it is not ready to become invisible infrastructure.

    Keep a change log, even for a single enclosure

    Record the date, old setting, new setting and reason. Add one observation after the next full day. This stops a sequence of sensible-looking tweaks from drifting far away from the original plan. It also helps another carer understand why an unusual schedule or position exists.

    Firmware, app and clock changes belong in the same record as physical maintenance. After an update, confirm units, time zone, schedules, alarm limits and channel names. Do not assume a graph that looks familiar proves the outputs are mapped correctly.

    Check the animal’s access around the hardware

    Run a hand along the routes the animal can climb. Look for hot guards, sharp clips, adhesive edges and cable loops. Make sure a hide, plant or deep substrate cannot press against the sensor and create a false reading. Equipment placement is finished only when the animal can use the habitat normally without becoming part of the mounting system.

    Observe the first week at ordinary care times, not only during a staged inspection. Feeding, misting, opening doors and moving bowls are the moments that disturb cables and airflow. If a control survives only when nobody touches the enclosure, it is not a durable installation.

    Watch what happens during ordinary care

    Open the enclosure, change water, mist, feed and move the usual hide or branch. Then check the hardware. Good installation survives those actions without a cable pulling tight, a probe moving or an alert becoming meaningless. A perfect result in an untouched display is less useful than a stable result during real care.

    Ask another person to perform the round using the written labels. If they cannot identify the shutoff, correct sensor or affected habitat, improve the record. This is especially important when one controller or gateway serves several enclosures.

    Plan the retirement path

    Connected products eventually lose app support, batteries weaken and replacement probes disappear. Export data in an open format and keep essential settings in plain text. Avoid building a safety function that only one discontinued phone app can change.

    Before replacing a working device, define the improvement you expect: quieter control, a second zone, remote alerts or better moisture protection. If the new product does not solve that specific limitation, maintenance and a spare part may be the better purchase.

    Common mistakes

    • Trusting the first stable-looking number without mapping the surrounding zone
    • Changing several settings at once and losing the cause of the result
    • Leaving probes, cables or mounts where normal animal movement can shift them
    • Treating an app or remote alert as the primary safety control
    • Skipping a power-recovery test because the device retained settings once

    Related Reptile Tech Lab guides

    Frequently asked questions

    Can it cool an enclosure?

    No. The ITC-306T controls heating only.

    Are the two sockets independent?

    No. They share the same relay and temperature decision.

    Can it run a basking bulb?

    It can switch a lamp electrically, but visible on/off cycling makes it a poor choice for most basking bulbs.

    Does it have a custom low-temperature alarm?

    The model has limited alarm behavior, so use an independent monitor for husbandry alerts.
  • Herpstat 2 SpyderWeb review: two-zone control without guesswork

    Herpstat 2 SpyderWeb review: two-zone control without guesswork

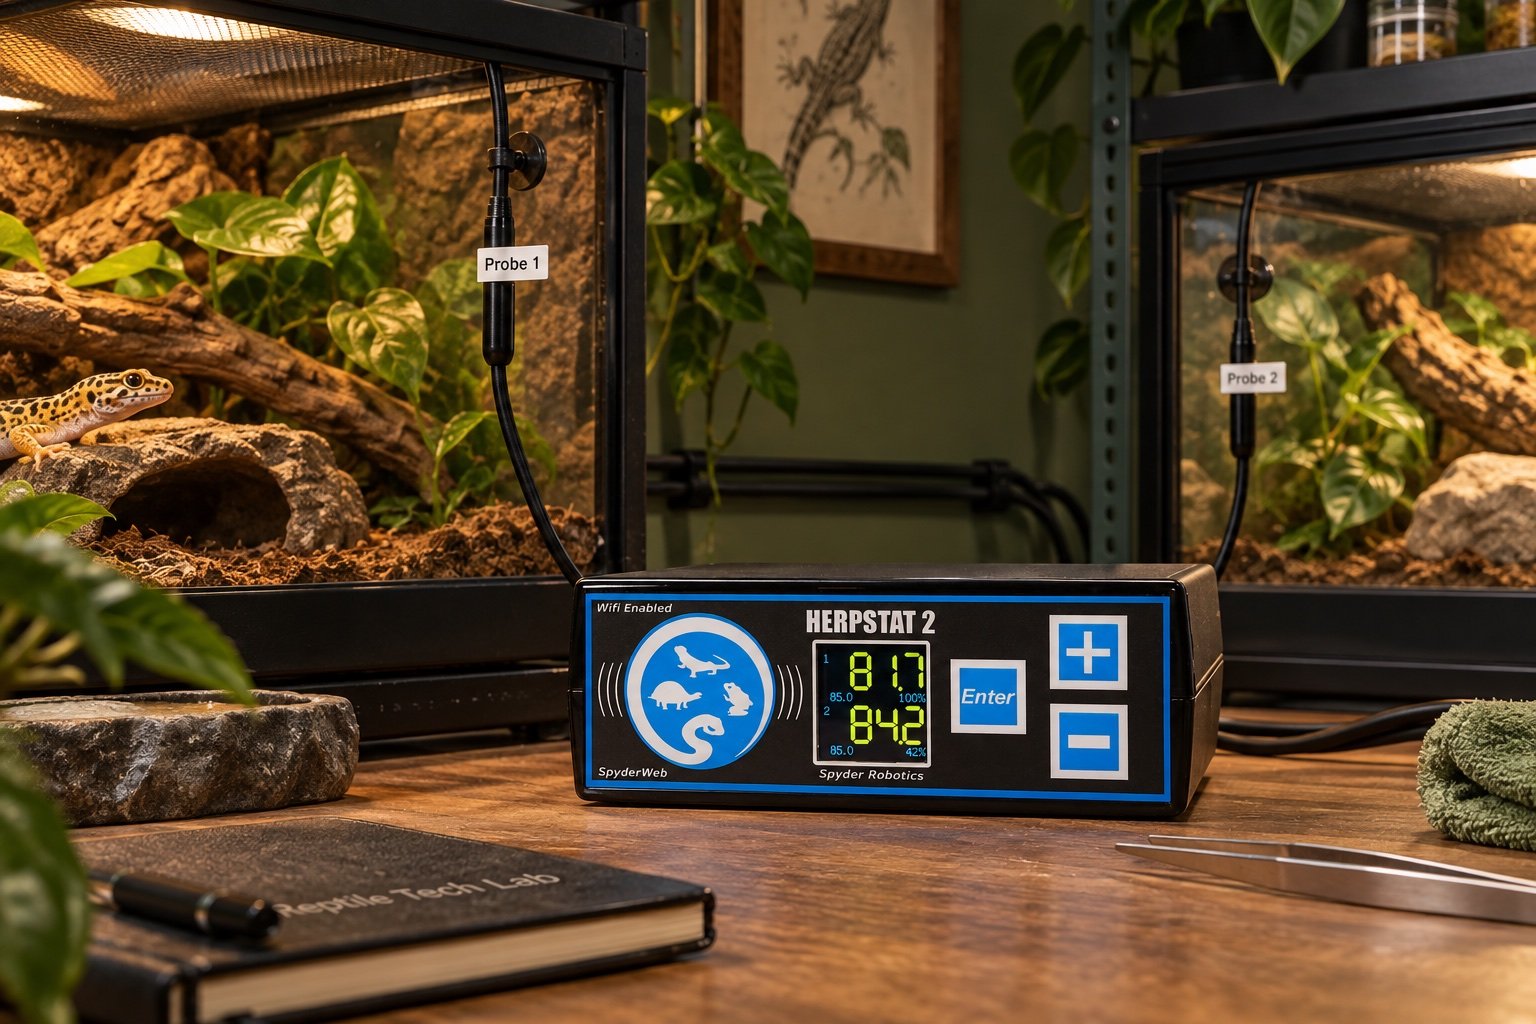
    Quick verdict: The Herpstat 2 SpyderWeb is most convincing when two heat zones need independent probes, schedules and alarms. It is overkill for one simple heat mat, but the extra output is genuinely useful in a two-enclosure rack or a habitat with separate daytime and background heat.

    This guide is built around commissioning, not box-opening. Compare it with our best reptile thermostats and Herpstat 1 review before changing a live enclosure.

    Point What to know
    Outputs 2 independently configured outlets
    Control Dimming, pulse proportional or on/off by setup
    Connection Wi-Fi with SpyderWeb interface
    Best fit Two zones that need separate probes and limits

    What changes when you move from one output to two

    A second socket sounds like a small upgrade until the probes are installed. Each output can solve a different problem: two enclosures, a basking lamp plus non-light heat, or warm-side control in a divided system. The useful part is independence. Copying one set point to both channels defeats most of the reason to buy this model. Map each outlet, probe and heater on paper first. If the job is only one heater, read our Herpstat 1 review before paying for unused capacity.

    Control modes need to match the heater

    A light-emitting basking lamp normally wants smooth dimming. A ceramic emitter or deep heat projector may behave well with proportional control, depending on the manufacturer instructions. Simple mats and some low-wattage heaters can use on/off control, though the resulting swing must be checked. The thermostat cannot make an unsuitable heater safe. Our deep heat projector vs halogen comparison explains why the visible result and the warmed surface are different parts of the decision.

    SpyderWeb is supervision, not the safety layer

    Remote graphs and alerts help when the room is unattended. They do not replace a correctly restrained probe, a safe maximum output and an independent thermometer. Test the controller with Wi-Fi disabled and confirm that both channels keep running locally. Then reconnect it and check that alerts arrive on another network. A cloud dashboard is useful only after the controller has proved it can fail safely without the cloud.

    Probe placement decides what the graph means

    Fasten each probe where it measures the surface or air mass the heater is meant to control. Do not leave a probe loose under a hide and do not tape it where the animal can peel it away. The two probe cables should be labelled at both ends. Our thermostat probe placement guide covers restraint, distance and the difference between air and surface targets.

    Commission both channels separately

    Run output one by itself for a full warm-up, then output two, then both together. The third test matters because shared room air and enclosure materials can couple the zones. Record overshoot, cool-side temperature and recovery after a short power cut. Save screenshots only after the physical readings agree with the controller. If two probes disagree with an independent logger, stop and find the cause instead of averaging the numbers.

    A seven-day field check

    Run the finished setup for a week before treating it as settled. On day one, photograph every position and record the room conditions. Watch the first warm-up and the final hour of the schedule. Midweek, compare the main reading with an independent instrument placed beside it long enough to stabilize. Near the end of the week, test a safe interruption such as a network loss or short power cut.

    Do not tune settings every time a single reading looks odd. Look for a repeated pattern and change one variable. A clear notebook entry is more useful than a folder of screenshots with no explanation.

    Build a baseline you can reproduce

    Write down the room temperature, enclosure dimensions, heat and light sources, probe positions and the time each reading was taken. A number without that context is hard to compare. Use a photograph from the same angle and place a small reference mark outside the animal’s contact area. The next check should be able to recreate the first one without relying on memory.

    Run the setup from a normal overnight low instead of beginning with an already warm habitat. Note how long it takes to reach the working zone and whether it overshoots. Then repeat with the enclosure doors closed, lids fitted and ventilation in its final position. A test performed while the habitat is open describes the workshop, not daily use.

    Decide what would make you stop using it

    Set rejection points before becoming attached to the purchase or layout. A drifting probe, missed schedule, damaged cable, unreachable sensor or unreliable power recovery is a reason to pause. So is a control that only works while a phone or cloud service is available. Write the limit and the action beside it.

    Small disagreements deserve investigation, not panic. Move the independent sensor beside the control probe, wait for both to stabilize and compare again. If the difference follows one location, placement is probably the issue. If it follows one device, calibration or replacement may be needed.

    Read the graph like a maintenance record

    A smooth line is not automatically a good line. Check whether the highs and lows occurred when lights, heat and misting were supposed to change. A flat sensor can indicate stable conditions, but it can also indicate a dead battery, failed sync or probe pressed against a large thermal mass. Compare the chart with an observed event.

    Write a short note whenever the enclosure is opened for a long clean, moved to another room or left with a temporary heater. Those annotations explain the odd parts of the history. Without them, a future reviewer may try to correct a normal event or overlook a real fault.

    Make replacement predictable

    Save the model, purchase date, compatible replacement part and the last known-good settings. Keep an export or photograph outside the device app. When a sensor, controller or lamp fails, the replacement should begin from a documented baseline rather than a guess.

    Do not discard the old unit until the new setup has completed a full cycle and the numbers have been compared. A replacement can be newer and still be wrong for the heater, socket, enclosure depth or network. Recommission it as a different system.

    Common mistakes

    • Trusting the first stable-looking number without mapping the surrounding zone
    • Changing several settings at once and losing the cause of the result
    • Leaving probes, cables or mounts where normal animal movement can shift them
    • Treating an app or remote alert as the primary safety control
    • Skipping a power-recovery test because the device retained settings once

    Related Reptile Tech Lab guides

    Frequently asked questions

    Can both outputs use different modes?

    Yes. Configure each channel for its own heater and verify the selected mode before connecting the load.

    Does Wi-Fi have to stay connected?

    Local control should continue. Test this deliberately before relying on the system.

    Can one probe control both outlets?

    Treat the outlets as separate controlled zones and use the assigned probe for each.

    Is it better than two single-output thermostats?

    It reduces boxes and can simplify monitoring, but two separate controllers provide more physical separation.

  • Best reptile UVB lights: choose by enclosure, distance and mesh

    Best reptile UVB lights: choose by enclosure, distance and mesh

    Quick verdict: The best reptile UVB light is not the tube with the largest percentage on the box. It is the lamp and fixture that can deliver the target UV Index across a usable basking area after distance, mesh and reflector losses are counted.

    Start with the animal, enclosure height and basking geometry. A compact forest setup and a tall desert enclosure should not use the same lamp simply because both fixtures fit the lid. Output must be measured where the reptile actually sits, not at the screen or on the product carton.

    Setup or factor Published or practical value Use
    Compact, low enclosure Low-output T5 fixture Wide, gentle usable zone
    Medium forest enclosure 6 to 7% T5 HO Good coverage with manageable distance
    Tall or desert enclosure 12 to 14% T5 HO More output headroom through distance or mesh
    Legacy shallow setup T8 tube Useful only when close and unobstructed

    Choose a target before choosing a lamp

    Use a reputable species husbandry range as the starting point, then create a gradient. The basking position should receive the intended exposure while hides and shaded routes remain available. A single high reading in the middle is less useful than a broad, repeatable zone the animal can enter and leave.

    Fixture and reflector matter

    Two tubes carrying the same percentage can produce different results when reflector shape, fixture temperature and tube age change. Buy the complete fixture when possible, mount it exactly as tested, and do not assume a bare tube behaves like a kit with a shaped reflector.

    Mesh changes the calculation

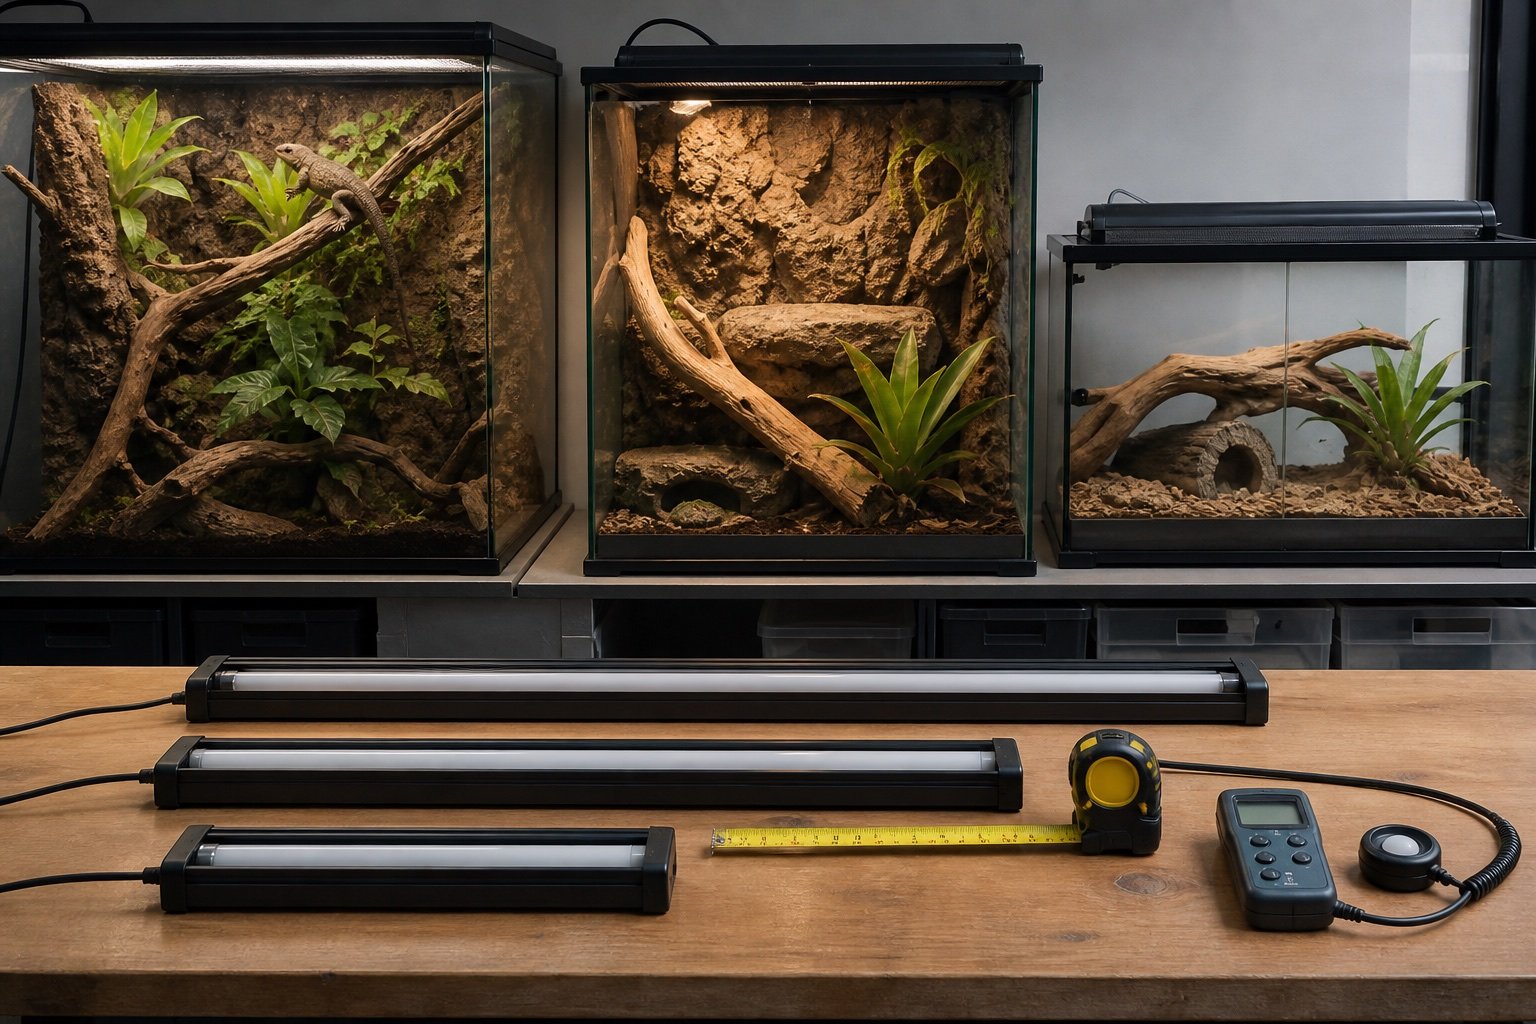
    Screen density, wire thickness and lamp angle all affect transmission. Published figures are useful for planning, but the final number should be checked below your own lid. Our guide to UVB through mesh explains a repeatable measurement method.

    Measure the basking zone

    A Solarmeter 6.5R reads UV Index, which is the most practical value for enclosure work. Map several points across the basking surface, record the lamp age and repeat after any change to the lid, branch or fixture.

    Replacement is based on output, not the calendar alone

    Tube aging is gradual. Mark the installation date, keep a baseline map, and retest at consistent distances. Replace when the useful zone can no longer reach its target without forcing the animal dangerously close.

    A commissioning routine that catches mistakes

    Assemble and run the system before the animal depends on it. Photograph the final positions, label cables, and compare the working zone with an independent instrument. Test one normal day, one night transition and a short power interruption. The goal is not a perfectly flat chart. It is a stable, understandable gradient with safe recovery.

    Recheck after cleaning because fixtures, probes and branches rarely return to the exact same position by accident. A two-minute baseline check is cheaper than troubleshooting weeks of unexplained behavior.

    Common mistakes

    • Buying by UVB percentage alone
    • Measuring above the screen instead of at the animal
    • Creating a tiny hot spot with no usable gradient
    • Moving decor without retesting lamp distance
    • Running UVB all night instead of using a reliable light timer

    How to verify the result in a real enclosure

    Lighting work becomes much easier when the enclosure is treated as a map rather than a box with one reading. Mark the basking center, both edges of the perch, the warm hide entrance and the darkest retreat. Take measurements at the height of the animal’s back. This reveals whether the reptile can make small choices instead of moving between two extremes.

    Visible light, UVB and heat overlap during the day, but each should be evaluated separately. A bright enclosure can still have weak UVB, and a strong UVB fixture does not create the correct basking surface temperature. Keep the lighting schedule consistent, control heat with suitable hardware, and change only one part before repeating the map.

    A practical seven-day check

    1. Day one: photograph positions, record room conditions and capture baseline readings.
    2. Day two: review the full day-night transition and check that schedules occurred at the intended local time.
    3. Day three: inspect mounts, probe restraints, plugs, tubing and any area exposed to moisture.
    4. Day four: compare the main reading with an independent instrument placed beside it long enough to stabilize.
    5. Day five: review animal access and behavior. Confirm that equipment does not block hides, climbing routes or the cool zone.
    6. Day six: simulate one safe failure, such as a short internet loss or power interruption, then check recovery.
    7. Day seven: save the final settings and observations in the enclosure record.

    Repeat the short version of this audit after major cleaning, seasonal room changes or equipment replacement. The point is not constant tinkering. It is catching the few changes that can quietly alter a previously stable habitat.

    Related Reptile Tech Lab guides

    Frequently asked questions

    Is T5 always better than T8?

    No. T5 HO offers more output and distance headroom, but a close, unobstructed T8 can still suit some shallow setups. Compare them in our T5 vs T8 guide.

    Can glass sit between the lamp and reptile?

    Ordinary glass blocks most useful UVB. The lamp needs an open or UV-transmitting path designed for the job.

    How long should UVB stay on?

    Match the visible daytime period, commonly controlled as one consistent lighting schedule. Species and seasonal plans can differ.

    Which fixture should I shortlist?

    The Arcadia ProT5 is a strong general option, while the ShadeDweller ProT5 targets lower-light, compact setups.

  • Reptile incubator setup: control, airflow and failure tests before eggs arrive

    Reptile incubator setup: control, airflow and failure tests before eggs arrive

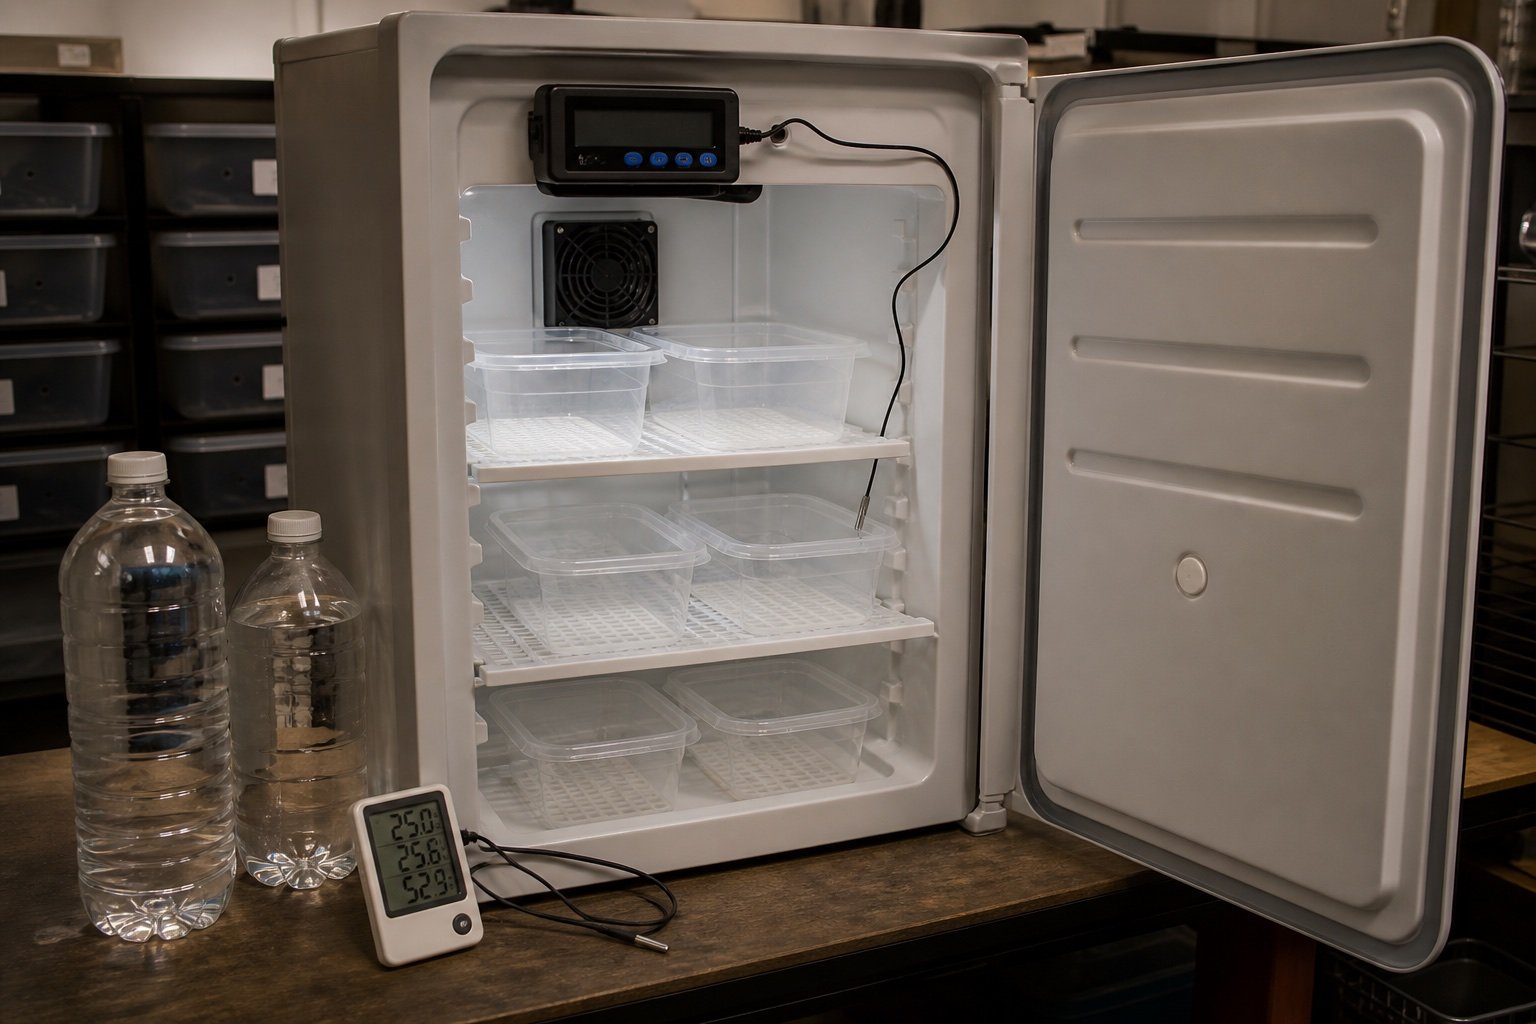
    Quick verdict: Set up and test a reptile incubator weeks before eggs arrive. The important qualities are stability, independent verification, gentle circulation where appropriate and predictable behavior during power loss. A precise display is not proof of a stable egg box.

    Reptile incubator setup: control, airflow and failure tests before eggs arrive is a narrow buying and setup question, so this guide stays focused on that job. It does not repeat our broader category pages. The aim is to help you choose, install and verify the equipment without turning one convenient device into a single point of failure.

    What matters in this comparison

    Factor Option or result Why it matters
    Controller display Shows control sensor Not an independent check
    Independent logger Records actual cycle Place near egg containers
    Water medium Adds thermal mass Must not create unsafe humidity or spills
    Egg boxes Create microclimate Ventilation depends on species and method

    Specifications are useful for screening products, but enclosure performance depends on placement. Room temperature, ventilation, mesh, substrate moisture and animal access can move the result far from a brochure figure. Work from a measured baseline and change one variable at a time.

    How to set it up

    1. Run empty for several days

    Find the basic control cycle. Test the result under normal enclosure conditions and write down what you observed. A setting that works on an empty bench can behave differently after decor, ventilation and daily room changes are added.

    2. Add thermal mass

    Test with the same shelves and water planned for use. Test the result under normal enclosure conditions and write down what you observed. A setting that works on an empty bench can behave differently after decor, ventilation and daily room changes are added.

    3. Map shelf temperatures

    Top and bottom can differ. Test the result under normal enclosure conditions and write down what you observed. A setting that works on an empty bench can behave differently after decor, ventilation and daily room changes are added.

    4. Simulate a brief outage

    Record cooling and restart behavior. Test the result under normal enclosure conditions and write down what you observed. A setting that works on an empty bench can behave differently after decor, ventilation and daily room changes are added.

    5. Prepare a written log

    Track set point, logger, checks and interventions. Test the result under normal enclosure conditions and write down what you observed. A setting that works on an empty bench can behave differently after decor, ventilation and daily room changes are added.

    What ownership looks like after the first week

    The first week should be treated as commissioning, not proof that the system will remain stable. Check the morning minimum, daytime peak and the transition between them. Look for loose probes, wet connectors, drifting clocks, blocked vents and any behavior that suggests the animal cannot use the intended zone.

    After the setup settles, use a short written routine. A glance at the device is not enough. Compare it with an independent instrument, inspect cables and mounts, and review stored history when available. Replace consumable parts based on condition and verified performance rather than memory.

    Common mistakes

    • Trusting one built-in sensor
    • Changing set point to chase every small fluctuation
    • Adding untested fans that dry boxes
    • Opening the incubator on every check
    • Placing eggs before testing alarm and outage behavior

    Who this approach suits

    This approach suits keepers who want a system that another person can understand during a holiday or emergency. It also scales better across several enclosures because labels, baseline readings and failure tests remove guesswork. If a device requires constant manual correction, the installation needs work even when its feature list looks impressive.

    How to verify the result in a real enclosure

    Write the failure order before buying backup equipment. Decide what happens if power disappears, Wi-Fi drops, a relay sticks on or a caregiver presses the wrong control. Critical devices should fail into a state that gives you time to respond, and their normal state should be visible without opening several apps.

    Run the plan with real labels and real cables. Disconnect one item at a time, confirm the expected alert, and record how quickly conditions move. That rate of change is more useful than a generic emergency number because it reflects the enclosure, room and season you actually have.

    A practical seven-day check

    1. Day one: photograph positions, record room conditions and capture baseline readings.
    2. Day two: review the full day-night transition and check that schedules occurred at the intended local time.
    3. Day three: inspect mounts, probe restraints, plugs, tubing and any area exposed to moisture.
    4. Day four: compare the main reading with an independent instrument placed beside it long enough to stabilize.
    5. Day five: review animal access and behavior. Confirm that equipment does not block hides, climbing routes or the cool zone.
    6. Day six: simulate one safe failure, such as a short internet loss or power interruption, then check recovery.
    7. Day seven: save the final settings and observations in the enclosure record.

    Repeat the short version of this audit after major cleaning, seasonal room changes or equipment replacement. The point is not constant tinkering. It is catching the few changes that can quietly alter a previously stable habitat.

    Related Reptile Tech Lab guides

    Frequently asked questions

    Should I rely on the built-in display?

    No. Use a separate thermometer, hygrometer, light meter or logger appropriate to the job. Independent verification catches probe movement and controller errors.

    How long should I test before animals or eggs depend on it?

    At least one complete day-night cycle, and longer for equipment affected by room weather or water use. Incubation and emergency systems deserve several days plus a power-loss test.

    Can an app replace local control?

    An app is useful for history and alerts. Critical regulation should continue safely when the phone, router or cloud service is unavailable.

    What should I record?

    Record device model, installation date, set points, probe location, baseline readings and the result of outage or disconnection tests. Those notes make later troubleshooting much faster.

  • Reptile power outage plan: protect heat, airflow and records

    Reptile power outage plan: protect heat, airflow and records

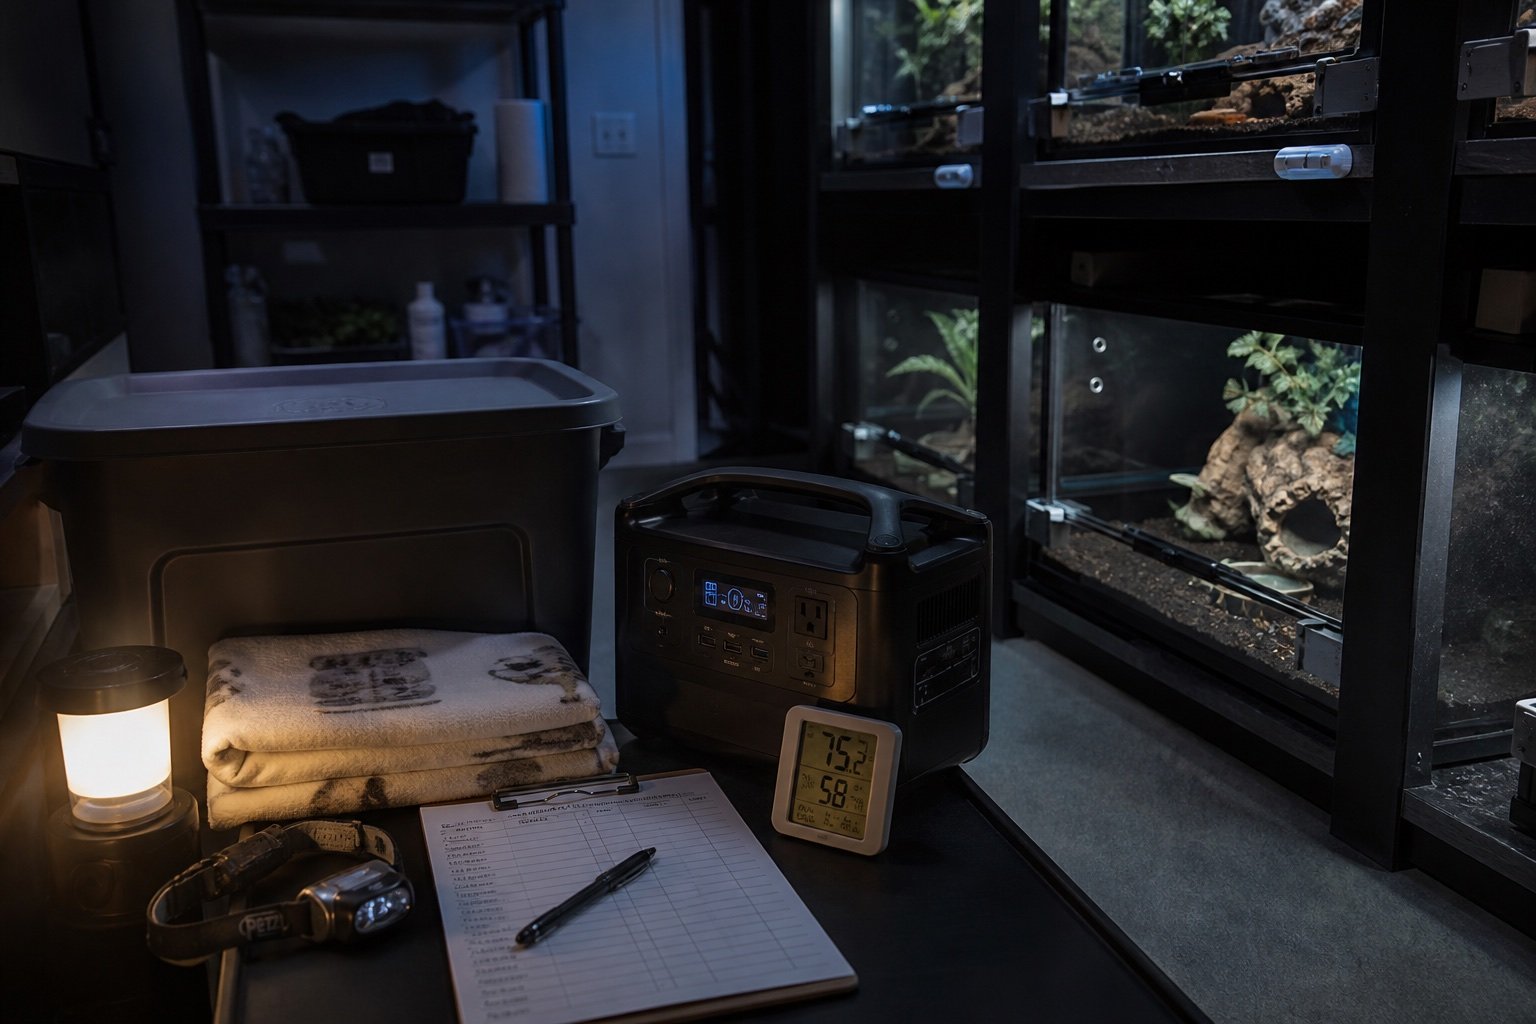
    Quick verdict: A useful outage plan protects animals from the rate of temperature change, not from a single scary room reading. Prioritize vulnerable species and incubators, conserve enclosure heat safely, keep ventilation adequate and record what happened during recovery.

    Reptile power outage plan: protect heat, airflow and records is a narrow buying and setup question, so this guide stays focused on that job. It does not repeat our broader category pages. The aim is to help you choose, install and verify the equipment without turning one convenient device into a single point of failure.

    What matters in this comparison

    Factor Option or result Why it matters
    First priority Incubators and medically fragile animals Small thermal margin
    Second priority Tropical or very young animals Monitor cooling rate
    Later priority Stable adults in mild rooms Avoid unnecessary handling
    Never use indoors Fuel-burning outdoor heaters Carbon monoxide risk

    Specifications are useful for screening products, but enclosure performance depends on placement. Room temperature, ventilation, mesh, substrate moisture and animal access can move the result far from a brochure figure. Work from a measured baseline and change one variable at a time.

    How to set it up

    1. Write normal ranges

    Include each enclosure and incubator. Test the result under normal enclosure conditions and write down what you observed. A setting that works on an empty bench can behave differently after decor, ventilation and daily room changes are added.

    2. Stage independent thermometers

    Battery devices still work when mains power fails. Test the result under normal enclosure conditions and write down what you observed. A setting that works on an empty bench can behave differently after decor, ventilation and daily room changes are added.

    3. Choose safe backup heat

    Follow product indoor-use rules. Test the result under normal enclosure conditions and write down what you observed. A setting that works on an empty bench can behave differently after decor, ventilation and daily room changes are added.

    4. Store contact details

    Vet, utility and alternate location. Test the result under normal enclosure conditions and write down what you observed. A setting that works on an empty bench can behave differently after decor, ventilation and daily room changes are added.

    5. Run a tabletop drill

    Practice decisions before winter. Test the result under normal enclosure conditions and write down what you observed. A setting that works on an empty bench can behave differently after decor, ventilation and daily room changes are added.

    What ownership looks like after the first week

    The first week should be treated as commissioning, not proof that the system will remain stable. Check the morning minimum, daytime peak and the transition between them. Look for loose probes, wet connectors, drifting clocks, blocked vents and any behavior that suggests the animal cannot use the intended zone.

    After the setup settles, use a short written routine. A glance at the device is not enough. Compare it with an independent instrument, inspect cables and mounts, and review stored history when available. Replace consumable parts based on condition and verified performance rather than memory.

    Common mistakes

    • Opening enclosures repeatedly
    • Using candles or combustion heaters near animals
    • Feeding during a prolonged cold event
    • Heating one spot without monitoring the rest
    • Restoring every heater at once without checking controls

    Who this approach suits

    This approach suits keepers who want a system that another person can understand during a holiday or emergency. It also scales better across several enclosures because labels, baseline readings and failure tests remove guesswork. If a device requires constant manual correction, the installation needs work even when its feature list looks impressive.

    How to verify the result in a real enclosure

    Write the failure order before buying backup equipment. Decide what happens if power disappears, Wi-Fi drops, a relay sticks on or a caregiver presses the wrong control. Critical devices should fail into a state that gives you time to respond, and their normal state should be visible without opening several apps.

    Run the plan with real labels and real cables. Disconnect one item at a time, confirm the expected alert, and record how quickly conditions move. That rate of change is more useful than a generic emergency number because it reflects the enclosure, room and season you actually have.

    A practical seven-day check

    1. Day one: photograph positions, record room conditions and capture baseline readings.
    2. Day two: review the full day-night transition and check that schedules occurred at the intended local time.
    3. Day three: inspect mounts, probe restraints, plugs, tubing and any area exposed to moisture.
    4. Day four: compare the main reading with an independent instrument placed beside it long enough to stabilize.
    5. Day five: review animal access and behavior. Confirm that equipment does not block hides, climbing routes or the cool zone.
    6. Day six: simulate one safe failure, such as a short internet loss or power interruption, then check recovery.
    7. Day seven: save the final settings and observations in the enclosure record.

    Repeat the short version of this audit after major cleaning, seasonal room changes or equipment replacement. The point is not constant tinkering. It is catching the few changes that can quietly alter a previously stable habitat.

    Related Reptile Tech Lab guides

    Frequently asked questions

    Should I rely on the built-in display?

    No. Use a separate thermometer, hygrometer, light meter or logger appropriate to the job. Independent verification catches probe movement and controller errors.

    How long should I test before animals or eggs depend on it?

    At least one complete day-night cycle, and longer for equipment affected by room weather or water use. Incubation and emergency systems deserve several days plus a power-loss test.

    Can an app replace local control?

    An app is useful for history and alerts. Critical regulation should continue safely when the phone, router or cloud service is unavailable.

    What should I record?

    Record device model, installation date, set points, probe location, baseline readings and the result of outage or disconnection tests. Those notes make later troubleshooting much faster.

  • Smart plugs for reptile enclosures: safe uses, limits and failure tests

    Smart plugs for reptile enclosures: safe uses, limits and failure tests

    Quick verdict: Smart plugs are useful for lights, noncritical circulation fans and monitoring energy use. They should not replace a thermostat, high-temperature safety device or purpose-built life-support controller. Local schedules and predictable recovery matter more than voice control.

    Smart plugs for reptile enclosures: safe uses, limits and failure tests is a narrow buying and setup question, so this guide stays focused on that job. It does not repeat our broader category pages. The aim is to help you choose, install and verify the equipment without turning one convenient device into a single point of failure.

    What matters in this comparison

    Factor Option or result Why it matters
    Good use UVB and visible-light schedules Low consequence if app is unavailable
    Conditional use Fans or pumps Only after safe failure testing
    Poor use Primary heat regulation Use a thermostat
    Useful feature Energy history Can reveal a failed lamp or pump

    Specifications are useful for screening products, but enclosure performance depends on placement. Room temperature, ventilation, mesh, substrate moisture and animal access can move the result far from a brochure figure. Work from a measured baseline and change one variable at a time.

    How to set it up

    1. Check the load type

    Motors and lamps can have startup current. Test the result under normal enclosure conditions and write down what you observed. A setting that works on an empty bench can behave differently after decor, ventilation and daily room changes are added.

    2. Prefer local schedules

    A router outage should not alter the cycle. Test the result under normal enclosure conditions and write down what you observed. A setting that works on an empty bench can behave differently after decor, ventilation and daily room changes are added.

    3. Disable accidental voice control

    Avoid casual switching of critical circuits. Test the result under normal enclosure conditions and write down what you observed. A setting that works on an empty bench can behave differently after decor, ventilation and daily room changes are added.

    4. Label every plug

    Include normal state and device name. Test the result under normal enclosure conditions and write down what you observed. A setting that works on an empty bench can behave differently after decor, ventilation and daily room changes are added.

    5. Test internet and power loss

    Confirm recovery before enclosure use. Test the result under normal enclosure conditions and write down what you observed. A setting that works on an empty bench can behave differently after decor, ventilation and daily room changes are added.

    What ownership looks like after the first week

    The first week should be treated as commissioning, not proof that the system will remain stable. Check the morning minimum, daytime peak and the transition between them. Look for loose probes, wet connectors, drifting clocks, blocked vents and any behavior that suggests the animal cannot use the intended zone.

    After the setup settles, use a short written routine. A glance at the device is not enough. Compare it with an independent instrument, inspect cables and mounts, and review stored history when available. Replace consumable parts based on condition and verified performance rather than memory.

    Common mistakes

    • Putting a heat lamp directly on a smart plug
    • Using a household plug in a wet location
    • Relying on push alerts as the only alarm
    • Sharing one plug across unrelated devices
    • Installing firmware updates without rechecking schedules

    Who this approach suits

    This approach suits keepers who want a system that another person can understand during a holiday or emergency. It also scales better across several enclosures because labels, baseline readings and failure tests remove guesswork. If a device requires constant manual correction, the installation needs work even when its feature list looks impressive.

    How to verify the result in a real enclosure

    Write the failure order before buying backup equipment. Decide what happens if power disappears, Wi-Fi drops, a relay sticks on or a caregiver presses the wrong control. Critical devices should fail into a state that gives you time to respond, and their normal state should be visible without opening several apps.

    Run the plan with real labels and real cables. Disconnect one item at a time, confirm the expected alert, and record how quickly conditions move. That rate of change is more useful than a generic emergency number because it reflects the enclosure, room and season you actually have.

    A practical seven-day check

    1. Day one: photograph positions, record room conditions and capture baseline readings.
    2. Day two: review the full day-night transition and check that schedules occurred at the intended local time.
    3. Day three: inspect mounts, probe restraints, plugs, tubing and any area exposed to moisture.
    4. Day four: compare the main reading with an independent instrument placed beside it long enough to stabilize.
    5. Day five: review animal access and behavior. Confirm that equipment does not block hides, climbing routes or the cool zone.
    6. Day six: simulate one safe failure, such as a short internet loss or power interruption, then check recovery.
    7. Day seven: save the final settings and observations in the enclosure record.

    Repeat the short version of this audit after major cleaning, seasonal room changes or equipment replacement. The point is not constant tinkering. It is catching the few changes that can quietly alter a previously stable habitat.

    Related Reptile Tech Lab guides

    Frequently asked questions

    Should I rely on the built-in display?

    No. Use a separate thermometer, hygrometer, light meter or logger appropriate to the job. Independent verification catches probe movement and controller errors.

    How long should I test before animals or eggs depend on it?

    At least one complete day-night cycle, and longer for equipment affected by room weather or water use. Incubation and emergency systems deserve several days plus a power-loss test.

    Can an app replace local control?

    An app is useful for history and alerts. Critical regulation should continue safely when the phone, router or cloud service is unavailable.

    What should I record?

    Record device model, installation date, set points, probe location, baseline readings and the result of outage or disconnection tests. Those notes make later troubleshooting much faster.

  • Reptile misting system drainage: build it before adding more nozzles

    Reptile misting system drainage: build it before adding more nozzles

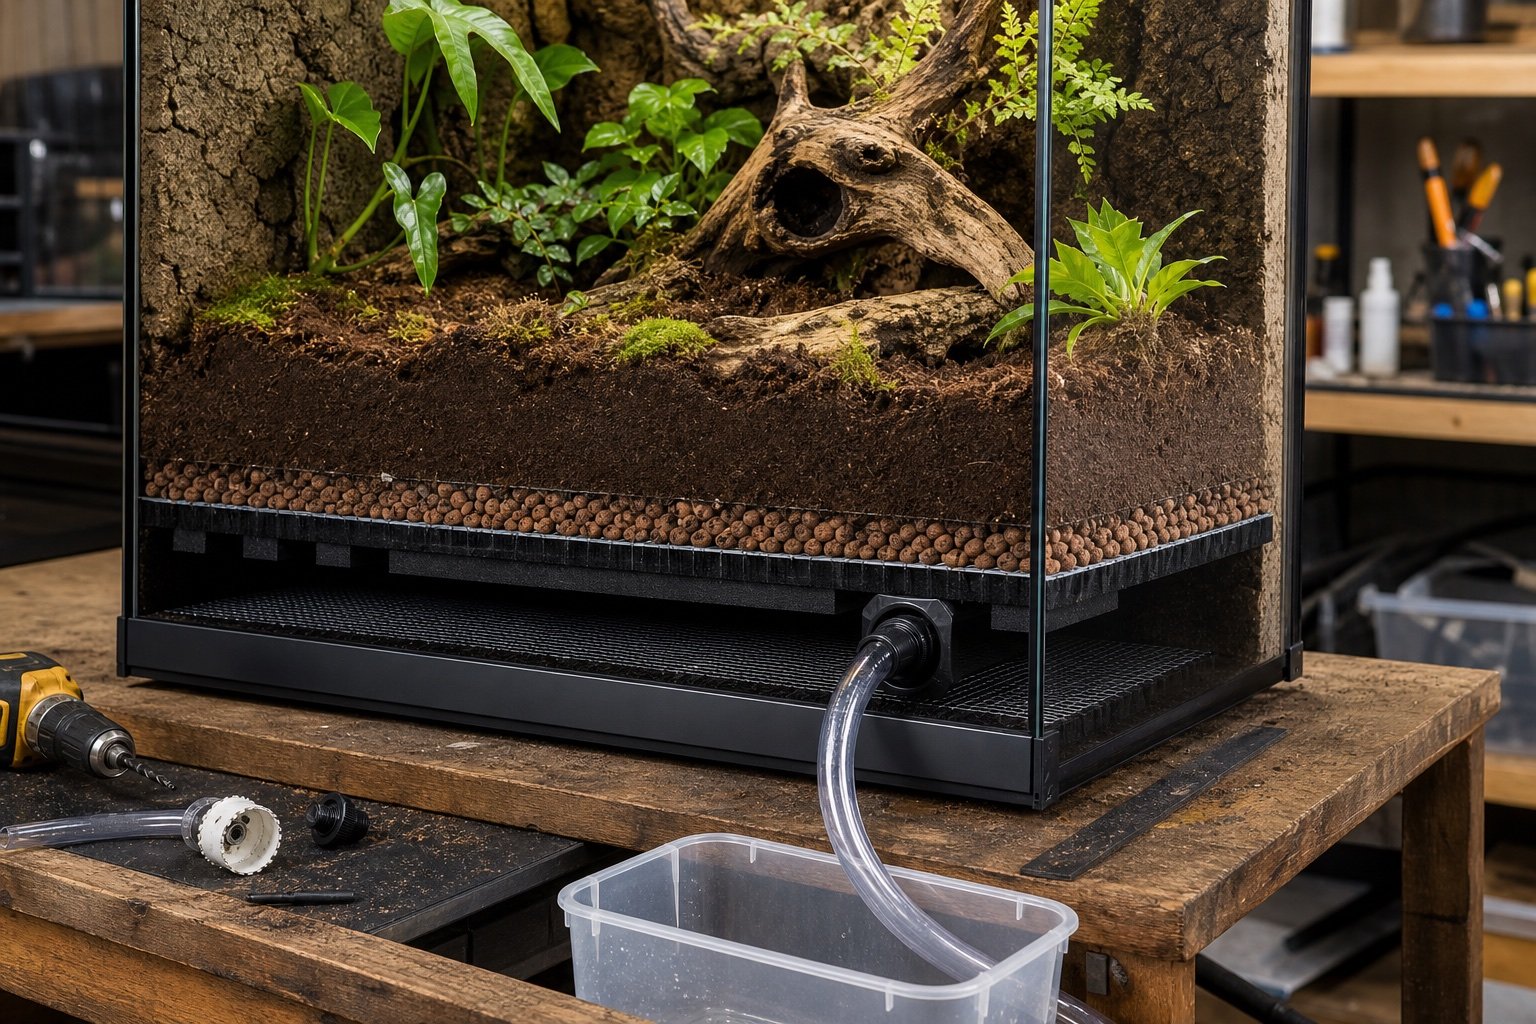
    Quick verdict: Drainage should be designed before the pump and nozzles. A safe system gives excess water a predictable route, keeps substrate out of plumbing, allows inspection and holds more than the worst plausible daily volume.

    Reptile misting system drainage: build it before adding more nozzles is a narrow buying and setup question, so this guide stays focused on that job. It does not repeat our broader category pages. The aim is to help you choose, install and verify the equipment without turning one convenient device into a single point of failure.

    What matters in this comparison

    Factor Option or result Why it matters
    False bottom Creates storage space Needs access and overflow plan
    Bulkhead drain Moves water out continuously Requires careful drilling and seal
    Removable catch tray Easy to inspect Limited capacity
    Planted substrate Buffers small cycles Not a substitute for drainage

    Specifications are useful for screening products, but enclosure performance depends on placement. Room temperature, ventilation, mesh, substrate moisture and animal access can move the result far from a brochure figure. Work from a measured baseline and change one variable at a time.

    How to set it up

    1. Measure daily input

    Catch nozzle output for a timed cycle. Test the result under normal enclosure conditions and write down what you observed. A setting that works on an empty bench can behave differently after decor, ventilation and daily room changes are added.

    2. Add failure margin

    Size for a stuck cycle or missed emptying. Test the result under normal enclosure conditions and write down what you observed. A setting that works on an empty bench can behave differently after decor, ventilation and daily room changes are added.

    3. Protect the drain

    Use mesh and a serviceable prefilter. Test the result under normal enclosure conditions and write down what you observed. A setting that works on an empty bench can behave differently after decor, ventilation and daily room changes are added.

    4. Leak test with plain water

    Run longer than the normal schedule. Test the result under normal enclosure conditions and write down what you observed. A setting that works on an empty bench can behave differently after decor, ventilation and daily room changes are added.

    5. Mark a maximum level

    Make inspection part of daily rounds. Test the result under normal enclosure conditions and write down what you observed. A setting that works on an empty bench can behave differently after decor, ventilation and daily room changes are added.

    What ownership looks like after the first week

    The first week should be treated as commissioning, not proof that the system will remain stable. Check the morning minimum, daytime peak and the transition between them. Look for loose probes, wet connectors, drifting clocks, blocked vents and any behavior that suggests the animal cannot use the intended zone.

    After the setup settles, use a short written routine. A glance at the device is not enough. Compare it with an independent instrument, inspect cables and mounts, and review stored history when available. Replace consumable parts based on condition and verified performance rather than memory.

    Common mistakes

    • Sealing a false bottom with no access
    • Letting roots block the only outlet
    • Running tubing uphill without checking siphon behavior
    • Putting the catch container above electrical strips
    • Assuming evaporation will remove all added water

    Who this approach suits

    This approach suits keepers who want a system that another person can understand during a holiday or emergency. It also scales better across several enclosures because labels, baseline readings and failure tests remove guesswork. If a device requires constant manual correction, the installation needs work even when its feature list looks impressive.

    How to verify the result in a real enclosure

    Water automation must be checked as a complete loop: clean reservoir, pump, tubing, nozzle, enclosure surfaces and drainage. Time one cycle into a measuring jug before installation. Multiply that volume by daily cycles and nozzle count, then compare it with drainage capacity. This simple calculation exposes undersized catch containers before they overflow.

    Observe how fast leaves and walls dry after spraying. The useful wet period depends on species and ventilation, but standing water that never clears is a maintenance warning. Adjust nozzle direction and cycle length before increasing frequency. Shorter cycles are not automatically safer if they occur so often that the habitat never dries.

    A practical seven-day check

    1. Day one: photograph positions, record room conditions and capture baseline readings.
    2. Day two: review the full day-night transition and check that schedules occurred at the intended local time.
    3. Day three: inspect mounts, probe restraints, plugs, tubing and any area exposed to moisture.
    4. Day four: compare the main reading with an independent instrument placed beside it long enough to stabilize.
    5. Day five: review animal access and behavior. Confirm that equipment does not block hides, climbing routes or the cool zone.
    6. Day six: simulate one safe failure, such as a short internet loss or power interruption, then check recovery.
    7. Day seven: save the final settings and observations in the enclosure record.

    Repeat the short version of this audit after major cleaning, seasonal room changes or equipment replacement. The point is not constant tinkering. It is catching the few changes that can quietly alter a previously stable habitat.

    Related Reptile Tech Lab guides

    Frequently asked questions

    Should I rely on the built-in display?

    No. Use a separate thermometer, hygrometer, light meter or logger appropriate to the job. Independent verification catches probe movement and controller errors.

    How long should I test before animals or eggs depend on it?

    At least one complete day-night cycle, and longer for equipment affected by room weather or water use. Incubation and emergency systems deserve several days plus a power-loss test.

    Can an app replace local control?

    An app is useful for history and alerts. Critical regulation should continue safely when the phone, router or cloud service is unavailable.

    What should I record?

    Record device model, installation date, set points, probe location, baseline readings and the result of outage or disconnection tests. Those notes make later troubleshooting much faster.

  • Reptile fogger vs mister: humidity, droplets and the problems each solves

    Reptile fogger vs mister: humidity, droplets and the problems each solves

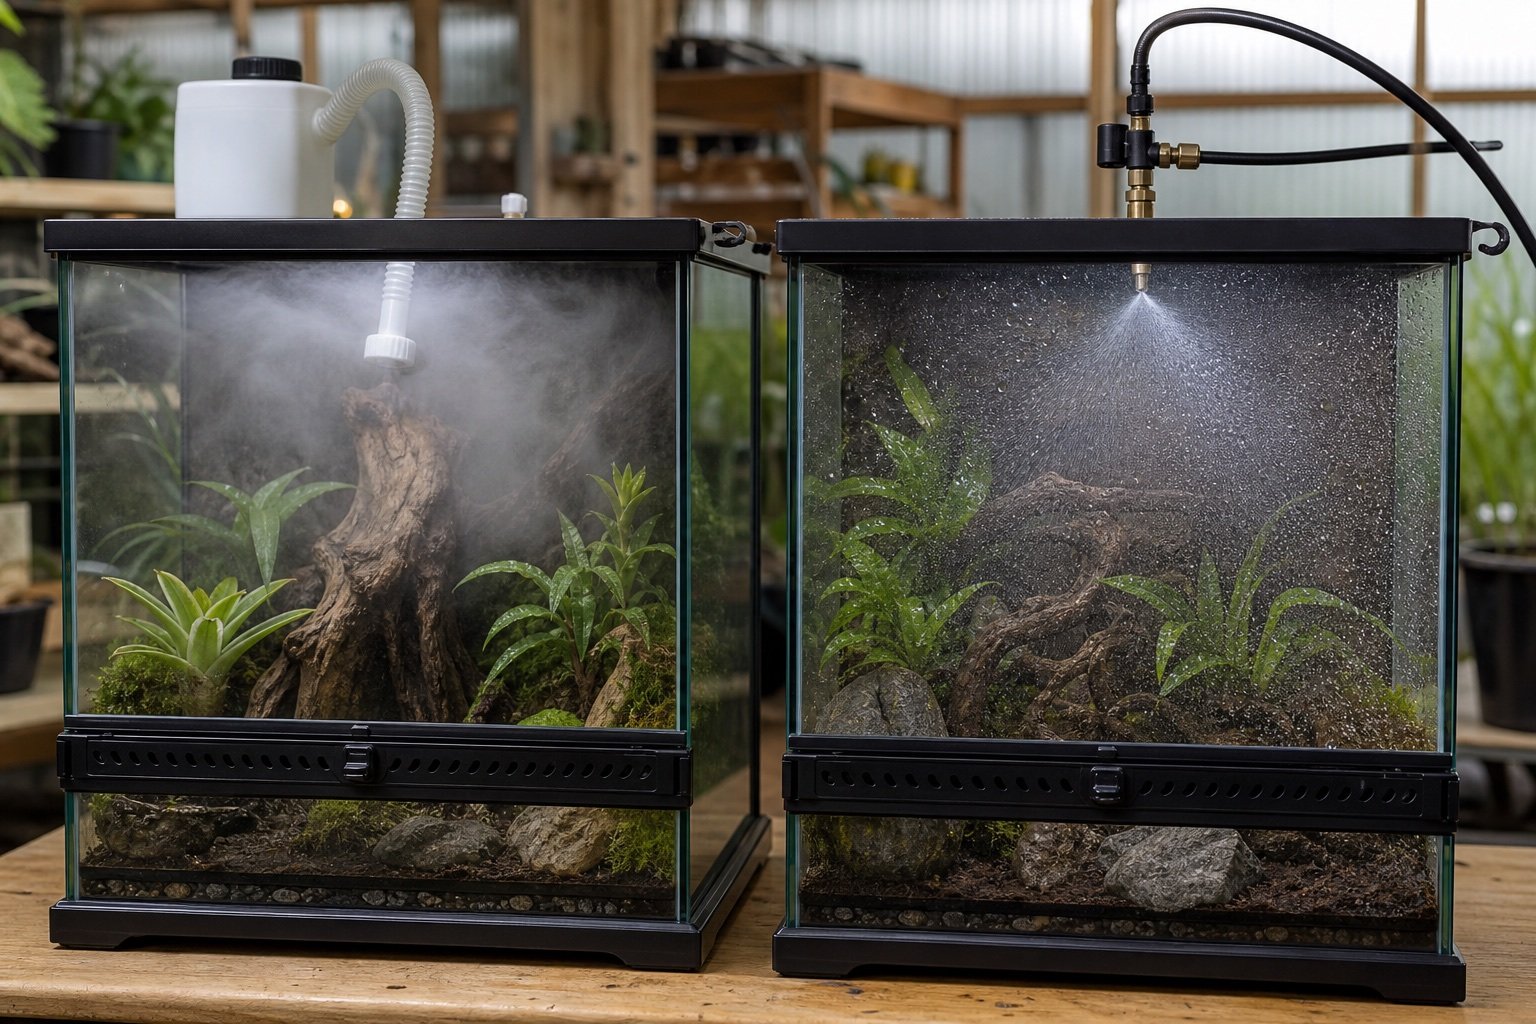
    Quick verdict: A mister wets surfaces with larger droplets and can support drinking, plant watering and short humidity peaks. A fogger suspends very fine droplets and is better for controlled atmospheric humidity. Neither fixes poor ventilation, and both require cleaning.

    Reptile fogger vs mister: humidity, droplets and the problems each solves is a narrow buying and setup question, so this guide stays focused on that job. It does not repeat our broader category pages. The aim is to help you choose, install and verify the equipment without turning one convenient device into a single point of failure.

    What matters in this comparison

    Factor Option or result Why it matters
    Droplet effect Wets leaves and decor Hangs in air
    Best job Drinking and wet-dry cycles Short atmospheric humidity periods
    Water load Higher on substrate Can condense in cool areas
    Sanitation Nozzles and reservoir Reservoir, hose and transducer

    Specifications are useful for screening products, but enclosure performance depends on placement. Room temperature, ventilation, mesh, substrate moisture and animal access can move the result far from a brochure figure. Work from a measured baseline and change one variable at a time.

    How to set it up

    1. Measure the problem

    Log humidity before adding equipment. Test the result under normal enclosure conditions and write down what you observed. A setting that works on an empty bench can behave differently after decor, ventilation and daily room changes are added.

    2. Check species behavior

    Some reptiles drink droplets, others do not. Test the result under normal enclosure conditions and write down what you observed. A setting that works on an empty bench can behave differently after decor, ventilation and daily room changes are added.

    3. Protect airflow

    Humidity without exchange becomes stagnant. Test the result under normal enclosure conditions and write down what you observed. A setting that works on an empty bench can behave differently after decor, ventilation and daily room changes are added.

    4. Use clean water

    Follow manufacturer guidance. Test the result under normal enclosure conditions and write down what you observed. A setting that works on an empty bench can behave differently after decor, ventilation and daily room changes are added.

    5. Inspect after each cycle

    Look for standing water and condensation. Test the result under normal enclosure conditions and write down what you observed. A setting that works on an empty bench can behave differently after decor, ventilation and daily room changes are added.

    What ownership looks like after the first week

    The first week should be treated as commissioning, not proof that the system will remain stable. Check the morning minimum, daytime peak and the transition between them. Look for loose probes, wet connectors, drifting clocks, blocked vents and any behavior that suggests the animal cannot use the intended zone.

    After the setup settles, use a short written routine. A glance at the device is not enough. Compare it with an independent instrument, inspect cables and mounts, and review stored history when available. Replace consumable parts based on condition and verified performance rather than memory.

    Common mistakes

    • Running fog continuously
    • Using a mister to compensate for saturated substrate
    • Blowing fog directly into an animal hide
    • Ignoring bacterial film in hoses
    • Automating before observing one manual cycle

    Who this approach suits

    This approach suits keepers who want a system that another person can understand during a holiday or emergency. It also scales better across several enclosures because labels, baseline readings and failure tests remove guesswork. If a device requires constant manual correction, the installation needs work even when its feature list looks impressive.

    How to verify the result in a real enclosure

    Water automation must be checked as a complete loop: clean reservoir, pump, tubing, nozzle, enclosure surfaces and drainage. Time one cycle into a measuring jug before installation. Multiply that volume by daily cycles and nozzle count, then compare it with drainage capacity. This simple calculation exposes undersized catch containers before they overflow.

    Observe how fast leaves and walls dry after spraying. The useful wet period depends on species and ventilation, but standing water that never clears is a maintenance warning. Adjust nozzle direction and cycle length before increasing frequency. Shorter cycles are not automatically safer if they occur so often that the habitat never dries.

    A practical seven-day check

    1. Day one: photograph positions, record room conditions and capture baseline readings.
    2. Day two: review the full day-night transition and check that schedules occurred at the intended local time.
    3. Day three: inspect mounts, probe restraints, plugs, tubing and any area exposed to moisture.
    4. Day four: compare the main reading with an independent instrument placed beside it long enough to stabilize.
    5. Day five: review animal access and behavior. Confirm that equipment does not block hides, climbing routes or the cool zone.
    6. Day six: simulate one safe failure, such as a short internet loss or power interruption, then check recovery.
    7. Day seven: save the final settings and observations in the enclosure record.

    Repeat the short version of this audit after major cleaning, seasonal room changes or equipment replacement. The point is not constant tinkering. It is catching the few changes that can quietly alter a previously stable habitat.

    Related Reptile Tech Lab guides

    Frequently asked questions

    Should I rely on the built-in display?

    No. Use a separate thermometer, hygrometer, light meter or logger appropriate to the job. Independent verification catches probe movement and controller errors.

    How long should I test before animals or eggs depend on it?

    At least one complete day-night cycle, and longer for equipment affected by room weather or water use. Incubation and emergency systems deserve several days plus a power-loss test.

    Can an app replace local control?

    An app is useful for history and alerts. Critical regulation should continue safely when the phone, router or cloud service is unavailable.

    What should I record?

    Record device model, installation date, set points, probe location, baseline readings and the result of outage or disconnection tests. Those notes make later troubleshooting much faster.

  • MistKing vs Exo Terra Monsoon: which misting system scales better?

    MistKing vs Exo Terra Monsoon: which misting system scales better?

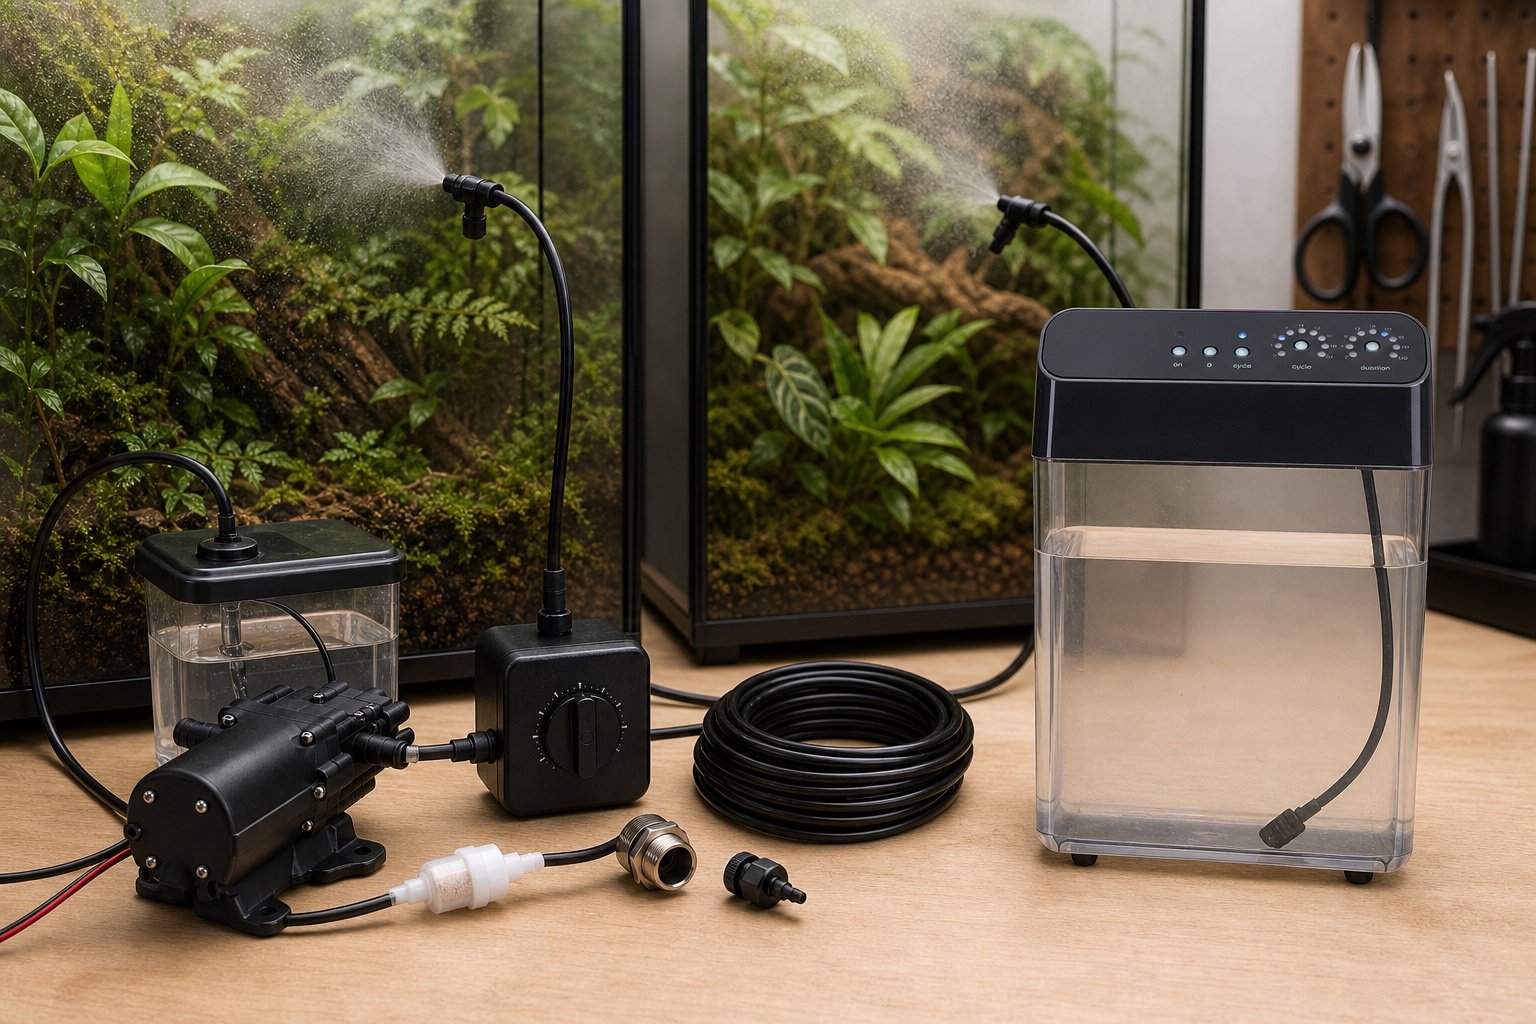
    Quick verdict: MistKing is the better platform for expansion, custom reservoirs and multi-enclosure plumbing. Exo Terra Monsoon Multi II is simpler when an integrated 8 L tank and a small number of nozzles fit the job. The decision is scale and serviceability, not spray appearance.

    MistKing vs Exo Terra Monsoon: which misting system scales better? is a narrow buying and setup question, so this guide stays focused on that job. It does not repeat our broader category pages. The aim is to help you choose, install and verify the equipment without turning one convenient device into a single point of failure.

    What matters in this comparison

    Factor Option or result Why it matters
    Reservoir User supplied on Starter kit Integrated 8 L
    Starter nozzles One Two
    Expansion Strong platform, pump supports more Up to six nozzles
    Timer Separate ST-24 in common kit Built into unit

    Specifications are useful for screening products, but enclosure performance depends on placement. Room temperature, ventilation, mesh, substrate moisture and animal access can move the result far from a brochure figure. Work from a measured baseline and change one variable at a time.

    How to set it up

    1. Draw the plumbing plan

    Count nozzles and line length before buying. Test the result under normal enclosure conditions and write down what you observed. A setting that works on an empty bench can behave differently after decor, ventilation and daily room changes are added.

    2. Decide reservoir location

    Access for cleaning matters. Test the result under normal enclosure conditions and write down what you observed. A setting that works on an empty bench can behave differently after decor, ventilation and daily room changes are added.

    3. Build drainage

    Every added nozzle adds water. Test the result under normal enclosure conditions and write down what you observed. A setting that works on an empty bench can behave differently after decor, ventilation and daily room changes are added.

    4. Test equal output

    Catch each nozzle for the same timed cycle. Test the result under normal enclosure conditions and write down what you observed. A setting that works on an empty bench can behave differently after decor, ventilation and daily room changes are added.

    5. Keep spares

    A plug, union and clean nozzle solve common failures. Test the result under normal enclosure conditions and write down what you observed. A setting that works on an empty bench can behave differently after decor, ventilation and daily room changes are added.

    What ownership looks like after the first week

    The first week should be treated as commissioning, not proof that the system will remain stable. Check the morning minimum, daytime peak and the transition between them. Look for loose probes, wet connectors, drifting clocks, blocked vents and any behavior that suggests the animal cannot use the intended zone.

    After the setup settles, use a short written routine. A glance at the device is not enough. Compare it with an independent instrument, inspect cables and mounts, and review stored history when available. Replace consumable parts based on condition and verified performance rather than memory.

    Common mistakes

    • Comparing kit prices without reservoir parts
    • Assuming more pressure fixes clogged nozzles
    • Skipping a drainage calculation
    • Mixing tubing sizes casually
    • Mounting the pump where vibration amplifies noise

    Who this approach suits

    This approach suits keepers who want a system that another person can understand during a holiday or emergency. It also scales better across several enclosures because labels, baseline readings and failure tests remove guesswork. If a device requires constant manual correction, the installation needs work even when its feature list looks impressive.

    How to verify the result in a real enclosure

    Water automation must be checked as a complete loop: clean reservoir, pump, tubing, nozzle, enclosure surfaces and drainage. Time one cycle into a measuring jug before installation. Multiply that volume by daily cycles and nozzle count, then compare it with drainage capacity. This simple calculation exposes undersized catch containers before they overflow.

    Observe how fast leaves and walls dry after spraying. The useful wet period depends on species and ventilation, but standing water that never clears is a maintenance warning. Adjust nozzle direction and cycle length before increasing frequency. Shorter cycles are not automatically safer if they occur so often that the habitat never dries.

    A practical seven-day check

    1. Day one: photograph positions, record room conditions and capture baseline readings.
    2. Day two: review the full day-night transition and check that schedules occurred at the intended local time.
    3. Day three: inspect mounts, probe restraints, plugs, tubing and any area exposed to moisture.
    4. Day four: compare the main reading with an independent instrument placed beside it long enough to stabilize.
    5. Day five: review animal access and behavior. Confirm that equipment does not block hides, climbing routes or the cool zone.
    6. Day six: simulate one safe failure, such as a short internet loss or power interruption, then check recovery.
    7. Day seven: save the final settings and observations in the enclosure record.

    Repeat the short version of this audit after major cleaning, seasonal room changes or equipment replacement. The point is not constant tinkering. It is catching the few changes that can quietly alter a previously stable habitat.

    Related Reptile Tech Lab guides

    Frequently asked questions

    Should I rely on the built-in display?

    No. Use a separate thermometer, hygrometer, light meter or logger appropriate to the job. Independent verification catches probe movement and controller errors.

    How long should I test before animals or eggs depend on it?

    At least one complete day-night cycle, and longer for equipment affected by room weather or water use. Incubation and emergency systems deserve several days plus a power-loss test.

    Can an app replace local control?

    An app is useful for history and alerts. Critical regulation should continue safely when the phone, router or cloud service is unavailable.

    What should I record?

    Record device model, installation date, set points, probe location, baseline readings and the result of outage or disconnection tests. Those notes make later troubleshooting much faster.

  • Exo Terra Monsoon Multi II review: pressure, programming and maintenance

    Exo Terra Monsoon Multi II review: pressure, programming and maintenance

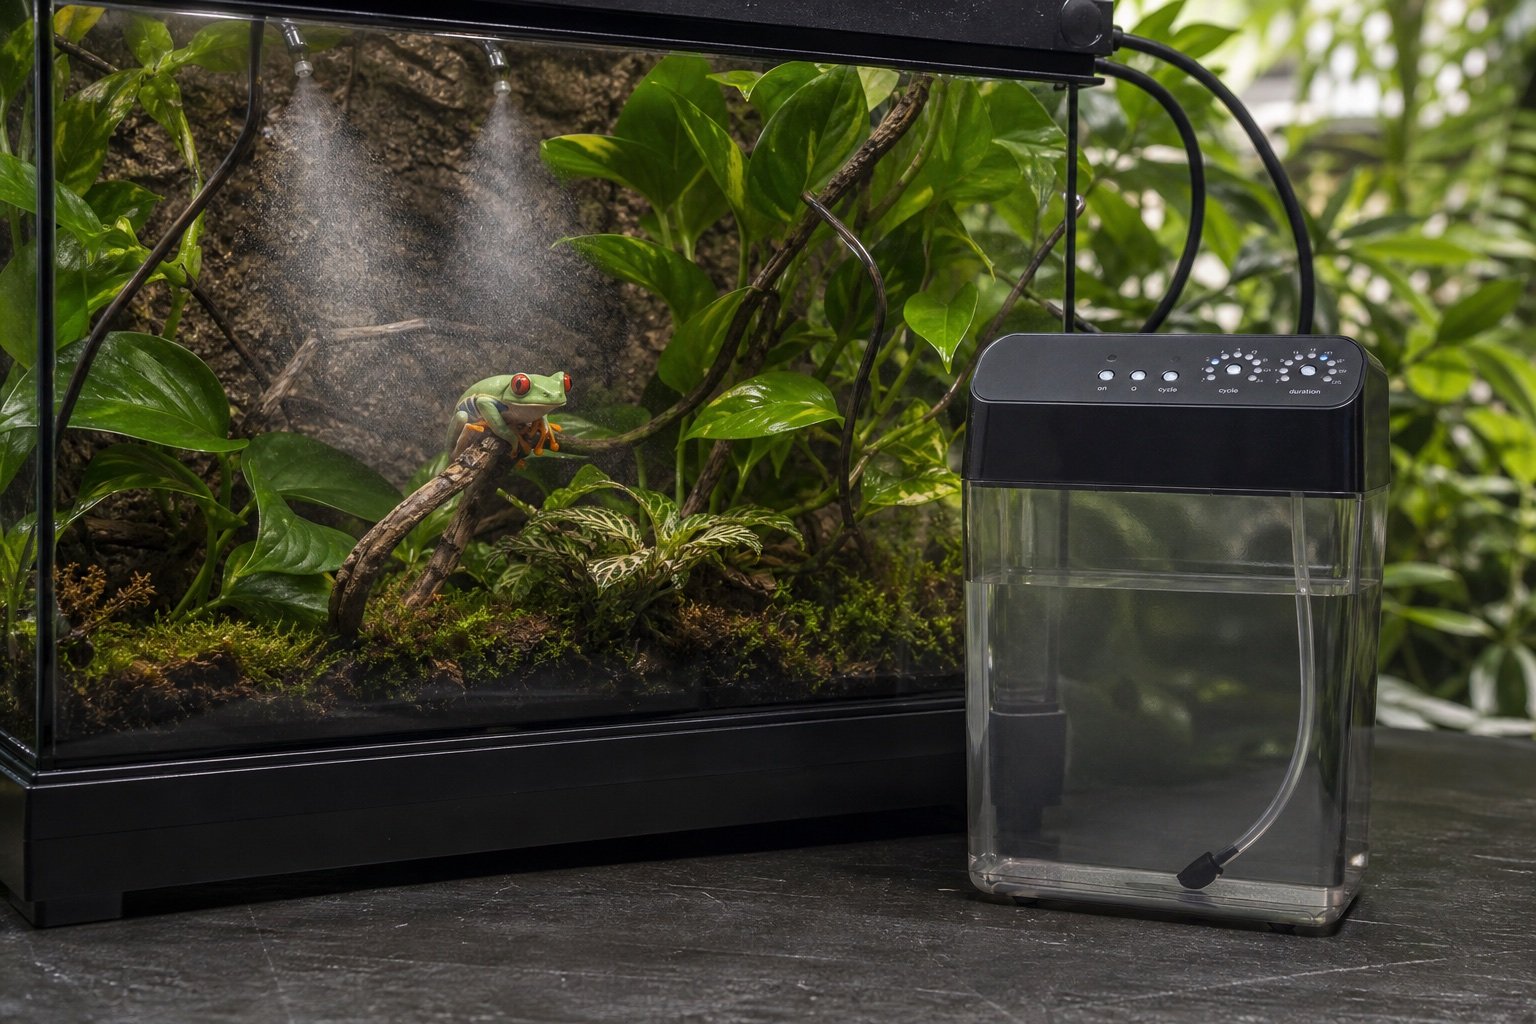
    Quick verdict: The Monsoon Multi II is a tidy all-in-one option for one enclosure or a small group. Its 8 L reservoir, two included nozzles and expansion to six make setup approachable. Large racks and long lines expose the limits of an integrated consumer system.

    Exo Terra Monsoon Multi II review: pressure, programming and maintenance is a narrow buying and setup question, so this guide stays focused on that job. It does not repeat our broader category pages. The aim is to help you choose, install and verify the equipment without turning one convenient device into a single point of failure.

    What matters in this comparison

    Factor Option or result Why it matters
    Pressure 4.5 bar, 65.25 PSI Adequate for included fine nozzles
    Reservoir 8 L Convenient integrated tank
    Included nozzles Two Enough for a basic start
    Expansion Up to six nozzles Plan equal line lengths

    Specifications are useful for screening products, but enclosure performance depends on placement. Room temperature, ventilation, mesh, substrate moisture and animal access can move the result far from a brochure figure. Work from a measured baseline and change one variable at a time.

    How to set it up

    1. Rinse the reservoir

    Remove manufacturing dust. Test the result under normal enclosure conditions and write down what you observed. A setting that works on an empty bench can behave differently after decor, ventilation and daily room changes are added.

    2. Cut tubing square

    Poor cuts cause connector leaks. Test the result under normal enclosure conditions and write down what you observed. A setting that works on an empty bench can behave differently after decor, ventilation and daily room changes are added.

    3. Route a drip loop

    Keep water below electrical connections. Test the result under normal enclosure conditions and write down what you observed. A setting that works on an empty bench can behave differently after decor, ventilation and daily room changes are added.

    4. Prime with no animals inside

    Catch leaks before substrate is soaked. Test the result under normal enclosure conditions and write down what you observed. A setting that works on an empty bench can behave differently after decor, ventilation and daily room changes are added.

    5. Add drainage first

    Use our drainage guide. Test the result under normal enclosure conditions and write down what you observed. A setting that works on an empty bench can behave differently after decor, ventilation and daily room changes are added.

    What ownership looks like after the first week

    The first week should be treated as commissioning, not proof that the system will remain stable. Check the morning minimum, daytime peak and the transition between them. Look for loose probes, wet connectors, drifting clocks, blocked vents and any behavior that suggests the animal cannot use the intended zone.

    After the setup settles, use a short written routine. A glance at the device is not enough. Compare it with an independent instrument, inspect cables and mounts, and review stored history when available. Replace consumable parts based on condition and verified performance rather than memory.

    Common mistakes

    • Running the reservoir dry
    • Using mineral-heavy tap water
    • Pointing nozzles at electronics or sensors
    • Adding six nozzles without checking spray balance
    • Letting stagnant water sit between cleanings

    Who this approach suits

    This approach suits keepers who want a system that another person can understand during a holiday or emergency. It also scales better across several enclosures because labels, baseline readings and failure tests remove guesswork. If a device requires constant manual correction, the installation needs work even when its feature list looks impressive.

    How to verify the result in a real enclosure

    Water automation must be checked as a complete loop: clean reservoir, pump, tubing, nozzle, enclosure surfaces and drainage. Time one cycle into a measuring jug before installation. Multiply that volume by daily cycles and nozzle count, then compare it with drainage capacity. This simple calculation exposes undersized catch containers before they overflow.

    Observe how fast leaves and walls dry after spraying. The useful wet period depends on species and ventilation, but standing water that never clears is a maintenance warning. Adjust nozzle direction and cycle length before increasing frequency. Shorter cycles are not automatically safer if they occur so often that the habitat never dries.

    A practical seven-day check

    1. Day one: photograph positions, record room conditions and capture baseline readings.
    2. Day two: review the full day-night transition and check that schedules occurred at the intended local time.
    3. Day three: inspect mounts, probe restraints, plugs, tubing and any area exposed to moisture.
    4. Day four: compare the main reading with an independent instrument placed beside it long enough to stabilize.
    5. Day five: review animal access and behavior. Confirm that equipment does not block hides, climbing routes or the cool zone.
    6. Day six: simulate one safe failure, such as a short internet loss or power interruption, then check recovery.
    7. Day seven: save the final settings and observations in the enclosure record.

    Repeat the short version of this audit after major cleaning, seasonal room changes or equipment replacement. The point is not constant tinkering. It is catching the few changes that can quietly alter a previously stable habitat.

    Related Reptile Tech Lab guides

    Frequently asked questions

    Should I rely on the built-in display?

    No. Use a separate thermometer, hygrometer, light meter or logger appropriate to the job. Independent verification catches probe movement and controller errors.

    How long should I test before animals or eggs depend on it?

    At least one complete day-night cycle, and longer for equipment affected by room weather or water use. Incubation and emergency systems deserve several days plus a power-loss test.

    Can an app replace local control?

    An app is useful for history and alerts. Critical regulation should continue safely when the phone, router or cloud service is unavailable.

    What should I record?

    Record device model, installation date, set points, probe location, baseline readings and the result of outage or disconnection tests. Those notes make later troubleshooting much faster.