Category: Best

Evidence-led product and software shortlists by keeper workflow.

  • Best reptile UVB lights: choose by enclosure, distance and mesh

    Best reptile UVB lights: choose by enclosure, distance and mesh

    Quick verdict: The best reptile UVB light is not the tube with the largest percentage on the box. It is the lamp and fixture that can deliver the target UV Index across a usable basking area after distance, mesh and reflector losses are counted.

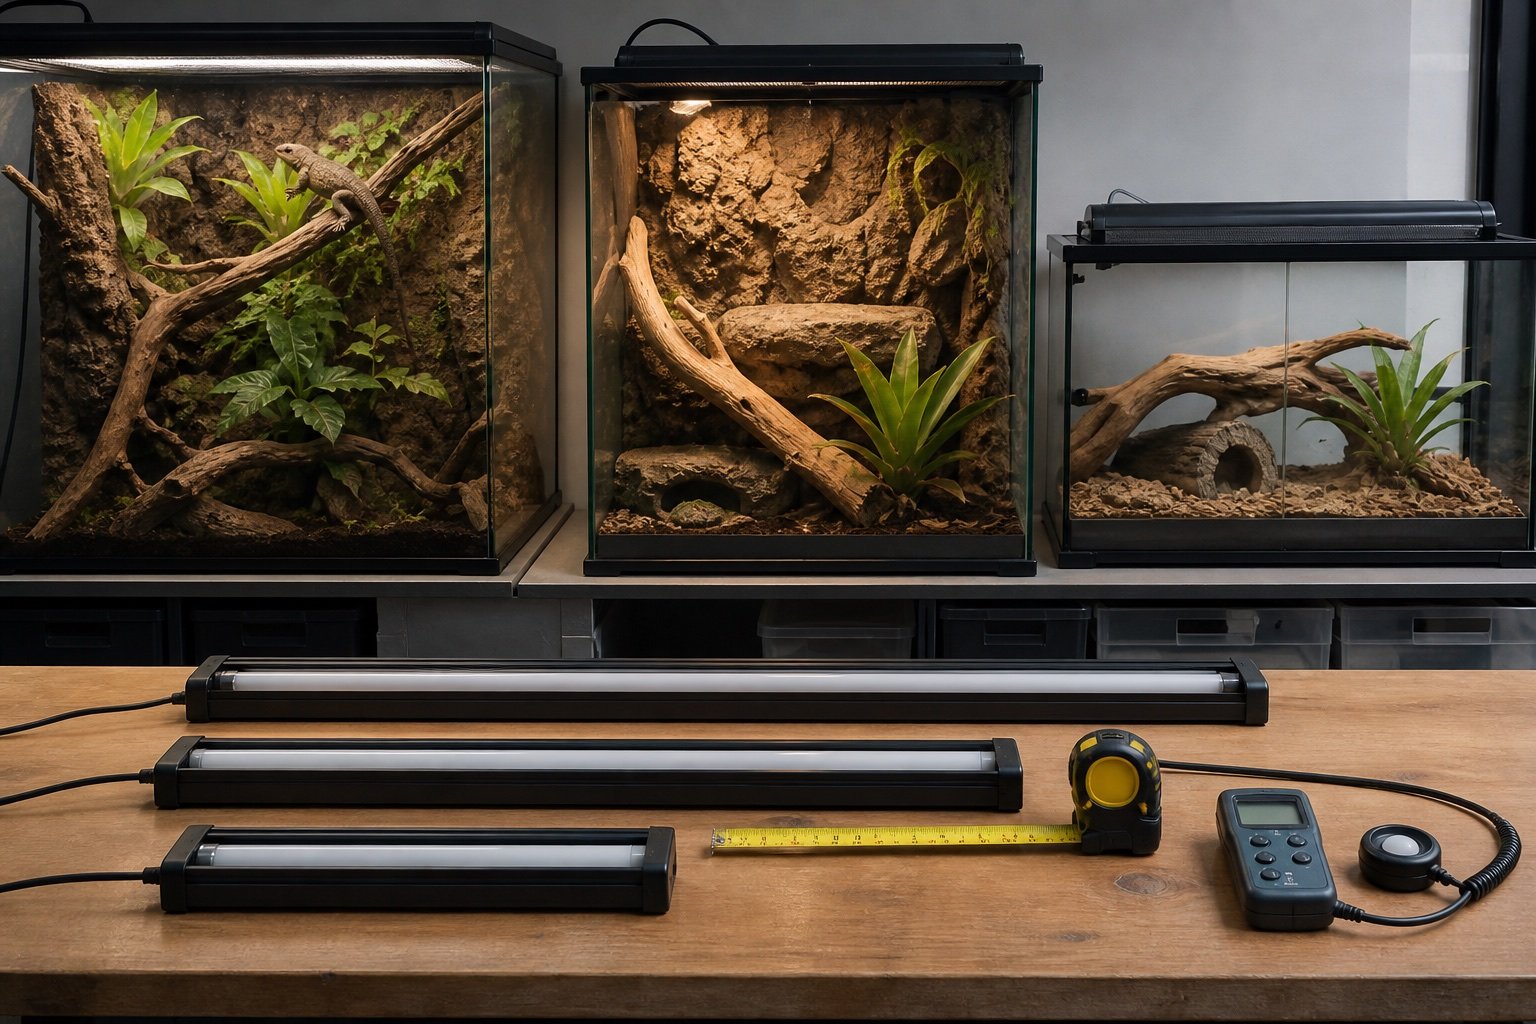
    Start with the animal, enclosure height and basking geometry. A compact forest setup and a tall desert enclosure should not use the same lamp simply because both fixtures fit the lid. Output must be measured where the reptile actually sits, not at the screen or on the product carton.

    Setup or factor Published or practical value Use
    Compact, low enclosure Low-output T5 fixture Wide, gentle usable zone
    Medium forest enclosure 6 to 7% T5 HO Good coverage with manageable distance
    Tall or desert enclosure 12 to 14% T5 HO More output headroom through distance or mesh
    Legacy shallow setup T8 tube Useful only when close and unobstructed

    Choose a target before choosing a lamp

    Use a reputable species husbandry range as the starting point, then create a gradient. The basking position should receive the intended exposure while hides and shaded routes remain available. A single high reading in the middle is less useful than a broad, repeatable zone the animal can enter and leave.

    Fixture and reflector matter

    Two tubes carrying the same percentage can produce different results when reflector shape, fixture temperature and tube age change. Buy the complete fixture when possible, mount it exactly as tested, and do not assume a bare tube behaves like a kit with a shaped reflector.

    Mesh changes the calculation

    Screen density, wire thickness and lamp angle all affect transmission. Published figures are useful for planning, but the final number should be checked below your own lid. Our guide to UVB through mesh explains a repeatable measurement method.

    Measure the basking zone

    A Solarmeter 6.5R reads UV Index, which is the most practical value for enclosure work. Map several points across the basking surface, record the lamp age and repeat after any change to the lid, branch or fixture.

    Replacement is based on output, not the calendar alone

    Tube aging is gradual. Mark the installation date, keep a baseline map, and retest at consistent distances. Replace when the useful zone can no longer reach its target without forcing the animal dangerously close.

    A commissioning routine that catches mistakes

    Assemble and run the system before the animal depends on it. Photograph the final positions, label cables, and compare the working zone with an independent instrument. Test one normal day, one night transition and a short power interruption. The goal is not a perfectly flat chart. It is a stable, understandable gradient with safe recovery.

    Recheck after cleaning because fixtures, probes and branches rarely return to the exact same position by accident. A two-minute baseline check is cheaper than troubleshooting weeks of unexplained behavior.

    Common mistakes

    • Buying by UVB percentage alone
    • Measuring above the screen instead of at the animal
    • Creating a tiny hot spot with no usable gradient
    • Moving decor without retesting lamp distance
    • Running UVB all night instead of using a reliable light timer

    How to verify the result in a real enclosure

    Lighting work becomes much easier when the enclosure is treated as a map rather than a box with one reading. Mark the basking center, both edges of the perch, the warm hide entrance and the darkest retreat. Take measurements at the height of the animal’s back. This reveals whether the reptile can make small choices instead of moving between two extremes.

    Visible light, UVB and heat overlap during the day, but each should be evaluated separately. A bright enclosure can still have weak UVB, and a strong UVB fixture does not create the correct basking surface temperature. Keep the lighting schedule consistent, control heat with suitable hardware, and change only one part before repeating the map.

    A practical seven-day check

    1. Day one: photograph positions, record room conditions and capture baseline readings.
    2. Day two: review the full day-night transition and check that schedules occurred at the intended local time.
    3. Day three: inspect mounts, probe restraints, plugs, tubing and any area exposed to moisture.
    4. Day four: compare the main reading with an independent instrument placed beside it long enough to stabilize.
    5. Day five: review animal access and behavior. Confirm that equipment does not block hides, climbing routes or the cool zone.
    6. Day six: simulate one safe failure, such as a short internet loss or power interruption, then check recovery.
    7. Day seven: save the final settings and observations in the enclosure record.

    Repeat the short version of this audit after major cleaning, seasonal room changes or equipment replacement. The point is not constant tinkering. It is catching the few changes that can quietly alter a previously stable habitat.

    Related Reptile Tech Lab guides

    Frequently asked questions

    Is T5 always better than T8?

    No. T5 HO offers more output and distance headroom, but a close, unobstructed T8 can still suit some shallow setups. Compare them in our T5 vs T8 guide.

    Can glass sit between the lamp and reptile?

    Ordinary glass blocks most useful UVB. The lamp needs an open or UV-transmitting path designed for the job.

    How long should UVB stay on?

    Match the visible daytime period, commonly controlled as one consistent lighting schedule. Species and seasonal plans can differ.

    Which fixture should I shortlist?

    The Arcadia ProT5 is a strong general option, while the ShadeDweller ProT5 targets lower-light, compact setups.
  • Best reptile light timers: simple controls that keep the day consistent

    Best reptile light timers: simple controls that keep the day consistent

    Quick verdict: A dependable timer should run the light schedule locally, recover predictably after an outage and handle the connected load with margin. For a simple UVB and daylight circuit, reliability matters more than a crowded app.

    Best reptile light timers: simple controls that keep the day consistent is a narrow buying and setup question, so this guide stays focused on that job. It does not repeat our broader category pages. The aim is to help you choose, install and verify the equipment without turning one convenient device into a single point of failure.

    What matters in this comparison

    Factor Option or result Why it matters
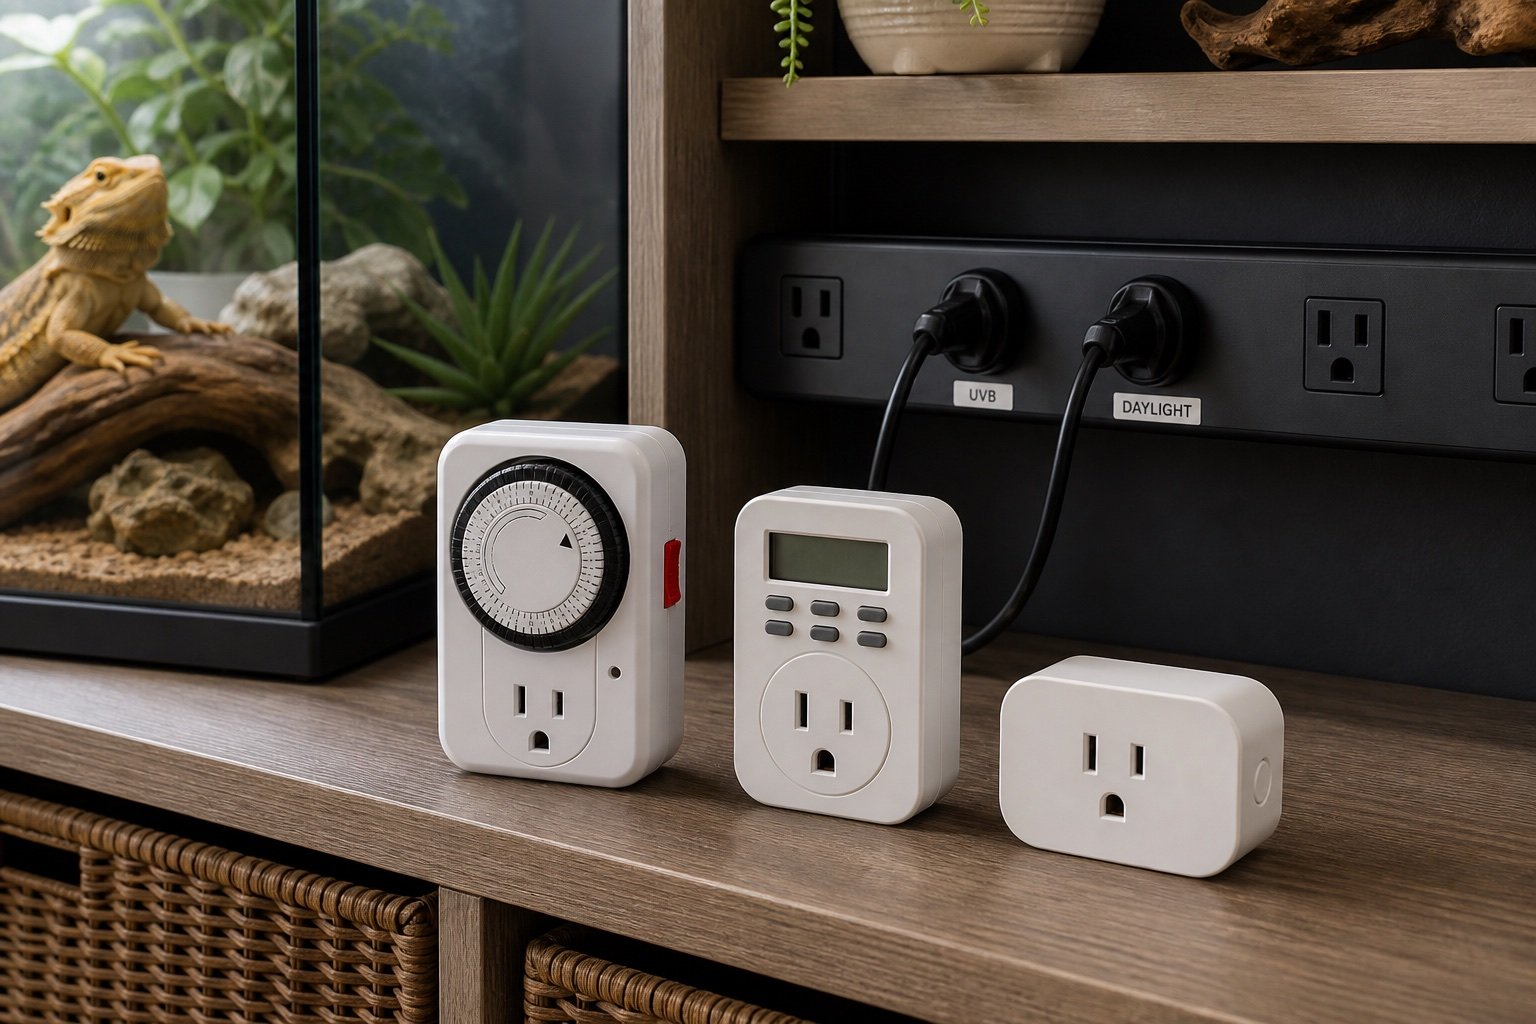
    Analog timer Simple and local Can drift and loses position during long outages
    Digital timer Precise weekly schedules Small controls and battery behavior vary
    Smart plug Remote status and energy data Wi-Fi and app add failure points
    Terrarium power center Several labeled outlets Bulky and load limits still apply

    Specifications are useful for screening products, but enclosure performance depends on placement. Room temperature, ventilation, mesh, substrate moisture and animal access can move the result far from a brochure figure. Work from a measured baseline and change one variable at a time.

    How to set it up

    1. Choose the circuit

    Keep thermostat-controlled heat separate from lighting. Test the result under normal enclosure conditions and write down what you observed. A setting that works on an empty bench can behave differently after decor, ventilation and daily room changes are added.

    2. Check the rating

    Add actual watts and leave margin for startup current. Test the result under normal enclosure conditions and write down what you observed. A setting that works on an empty bench can behave differently after decor, ventilation and daily room changes are added.

    3. Program off-enclosure

    Test with a desk lamp before connecting habitat lights. Test the result under normal enclosure conditions and write down what you observed. A setting that works on an empty bench can behave differently after decor, ventilation and daily room changes are added.

    4. Simulate an outage

    Unplug for ten minutes and confirm clock and schedule recovery. Test the result under normal enclosure conditions and write down what you observed. A setting that works on an empty bench can behave differently after decor, ventilation and daily room changes are added.

    5. Label manual override

    Anyone caring for the animal should understand it. Test the result under normal enclosure conditions and write down what you observed. A setting that works on an empty bench can behave differently after decor, ventilation and daily room changes are added.

    What ownership looks like after the first week

    The first week should be treated as commissioning, not proof that the system will remain stable. Check the morning minimum, daytime peak and the transition between them. Look for loose probes, wet connectors, drifting clocks, blocked vents and any behavior that suggests the animal cannot use the intended zone.

    After the setup settles, use a short written routine. A glance at the device is not enough. Compare it with an independent instrument, inspect cables and mounts, and review stored history when available. Replace consumable parts based on condition and verified performance rather than memory.

    Common mistakes

    • Putting critical heat on a cloud-only schedule
    • Connecting more load than the outlet or timer rating
    • Using a timer where a thermostat is required
    • Hiding the unit where water can reach it
    • Changing seasonal hours without recording the date

    Who this approach suits

    This approach suits keepers who want a system that another person can understand during a holiday or emergency. It also scales better across several enclosures because labels, baseline readings and failure tests remove guesswork. If a device requires constant manual correction, the installation needs work even when its feature list looks impressive.

    How to verify the result in a real enclosure

    Lighting work becomes much easier when the enclosure is treated as a map rather than a box with one reading. Mark the basking center, both edges of the perch, the warm hide entrance and the darkest retreat. Take measurements at the height of the animal’s back. This reveals whether the reptile can make small choices instead of moving between two extremes.

    Visible light, UVB and heat overlap during the day, but each should be evaluated separately. A bright enclosure can still have weak UVB, and a strong UVB fixture does not create the correct basking surface temperature. Keep the lighting schedule consistent, control heat with suitable hardware, and change only one part before repeating the map.

    A practical seven-day check

    1. Day one: photograph positions, record room conditions and capture baseline readings.
    2. Day two: review the full day-night transition and check that schedules occurred at the intended local time.
    3. Day three: inspect mounts, probe restraints, plugs, tubing and any area exposed to moisture.
    4. Day four: compare the main reading with an independent instrument placed beside it long enough to stabilize.
    5. Day five: review animal access and behavior. Confirm that equipment does not block hides, climbing routes or the cool zone.
    6. Day six: simulate one safe failure, such as a short internet loss or power interruption, then check recovery.
    7. Day seven: save the final settings and observations in the enclosure record.

    Repeat the short version of this audit after major cleaning, seasonal room changes or equipment replacement. The point is not constant tinkering. It is catching the few changes that can quietly alter a previously stable habitat.

    Related Reptile Tech Lab guides

    Frequently asked questions

    Should I rely on the built-in display?

    No. Use a separate thermometer, hygrometer, light meter or logger appropriate to the job. Independent verification catches probe movement and controller errors.

    How long should I test before animals or eggs depend on it?

    At least one complete day-night cycle, and longer for equipment affected by room weather or water use. Incubation and emergency systems deserve several days plus a power-loss test.

    Can an app replace local control?

    An app is useful for history and alerts. Critical regulation should continue safely when the phone, router or cloud service is unavailable.

    What should I record?

    Record device model, installation date, set points, probe location, baseline readings and the result of outage or disconnection tests. Those notes make later troubleshooting much faster.

  • Best reptile thermostats: match the controller to the heat source

    Editorial note: this guide compares controller designs, published specifications and setup risks. A thermostat is a safety device, so verify the manual, electrical rating and heater compatibility for the exact model sold in your country.

    Verdict: The best reptile thermostat is the one that matches the heat source and fails in a predictable way. Herpstat 1 SpyderWeb is the most complete single-zone option here for keepers who value proportional control, alarms and remote records. Exo Terra’s 600W Dimming and Pulse model is a practical all-round controller for a display enclosure. HabiStat’s dimming models remain a sensible match for light-emitting basking lamps, while Inkbird ITC-308 and Zoo Med ReptiTemp make more sense when simple on/off control suits the equipment.

    Do not choose from wattage or price alone. A controller can have enough electrical capacity and still use the wrong control method for the heater. Start with the heater, the animal’s required gradient and the consequence of a failed probe. Then pick the thermostat.

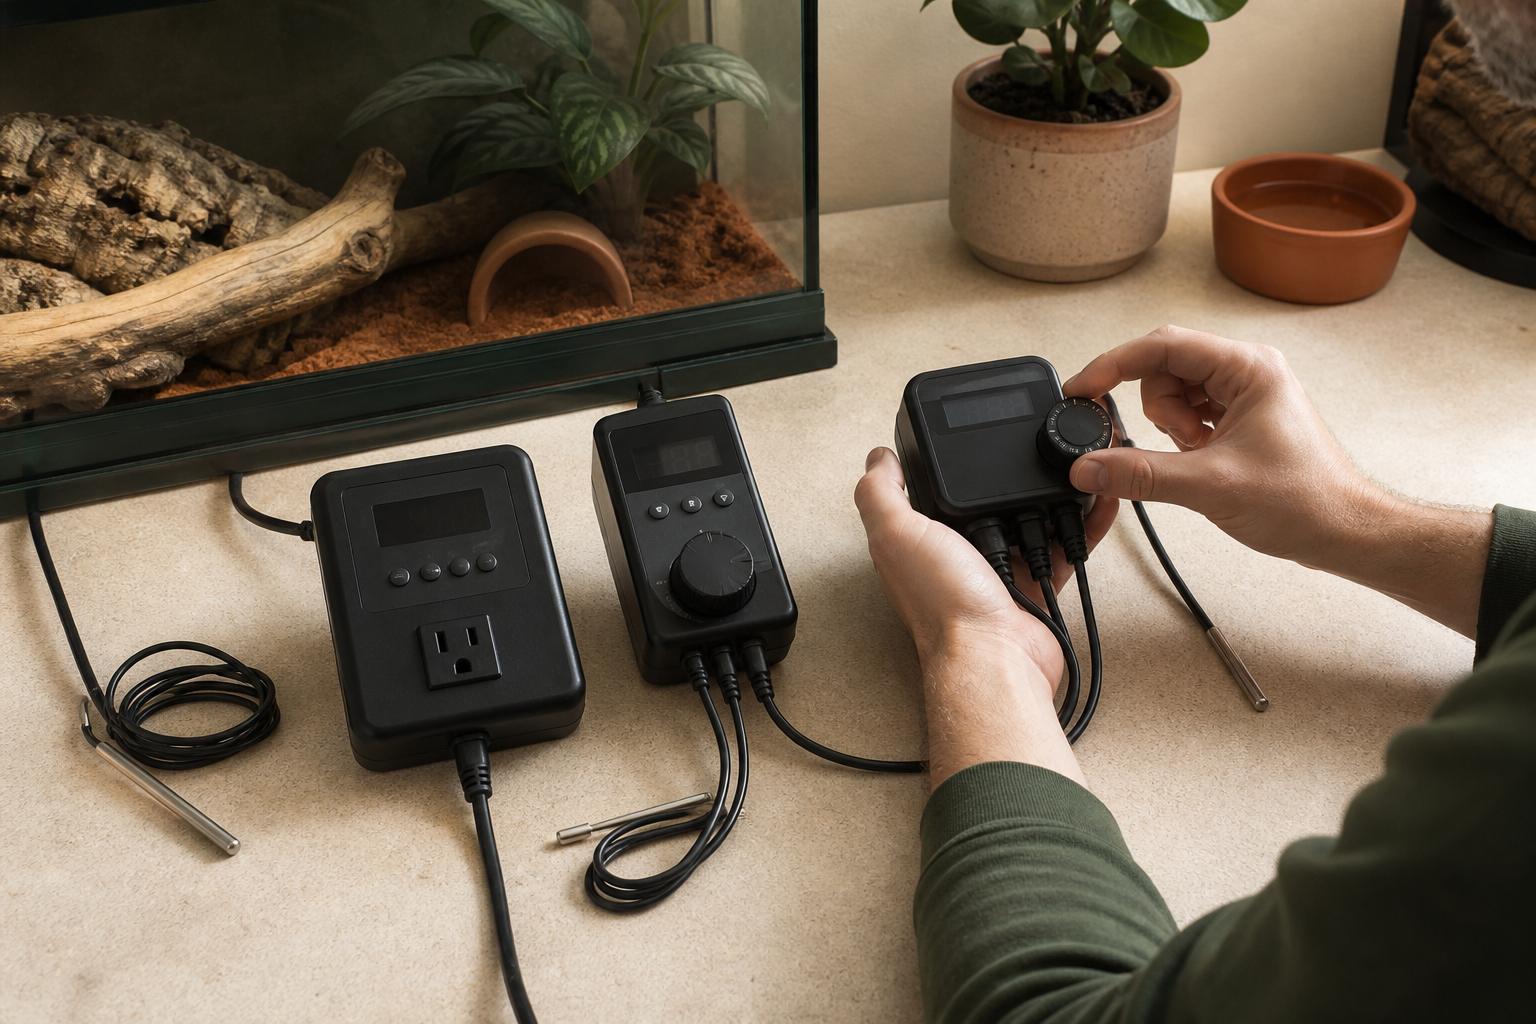
    Reptile keeper comparing thermostat controllers beside a terrarium

    Quick recommendations

    Use case Starting point Why
    Premium single enclosure Herpstat 1 SpyderWeb Proportional control, schedules, replaceable probe, audible and remote alerts, safety relay
    Mixed heat sources Exo Terra 600W Dimming and Pulse Dimming and pulse modes, day/night settings, light-sensing probe
    Visible basking lamp HabiStat dimming thermostat Smooth power adjustment designed around lamp control
    Heat mat or non-lighting load Inkbird ITC-308 or Zoo Med ReptiTemp Simple on/off control and easy plug-in setup
    Two independent enclosures A true multi-output reptile controller Separate probes and control channels prevent one enclosure from driving another

    Control type matters more than the brand name

    An on/off thermostat supplies full power until the measured temperature reaches a threshold, then removes power until the temperature falls by a set differential. That is easy to understand and works with many mats, cables, ceramic heaters and cooling fans. The thermal mass of the enclosure determines how much overshoot occurs after power stops.

    Pulse proportional control sends power in repeated pulses and changes the duty cycle as the temperature approaches the target. It can hold some non-lighting heaters more steadily than a wide on/off differential. Do not use obvious pulsing with a visible lamp unless the manufacturer explicitly supports the combination; flicker is distracting and can shorten lamp life.

    Dimming control varies power smoothly. It is usually the best fit for halogen and incandescent basking lamps because the lamp brightens and dims instead of snapping on and off. Some controllers can also run deep heat projectors or ceramic emitters, but the manual is the authority. The temperature monitoring guide explains why the thermostat’s probe and an independent thermometer do different jobs.

    Herpstat 1 SpyderWeb

    Herpstat is the strongest choice when one heat zone deserves serious monitoring. Spyder Robotics lists proportional heating, soft startup, four scheduled temperature periods, sensor matching, auto power matching, high and low tracking, a history graph, Wi-Fi viewing, outage tracking, email alerts and a separate internal safety relay. The current single-output model is rated for 700 total watts.

    The removable steel-tipped probe and user-replaceable fuse are practical ownership advantages. If a probe is damaged, the entire controller does not automatically become waste. The unit also stores settings through an outage and can shut heat off when the sensor fails or a safety condition is met.

    Complexity is the cost. Remote features depend on network setup and should never be the only alarm path. The thermostat still needs to control safely without Wi-Fi. Read the full Herpstat 1 review for schedule setup, probe calibration and the limits of remote monitoring.

    Secure thermostat probe and independent sensor inside a reptile enclosure

    Exo Terra 600W Dimming and Pulse

    Exo Terra’s 600W controller offers both dimming and pulse proportional modes, separate day and night temperatures and a 10 to 60°C range. The remote probe includes a light sensor, and the company lists compatibility with heat mats, cables, ceramic heaters and heat bulbs. That makes it flexible for a typical display enclosure where the heat source may change later.

    Mode selection still matters. Use dimming for a light-emitting basking lamp unless the manual directs otherwise. Pulse control is better suited to a non-visible heater that tolerates cycling. The controller includes memory and protection features, but you should still test power recovery with the enclosure empty and verify time, mode and setpoints after reconnecting power.

    HabiStat dimming thermostats

    HabiStat’s Classic Pro Dimming thermostat supports up to 450 watts, a detachable probe, an LCD and over- and under-temperature alarms. Other HabiStat digital day/night models are sold with higher limits and timer functions, so check the exact product name rather than assuming every black controller has the same specification.

    The dimming behavior is the main reason to buy one. A basking lamp can settle near the required output without repeated hard starts. HabiStat also describes a fast-blow fuse and safety cutout on current designs. Those protections are useful, but an independent temperature display remains necessary.

    Inkbird ITC-308

    The ITC-308 is a general-purpose dual-stage on/off controller rather than a reptile-specific proportional thermostat. It has separate heating and cooling outlets, adjustable differentials, high and low alarms, calibration and compressor delay. Inkbird lists a 10A total load and model-dependent wattage, so use the rating on the exact regional unit.

    It can be a good value for a heat mat, cabinet heater or fan. It is a poor substitute for a dimming thermostat on a visible basking lamp. The controller body and sockets are not waterproof even though Inkbird describes the probe as IP68. Mount all mains connections outside spray and condensation paths.

    The detailed Herpstat vs Inkbird comparison covers why a cheaper on/off controller and a proportional reptile controller are not direct equivalents.

    Zoo Med ReptiTemp Digital Thermostat

    Zoo Med’s RT-600 is a straightforward on/off controller with heat and cool modes, a remote probe and a 50 to 122°F control range. Zoo Med lists up to 600 watts for heating and 150 watts for cooling. It suits a keeper who wants simple controls and does not need graphs, schedules or remote alerts.

    The limitation is the same as other basic controllers: the enclosure’s response determines the temperature swing. A high-mass hide or thick substrate can continue warming after the heater switches off. Measure the actual basking surface and ambient gradient during setup.

    Probe placement decides what the controller sees

    A thermostat controls the temperature at its probe, not the animal’s body and not every point in the enclosure. Secure the probe so the animal cannot move it closer to or farther from the heater. Do not leave a loose cable that can loop around a reptile or be pulled under furniture.

    For a heat mat, place the probe where the controlled warm surface could become hottest under normal use. For overhead heat, follow the controller and heater manuals, then verify the accessible basking area with an appropriate independent instrument. Avoid placing a probe directly against a lamp unless the manufacturer calls for it.

    Use a separate thermometer beside the controlled point and at the cool end. An infrared thermometer reads surfaces, while a digital probe or logger reads local air or contact temperature. Neither replaces the other.

    Safety features worth paying for

    • A sensor-failure response that cuts heat rather than applying full power
    • Independent high-temperature shutdown or safety relay
    • Audible alarms that work without internet access
    • Settings retained after power loss
    • A replaceable probe and accessible fuse
    • A clear maximum load for the exact supply voltage
    • A grounded plug and properly rated outlet where required

    Remote notifications are useful but fragile. A router, cloud service, phone setting or email provider can fail while the thermostat keeps operating. Treat remote alerts as an extra path, not the primary safety control.

    How to size the electrical load

    Add the wattage of every device connected to one controlled output and stay below both the watt and current limits. Do not use a splitter merely because the total appears low. One probe cannot safely control two enclosures that heat at different rates.

    Inspect plugs, lamp holders and extension leads. Keep sockets off the floor and outside the enclosure. Use a drip loop anywhere water may run along a cable. Misting systems deserve their own circuit and routing plan; the reptile misting systems guide covers leak and electrical separation.

    Setup test before an animal moves in

    1. Install the heater, probe and independent sensors in the finished enclosure.
    2. Confirm control mode, target, differential and alarm thresholds.
    3. Run the enclosure through a full day and night cycle while empty.
    4. Record warm surface, warm-side air and cool-side air at regular intervals.
    5. Move the probe slightly to learn how sensitive the setup is to displacement.
    6. Disconnect the probe if the manual permits a failure test and confirm safe shutdown.
    7. Interrupt power, restore it and verify the controller returns to the correct schedule.

    A logger helps reveal a short overshoot that a spot check misses. Our coming guide to the best reptile thermometers and hygrometers explains placement and calibration without treating consumer accuracy claims as laboratory results.

    What we would buy

    For a valuable animal or a setup where overheating would happen quickly, the Herpstat’s safety hardware and history justify the price. For a display enclosure using a basking lamp, choose a reliable dimming controller that is sold and supported in your region. For a heat mat in a stable room, a simpler on/off model can be adequate when it is paired with independent monitoring and conservative settings.

    Do not save money by pairing a sophisticated heater with the wrong controller. A basic thermostat that matches the load is safer than an impressive control panel running in the wrong mode.

    Frequently asked questions

    Can one thermostat control two reptile enclosures?

    Only when it has independent outputs and a separate probe for each controlled zone. A power strip on one output does not create independent control.

    Do I still need a thermometer?

    Yes. The thermostat uses its own probe to control power. Independent instruments verify the basking surface, air gradient and cool side.

    Is dimming always better?

    No. Dimming is usually the right choice for visible heat lamps. Pulse or on/off control may suit mats, cables, ceramic heaters and cooling equipment better. Follow both manuals.

    Should the thermostat probe go inside the enclosure?

    The sensing tip usually must measure the controlled location, but the body and sockets stay outside. Secure the cable and follow the manufacturer’s placement instructions.

  • Best reptile misting systems: pumps, nozzles and controls compared

    Editorial note: this guide compares current system designs and published specifications. Water near electricity demands careful installation. Follow every pump, timer and enclosure instruction.

    Verdict: MistKing Starter v5 is the best expandable system for keepers who want fine mist, replaceable parts and room to add enclosures. Exo Terra Monsoon is easier to buy as a self-contained package for a small display setup. Budget pump kits can work, but nozzle consistency, timer control and replacement fittings matter more than the number of spray heads printed on the box.

    Terrarium misting pumps reservoirs tubing and nozzles compared

    Shortlist by use case

    Use case Starting point Reason
    Expandable multi-enclosure system MistKing Starter v5 Pressure pump, fine check-valved nozzle, standard tubing and support for up to ten nozzles
    One small display vivarium Exo Terra Monsoon Solo or Multi Reservoir, pump and controller packaged together
    Very small budget build Serviceable generic pressure kit Accept only if fittings, nozzles and timer can be replaced
    Humidity-triggered control Quality pump plus separate compatible hygrostat Useful only after sensor placement and drying behavior are understood

    Misting is not fogging

    A pressure misting system pushes water through fine nozzles and wets leaves and surfaces with droplets. An ultrasonic fogger creates suspended fog and can raise local humidity without providing the same drinking droplets. The two tools solve different problems.

    Many reptiles benefit from a wetting and drying cycle rather than a flat humidity number. Choose duration and nozzle direction by observing surface wetting, drainage and recovery. Do not use continuous fog to hide poor ventilation.

    Pump pressure and nozzle quality

    A strong diaphragm pump maintains a fine spray across several nozzles. Weak pumps often produce coarse droplets at the far end of a line. Check the supported nozzle count at the tubing length and layout you expect, not only at the pump outlet.

    Check valves reduce dripping after a cycle. A little residual water may still escape as line pressure falls. Position nozzles so a drip cannot pool on a heat source, electrical fitting or animal’s permanent resting spot.

    Fine mist nozzle wetting tropical leaves inside a gecko vivarium

    MistKing Starter v5

    The current starter package includes a 24V pump rated by MistKing for up to ten nozzles, one Value L nozzle, 15 feet of quarter-inch opaque tubing, reservoir bulkhead, filter, ST-24 seconds timer and clips. The nozzle is described as producing roughly 50-micron droplets. A reservoir itself is not included.

    That last detail matters. You must drill and seal a suitable container. The advantage is choosing capacity for the room instead of accepting a small built-in tank. Read the complete MistKing Starter review before deciding whether its extra installation work suits you.

    Self-contained systems

    Exo Terra Monsoon models combine reservoir, pump and controller in one unit. Setup is tidier for one or two enclosures, and there is no bucket bulkhead to install. The tradeoff is a smaller reservoir, proprietary packaging and less flexible expansion.

    Measure usable reservoir volume against the real schedule. Run the system into a container for one complete day, measure the water and calculate refill frequency. Never estimate consumption from nozzle count alone.

    Timer versus humidity control

    A seconds timer runs a known duration at known times. It is predictable and easy to audit. A hygrostat responds to a sensor, but the reading depends on location and temperature. A sensor in the mist cone can stop the system before the enclosure is evenly wetted; one in a dry vent can overrun it.

    Begin with timer control and observe several cycles. Add humidity logic only when it solves a measured problem. Pair the system with a logger from the thermometer and hygrometer comparison.

    Reservoir design

    Use a food-safe opaque container with a secure lid. Keep the intake above settled debris and large enough that the pump never runs empty between checks. Mark minimum and maximum levels.

    Place the reservoir below nozzle height when the manufacturer recommends it and add the specified bulkhead. Test the fitting outside the reptile room. A slow leak can travel along tubing and reach an outlet before it becomes visible.

    Water quality and maintenance

    Minerals clog fine nozzles and leave deposits on glass and plants. Use the water quality recommended by the manufacturer. Keep a reservoir filter, inspect it monthly and clean or replace nozzles by the documented method.

    Do not add disinfectant, supplement or medication to a misting reservoir unless every component manufacturer and veterinarian approves the practice. Fine aerosols change exposure routes, and residue can damage pumps or nozzles.

    Routing lines safely

    Cut tubing square, seat it fully and support long runs. Route lines away from lamp surfaces and hinges. Leave enough slack for maintenance without creating loops an animal can reach.

    Put the pump on vibration-damping feet or a dense pad that does not block ventilation. Keep timers, adapters and power strips off the floor. Use drip loops and ground-fault protection where local electrical rules require it.

    Nozzle placement

    Aim across foliage or textured backgrounds rather than directly at the animal. Watch the spray with the enclosure empty. Make sure water does not collect inside lamp guards, camera housings or ventilation channels.

    One nozzle can cover a small enclosure better than two badly aimed heads. Add nozzles only after checking dry areas. Multiple enclosures need balancing so the first nozzle does not receive a much stronger pattern than the last.

    Failure tests

    1. Run every fitting over absorbent paper and inspect for slow leaks.
    2. Disconnect power mid-cycle and verify what the timer does after restart.
    3. Let the reservoir approach its safe minimum and confirm the intake stays submerged.
    4. Block one nozzle briefly using the maintenance method and inspect pressure elsewhere.
    5. Run the maximum daily schedule and measure drainage.
    6. Check humidity recovery rather than only the peak.

    Record maintenance in the same system used for animal care. The guide to large reptile collection management explains how equipment tasks can live beside daily queues without cluttering animal histories.

    What to buy with the system

    • A properly sized opaque reservoir and lid
    • Spare tubing, clips and at least one nozzle tip
    • A shutoff valve or approved pressure-relief accessory where useful
    • Independent temperature and humidity logging
    • Leak sensors near the reservoir and pump for larger rooms
    • A cleaning kit and dated maintenance log

    Match the system to enclosure construction

    Glass, PVC, screen and converted furniture handle water differently. A glass terrarium may retain moisture but collect runoff along the front track. A screen enclosure dries quickly and can spray the wall behind it. PVC is easy to drill, yet every penetration still needs a clean route that cannot abrade tubing. Decide where water will land and where it will leave before choosing pump size.

    Drainage is part of the misting system. False bottoms, drain fittings and removable catch trays need enough capacity for a failed timer or stuck relay, not just a normal cycle. Put electrical strips above the lowest possible leak path and form drip loops in every power cable.

    Calculate daily water use

    Measure consumption instead of guessing. Fill the reservoir to a marked level, run the actual schedule for 24 hours and record the difference. Repeat during the warmest and coolest parts of the year because ventilation and drying time change. Daily use determines reservoir size, refill frequency and whether a weekend absence is realistic.

    A large reservoir reduces chores but also increases the amount available to leak. Choose capacity from measured demand plus a sensible reserve. For a collection, record refills in the same workflow used for feeding and equipment checks. Our guide to managing a large reptile collection explains how to make those checks visible to everyone in the room.

    Seasonal tuning without chasing humidity

    Room heating, air conditioning and outdoor weather can change enclosure drying time. Adjust one variable at a time: cycle length, cycle count or ventilation. Then observe several complete wet and dry periods. Constantly changing all three makes it impossible to know what worked.

    Use a separate logger to see the curve between cycles, but pair the graph with direct observation of substrate, leaves and animal behavior. The target is a repeatable water cycle suited to the species, not a flat humidity line. The temperature monitoring guide covers sensor placement and verification methods that also apply to humidity logging.

    Frequently asked questions

    How many nozzles do I need?

    Start with the fewest that wet the usable surfaces evenly. Pump capacity, tubing length, enclosure size and plant density all matter.

    Should misting be controlled by humidity?

    Not automatically. Timer control is often more predictable. Use a hygrostat only after proving sensor placement and understanding the enclosure’s drying cycle.

    Can tap water be used?

    Follow the system maker’s guidance and consider mineral content. Hard water can clog nozzles and leave deposits.

    Does misting replace a water bowl?

    No. Drinking strategy is species-specific, and many reptiles still need clean accessible water even when surfaces are misted.

  • Best reptile enclosure cameras: night vision without glass glare

    Editorial note: camera features and subscriptions change often. This guide uses current manufacturer specifications and enclosure-specific risks. Confirm storage, app requirements and privacy controls before buying.

    Verdict: Wyze Cam v4 is the best value starting point for a wired reptile enclosure camera when local microSD storage and a wide view matter. Tapo’s compact indoor cameras are a sensible alternative for simple local recording. A pan-and-tilt model can cover a large room, but a fixed camera usually causes fewer reflections when shooting through glass.

    The hardest problem is not resolution. It is placing the camera where infrared light does not bounce off glass, the cable cannot create an escape gap and the animal still has a private retreat.

    Compact camera safely mounted outside a planted gecko enclosure

    What to compare

    Feature Why it matters in an enclosure
    Field of view A close camera needs a wide lens to see the full habitat
    Infrared control Built-in IR reflects from glass and can wash out the animal
    Local storage Reduces subscription dependence and keeps long clips on site
    Continuous recording Motion detection often misses slow reptile movement
    Mounting The camera must stay aligned without exposed adhesive or escape gaps
    Status lights and spotlight Bright LEDs can disturb night conditions
    Privacy controls An indoor camera can capture people, voices and room routines

    Wyze Cam v4

    Wyze lists 2560 by 1440 video, a 115.8-degree diagonal field of view, 850 nm infrared LEDs, color night vision, a 6-foot power cable and local microSD support. It uses 2.4 GHz Wi-Fi and can record to local storage without making every clip a cloud purchase.

    The compact body and broad view suit an enclosure, but the spotlight, siren, status light and two-way audio should be disabled unless there is a specific reason to use them. The published IP65 rating does not mean the power adapter and indoor cable routing belong in a wet vivarium.

    Through glass, turn the camera’s own IR off and test with room-side infrared illumination placed so its reflection misses the lens. Color night vision needs some ambient light. Do not add visible night lighting merely to improve video without considering the animal.

    Tapo compact indoor cameras

    TP-Link Tapo C100 and related fixed models are inexpensive, support local microSD recording and provide infrared night vision. Their fixed bases are easy to mount on a shelf. Check the current card limit and whether continuous recording remains available without a subscription on the exact model.

    The same glass problem applies. A cheaper camera with IR disabled and carefully placed external illumination can outperform a premium model pressed against reflective glass.

    Night camera view before and after reducing infrared glare on terrarium glass

    Pan-and-tilt cameras

    A pan camera such as Wyze Cam Pan can watch several enclosures or follow a large habitat. Movement tracking sounds useful, but motors can attract attention, create noise and lose the desired framing. Reflections also change as the lens turns.

    Use pan-and-tilt for a room overview or a very large enclosure. Use a fixed camera for a close glass-front view where alignment matters more than coverage.

    Inside or outside the enclosure?

    Outside is safer in most cases. The camera avoids humidity, heat, waste and direct animal contact. Power stays outside too. The price is glass reflection and a little lost detail.

    An internal camera should be used only when its environmental rating, cable routing and mount are appropriate. A snake can wrap around a cable or push a loose camera. A gecko can soil the lens. An exposed microSD door is not a waterproof seal.

    Never widen a cable port so far that it becomes an escape path. Never leave a USB cable pinched in a sliding door. If the safe route is not obvious, keep the camera outside.

    How to remove night-vision glare

    1. Clean both sides of the viewing glass.
    2. Place the lens close and square to the glass, with a dark surround.
    3. Turn off the camera’s internal infrared LEDs.
    4. Move an external IR illuminator to the side or above so its reflection does not return to the lens.
    5. Test with enclosure lights off and room lights in their normal state.
    6. Check every corner for a bright reflection or hidden area.

    Black fabric or a small hood around the lens can block room reflections, but keep fabric away from heaters and ventilation. A removable foam shade on the room side is safer than adhesive inside the habitat.

    Motion detection misses reptiles

    Many cameras are tuned for people, pets and fast movement. A snake moving slowly across a warm hide or a gecko remaining still for minutes may not create an event. Motion zones and sensitivity help, but they should be tested with the actual animal routine.

    Use continuous local recording when the question is behavioral review. Event clips are fine for alerts, not for proving that nothing happened. Large memory cards need endurance ratings and periodic playback checks.

    Storage and subscriptions

    Local microSD is the simplest way to avoid monthly cloud cost. Check whether the camera supports continuous or event-only recording, how old files are overwritten and whether clips can be exported without removing the card.

    Cloud plans add off-site history and smarter detection, but they also upload indoor video. Read retention and deletion settings. A plan can change after the hardware is installed, so buy a camera that remains useful with local storage.

    Privacy in a reptile room

    A camera aimed at an enclosure may capture people, conversations, veterinary paperwork and computer screens. Disable the microphone if audio is unnecessary. Use a unique account password, multi-factor authentication and the smallest sharing list.

    Do not publish a live stream that reveals home routines or valuable animals. If a clip is shared, trim it and inspect the background. The principles in the data and privacy checklist apply to camera apps too.

    Power and heat safety

    Route the low-voltage cable outside the habitat and keep the mains adapter away from misting. Use a drip loop. Do not place a camera or cable on a lamp guard, radiant heater or warm ventilation grille.

    Measure the mounting location during the hottest part of the cycle and compare it with the camera’s operating range. The temperature monitoring guide explains how to log a local hot spot rather than guessing from the room temperature.

    Seven-day camera test

    1. Mount outside the finished enclosure with temporary safe supports.
    2. Check the full field in daylight and darkness.
    3. Disable lights, siren and audio that are not needed.
    4. Test internal IR on and off, then adjust external illumination.
    5. Verify motion detection against slow movement.
    6. Record continuously to microSD and export a sample clip.
    7. Disconnect Wi-Fi and power separately to learn recovery behavior.
    8. Inspect cable, heat, condensation and privacy settings.

    Which camera should you buy?

    Choose Wyze Cam v4 for a compact wide view, detailed video and flexible local storage. Choose Tapo for a simple budget camera in an ecosystem you already use. Choose a pan camera for room coverage, not because tracking sounds impressive.

    Skip the camera when a safe mount or cable route would compromise the enclosure. Monitoring is useful only when it does not add a new hazard.

    Mounting positions that preserve useful detail

    Start outside the enclosure at a slight angle to the glass. A straight-on view is easy to frame but more likely to show room reflections. Keep the lens close enough to reduce reflections without allowing the camera body to touch a warm panel or block ventilation. Use a stable shelf or mechanical mount rather than adhesive alone near heat and humidity.

    Frame the locations that answer a question: the basking shelf, water bowl, hide entrance or nesting area. One wide shot rarely shows all of them well. Before adding a second camera, move the first for a week and compare which view produces information you actually use.

    Build a review routine for recordings

    Continuous footage becomes useless if nobody reviews it. Choose short windows tied to behavior, such as the first hour after lights out or the period after feeding. Save only clips that document a change, equipment issue or health observation. Add the date and animal identifier to the filename.

    A camera timeline is not a husbandry record by itself. Link important clips from the animal’s existing notes and record what the footage changed. For structured records, compare the workflows in our guide to the best reptile tracking apps.

    Network isolation and account security

    Use a unique password and enable multi-factor authentication when the camera service offers it. Keep firmware and the mobile app current. A separate guest or IoT network can limit what a compromised device reaches, provided the camera still receives updates and the phone can connect when needed.

    Review shared-account access after staff, sitters or family members no longer need it. Disable unused cloud trials and confirm whether local recording continues without a subscription. If the camera watches more than the enclosure, reposition it or define privacy zones before storing footage.

    Frequently asked questions

    Can a camera see through terrarium glass at night?

    Yes, but built-in IR often reflects into the lens. Disable it and reposition external infrared illumination.

    Should the camera be inside the enclosure?

    Usually no. External mounting protects the camera and animal and keeps power outside.

    Do I need a subscription?

    Not when the chosen model supports the required local microSD recording. Cloud features and smart detection may still require a plan.

    Will motion alerts detect a snake?

    Not reliably. Test sensitivity and use continuous recording when slow behavior matters.

  • Best thermometers and hygrometers for reptile enclosures

    Editorial note: specifications below come from current manufacturer documentation. Consumer sensors can drift, especially in persistent high humidity, so compare them with a known reference before trusting alarms.

    Verdict: The best reptile thermometers and hygrometers depend on enclosure conditions. SwitchBot Meter Plus is the strongest value for a readable display, long local history and CSV export. SensorPush HT.w is the better fit for splash-prone tropical setups. Govee H5075 is an inexpensive Bluetooth logger for drier enclosures, while a simple probe display remains useful as a permanent local check. Use at least two measurement points and keep temperature control on a separate thermostat.

    Digital thermometers and hygrometers compared beside a planted terrarium

    Our shortlist

    Device type Best use Main limitation
    SwitchBot Meter Plus Large display, app history, CSV and optional remote alerts Remote alerts require a hub; body is not designed for direct spray
    SensorPush HT.w Compact logging in humid or splash-prone setups No built-in display; remote access requires a gateway
    Govee H5075 Low-cost Bluetooth history and CSV in ordinary indoor humidity No native Wi-Fi; high humidity and enclosure walls deserve testing
    Wired digital probe display Permanent warm-side or cool-side glance Often no history, alarm or published accuracy detail
    Infrared thermometer Basking surface spot checks Does not measure ambient air or continuous trends

    Measure a gradient, not a single number

    A reptile enclosure should let the animal move between conditions. One sensor in the center hides the warmest accessible surface and the coolest retreat. Place one air sensor on the warm side at animal height and another at the cool side. Add a surface method for the basking point.

    Do not place the sensor directly on glass, against a heater or in the mist stream unless that is the specific condition being tested. A display mounted outside with a probe inside can be easier to read and keeps batteries away from the animal.

    The existing guide to reptile temperature monitoring tools explains the roles of thermostat probes, air sensors, infrared thermometers and loggers.

    SwitchBot Meter Plus

    SwitchBot publishes typical accuracy of ±0.2°C between 0 and 65°C and ±2% RH between 10 and 90% RH at 25°C. The Meter Plus has a three-inch display, Bluetooth range quoted up to 120 meters in open conditions, about 68 days of onboard history and CSV export. A SwitchBot hub adds remote notifications and cloud history.

    The large screen is genuinely useful in a reptile room. You can spot a problem without opening an app. Local storage also means a phone can reconnect later and collect missed readings. Test sync time before leaving the sensor unattended for weeks.

    Published open-air range will not survive walls, rack material and water unchanged. Put the sensor in the final enclosure, close every door and test from the place where the phone or hub will normally sit.

    Warm-side and cool-side sensor placement in a reptile enclosure

    SensorPush HT1 and HT.w

    SensorPush stores readings on the sensor and transfers them by Bluetooth. The HT1 records at one-minute intervals and holds more than two weeks of data. The company lists typical accuracy of ±0.3°C and ±3% RH in the central humidity range. It also warns that prolonged exposure above 80% RH may create a temporary positive humidity offset.

    For tropical enclosures, the water-resistant HT.w is the more sensible starting point. Its seals and protective membrane are designed for splashes, though water-resistant does not mean the sensor should sit under a nozzle. The optional G1 gateway provides remote access for multiple sensors.

    SensorPush has no built-in display, so pair it with a visible local gauge or accept that every check happens in the app. Its compact body makes placement easier, but protect it from chewing, crushing and direct contact with the animal.

    Govee H5075

    Govee H5075 combines a local LCD, Bluetooth app history, alert thresholds and CSV export. The current product page says it uses two AAA batteries, lasts about six months and connects up to 50 meters in open conditions. It does not have native Wi-Fi.

    That makes it a good budget logger for a snake room or drier display enclosure. It is less convincing when the sensor will remain near saturation or receive spray. The detailed Govee H5075 reptile review covers placement, Bluetooth behavior and export checks.

    Why cheap analog dials are hard to trust

    Small stick-on analog gauges often have no useful accuracy specification and respond slowly. Adhesive can also fail in heat and humidity. If one is already installed, compare it at several stable conditions rather than assuming the pointer is correct.

    A digital number can be wrong too. The advantage is easier comparison and, on logging models, a visible trend. Buy published accuracy, calibration support and replaceable batteries before decorative packaging.

    Keeper comparing reptile temperature and humidity sensors in a stable room

    Humidity is the harder measurement

    Relative humidity changes when temperature changes, even if the amount of water vapor stays similar. A sensor close to a warm lamp can show a lower RH than one in a cooler hide. That does not automatically mean either device is faulty.

    Misting creates a sharp local spike, followed by drying. A sensor in the spray cone reports droplets more than enclosure climate and may become saturated. Place it where the animal spends time, shield it from direct mist and study the recovery curve.

    Persistent high humidity can shift consumer sensors. Compare two devices periodically and investigate widening disagreement. Do not use one unverified number to diagnose respiratory or shedding problems; record conditions and consult a qualified reptile veterinarian when health is involved.

    How to compare accuracy at home

    1. Place all sensors together in a stable room away from sunlight, vents and heaters.
    2. Wait several hours, not several minutes.
    3. Record temperature and humidity from every device.
    4. Repeat at a second condition that still falls inside the published range.
    5. Use calibration offsets only after the difference is repeatable.
    6. Label each device with the date and offset.

    A salt test can create a reference humidity point, but contamination, temperature instability and poor sealing easily spoil the result. Follow a reliable procedure and do not treat a kitchen experiment as laboratory certification.

    Logging and alerts

    History should answer three questions: how high, how low and for how long. A daily minimum and maximum can hide a ten-minute overheat. Inspect the actual curve and learn the sensor’s sampling interval.

    Set alerts wide enough to avoid constant nuisance notifications but narrow enough to catch a real equipment failure. Test them. Put the phone in Do Not Disturb, disconnect Bluetooth and turn off the hub to learn which alerts still arrive.

    Export a CSV before relying on years of app history. Confirm timestamps, units and sensor names. The data export and privacy checklist applies to sensor apps as much as husbandry trackers.

    Placement by enclosure type

    Glass display enclosure

    Keep the display where it can be read without opening doors. Place sensors away from cold exterior glass and direct lamp radiation. Check night-time cooling near the lower vents.

    PVC enclosure

    Wireless signals may behave better than through a metal rack, but foil insulation and dense shelving can still reduce range. Secure sensors so a strong snake cannot push them into the water bowl.

    Rack system

    Do not assume one room sensor represents every tub. Measure representative upper, middle and lower positions, then move a logger periodically to audit variation.

    Tropical vivarium

    Choose a splash-resistant body, keep it outside the nozzle cone and watch recovery after misting. The misting system guide covers nozzle placement and drying cycles.

    A practical monitoring kit

    For one enclosure, use a reliable thermostat, two air temperature sensors, one humidity sensor where relevant and an infrared thermometer for surfaces. A combined thermo-hygrometer can cover one air point, but it does not remove the need to check the cool end.

    For a room, add a logger outside the enclosures. Room temperature explains changes seen across several habitats and can warn when HVAC failure is driving every controller harder.

    Frequently asked questions

    Can a hygrometer control a mister?

    A monitor only reports conditions. Automatic control needs a compatible hygrostat or controller, and timer-based misting is often easier to reason about than chasing a single RH setpoint.

    Is Bluetooth enough for alerts?

    Only while the phone or gateway remains in range and the app is allowed to run. Test the final placement and notification settings.

    How often should sensors be checked?

    Compare them when new, after battery changes, after prolonged high humidity and whenever two devices begin to disagree.

    Can I put a sensor inside a snake enclosure?

    Yes if it is securely mounted, has no exposed adhesive or loose cable, cannot be swallowed or crushed, and stays within the manufacturer’s environmental limits.

  • Best snake tracking apps for feeding, weight and sheds

    Verdict: The best snake tracking apps make refusals, sheds and weight changes easy to record without turning routine care into paperwork. Snake keepers need a clean timeline more than a busy dashboard.

    Snake keeper using a tracking app beside a corn snake enclosure

    What a snake tracking app should handle

    Feeding records need more than a yes or no field. Useful entries include prey type, prey size, feeding method, refusal and any note that explains an unusual response. The history should remain easy to scan months later.

    Shed logging also needs context. A date, complete or incomplete result and a short observation are usually enough. Keepers who track humidity may want to compare environment readings with a difficult shed, but an app should not imply medical causation from a single event.

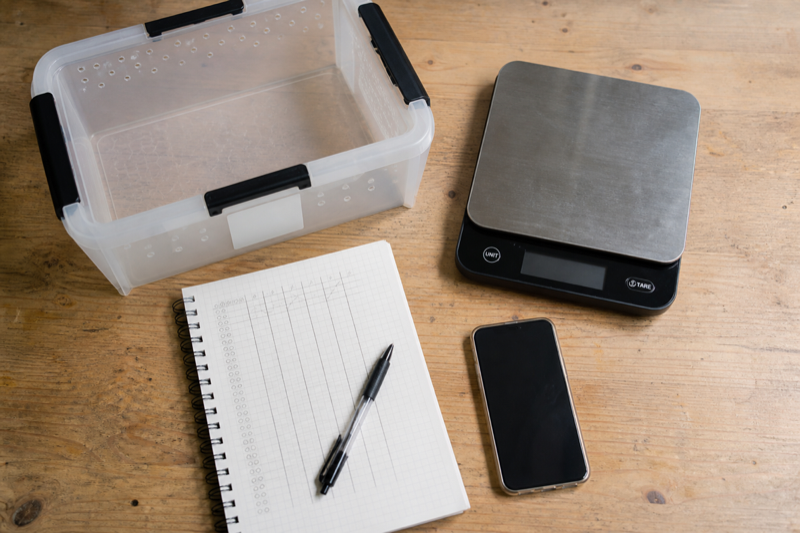
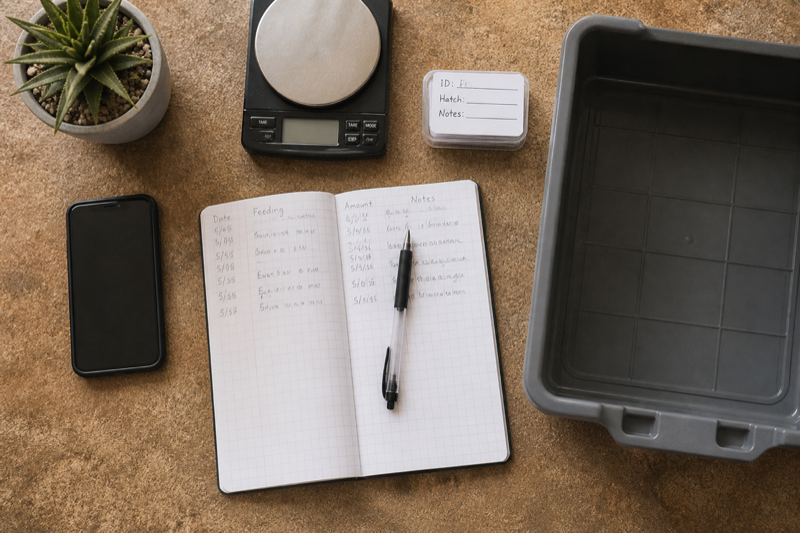
    Snake weighing kit with scale secure tub notebook and phone

    Weight trends without false alarms

    A graph is helpful when its source entries are visible. Check whether you can correct a typo, change units and see the original measurement date. A smooth line can hide messy data, so the underlying log still matters.

    For one snake or a collection

    One-animal homes can choose for speed and clarity. Collection keepers need better navigation. Search, filters and labels become essential once similar names and morphs fill the list. Test the app with at least a dozen sample animals before committing.

    Before you migrate

    Shortlist for snake keepers

    For a single snake, Reptile Rocket and other simple profile trackers can cover the basics without turning each feeding into data entry. Husbandry.Pro becomes more attractive as the number of animals rises because it adds collection, task and breeder workflows. Reptile Scan is the better match when labels and rack-side scanning are part of the routine.

    A general pet app can still work, but it needs a true refusal event. Writing “did not eat” in a note makes later filtering harder. The same applies to sheds. Complete, incomplete and pre-shed observations should not collapse into one undated text box.

    A practical snake record

    Keep feeding entries modest. Date, prey type, prey size or weight, accepted or refused, and a short note usually cover the useful ground. Record body weight on its own schedule rather than every time food is offered. That keeps the chart readable and avoids handling a snake simply to satisfy the app.

    Shed records are most useful when they show the beginning of a cycle, the completed shed and whether retained skin or eye caps were seen. Add a photo only when it helps document a change. A tracker is a memory aid, not a diagnosis engine.

    Test the timeline before committing

    1. Backdate several feedings, including two refusals.
    2. Add weights in the unit you normally use.
    3. Record a shed and a husbandry change on the same date.
    4. Find the last accepted meal without opening every note.
    5. Export the record and check dates, units and animal IDs.

    That final search is revealing. A decorative dashboard may show totals while hiding the answer you need: what happened immediately before the animal stopped eating?

    FAQ

    Does a feeding refusal need a reminder?

    Not automatically. A missed meal can be normal in context. Use reminders for your planned recheck or next offer, not as a medical alarm.

    Can an app predict sheds?

    It can estimate from past intervals, but individual cycles vary. Treat predictions as prompts to observe the animal and review humidity.

    Is a spreadsheet better?

    A spreadsheet wins on customization and portability. An app wins when fast phone entry and reminders keep you consistent.

    For a wider view: Compare the broader options in our reptile tracking app guide, then use the feeding tracker comparison to test refusal and prey-size workflows.

  • Best reptile apps for breeders and large collections

    Verdict: The best reptile apps for breeders reduce repeated work. A breeder gains more from reliable identity, fast batch entry and clean exports than from decorative charts.

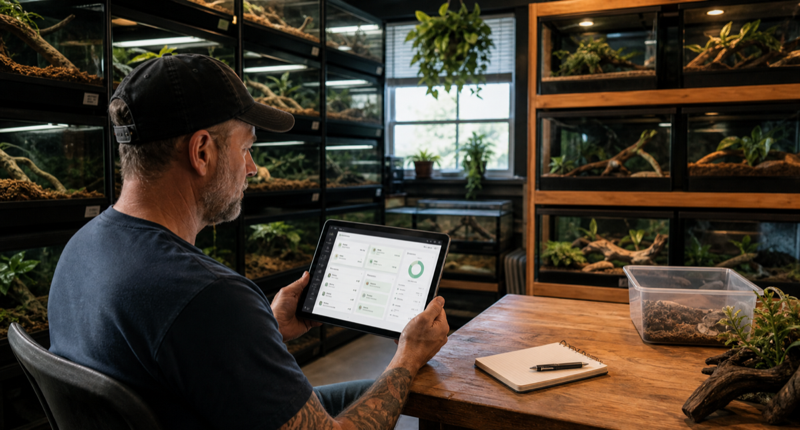
    Breeder reviewing a reptile collection dashboard on a tablet

    Why breeder workflows are different

    A collection of twelve animals already exposes friction that a one-pet demo hides. The app must keep similar animals distinct, move quickly between profiles and make routine events easy to repeat. Search should work with names, internal IDs and enclosure labels.

    Breeding records add pairings, clutches, hatch dates and lineage. Those fields are useful only if they remain connected to each animal and can leave the platform in a sensible export.

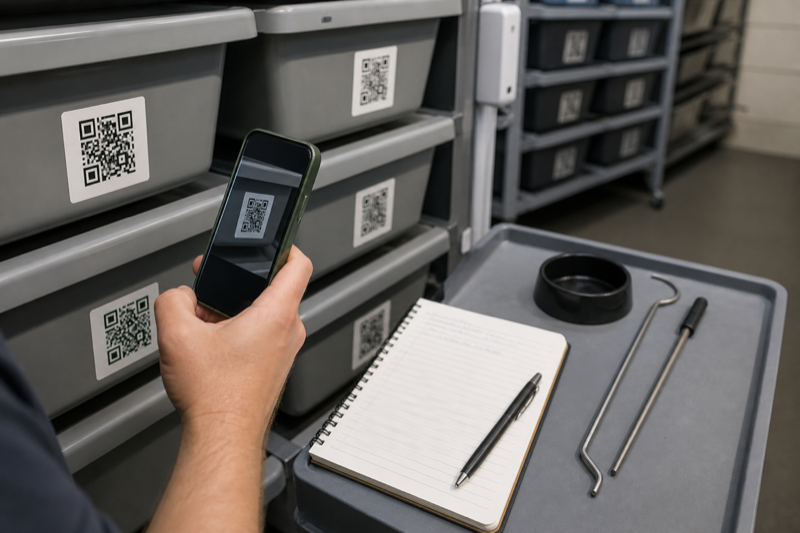
    Keeper scanning a QR label in a reptile collection workflow

    Batch tools to test

    • Record the same event for several animals
    • Filter by species, group or status
    • Print or scan stable identity labels
    • Find overdue tasks without duplicate reminders
    • Export animals and events with consistent IDs

    Reliability comes before speed

    Batch entry is risky if a tap applies an event to the wrong animal. Test cancellation, undo and edit behavior. Then close the app, reopen it and confirm that every record is still attached to the intended profile.

    How we will rank breeder apps

    Best choices for a breeder workflow

    Husbandry.Pro Next and Reptile Scan are the two clearest starting points for a serious comparison. Husbandry.Pro publishes tiered plans from a small free account through breeder, commercial and institutional levels. Its higher plans add breeding systems, QR scanning, sales tools, multiple users and stronger account controls. Reptile Scan combines web management with mobile scanning, clutch records, racks, reports and batch registrations.

    The distinction is less about which list is longer and more about where work happens. Reptile Scan expects much of the setup and administration to happen in its web console, while the phone app is built for quick actions. Husbandry.Pro Next positions the phone, tablet and desktop as parts of the same broader workspace.

    Collection features that save real time

    • Permanent animal IDs that survive name changes and sales
    • Rack and enclosure locations that can be updated in batches
    • Pairing, clutch and offspring links that remain traceable
    • Feeder inventory and planned feeding lists
    • Role-based access for staff or family helpers
    • Export files that can be opened without the original service

    Batch actions need guardrails. The screen should show exactly which animals are selected, what event will be added and how to undo a mistake. Saving thirty cleanings to the wrong rack is faster than paper, but it is not progress.

    Run a breeder-sized trial

    Do not test with one animal. Create at least twelve sample profiles across two racks, add a pairing and follow a clutch through laying, incubation and offspring IDs. Move several animals, record a batch feeding and invite a second user if the plan supports it. Then export everything.

    Also check what happens when an animal is sold. A good system preserves your history, creates a useful transfer record and removes the animal from daily task lists without erasing it.

    FAQ

    Are QR codes required?

    No. They are useful when enclosure identity is the slow part of logging. Small collections may be faster with search or favorites.

    How much history should a breeder keep?

    Keep enough to document identity, care, breeding and transfers under the rules that apply to your animals and location. The app should not decide that policy for you.

    Plan the workflow: Our guide to managing a large reptile collection covers IDs and room routines. The pricing comparison helps estimate the cost as animal numbers grow.

  • Best reptile tracking apps: what to compare before you switch

    Verdict: The best reptile tracking apps are the ones you will still use after the novelty wears off. Fast event entry, clear animal histories and a usable export matter more than a long feature list.

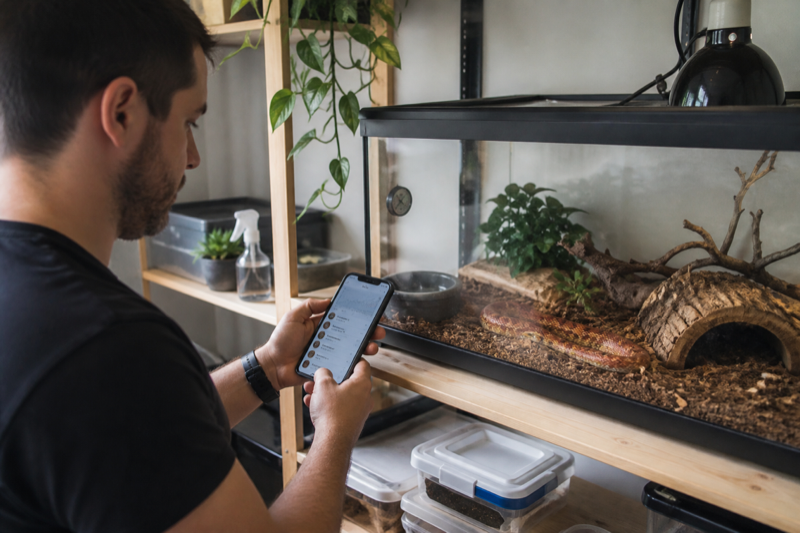
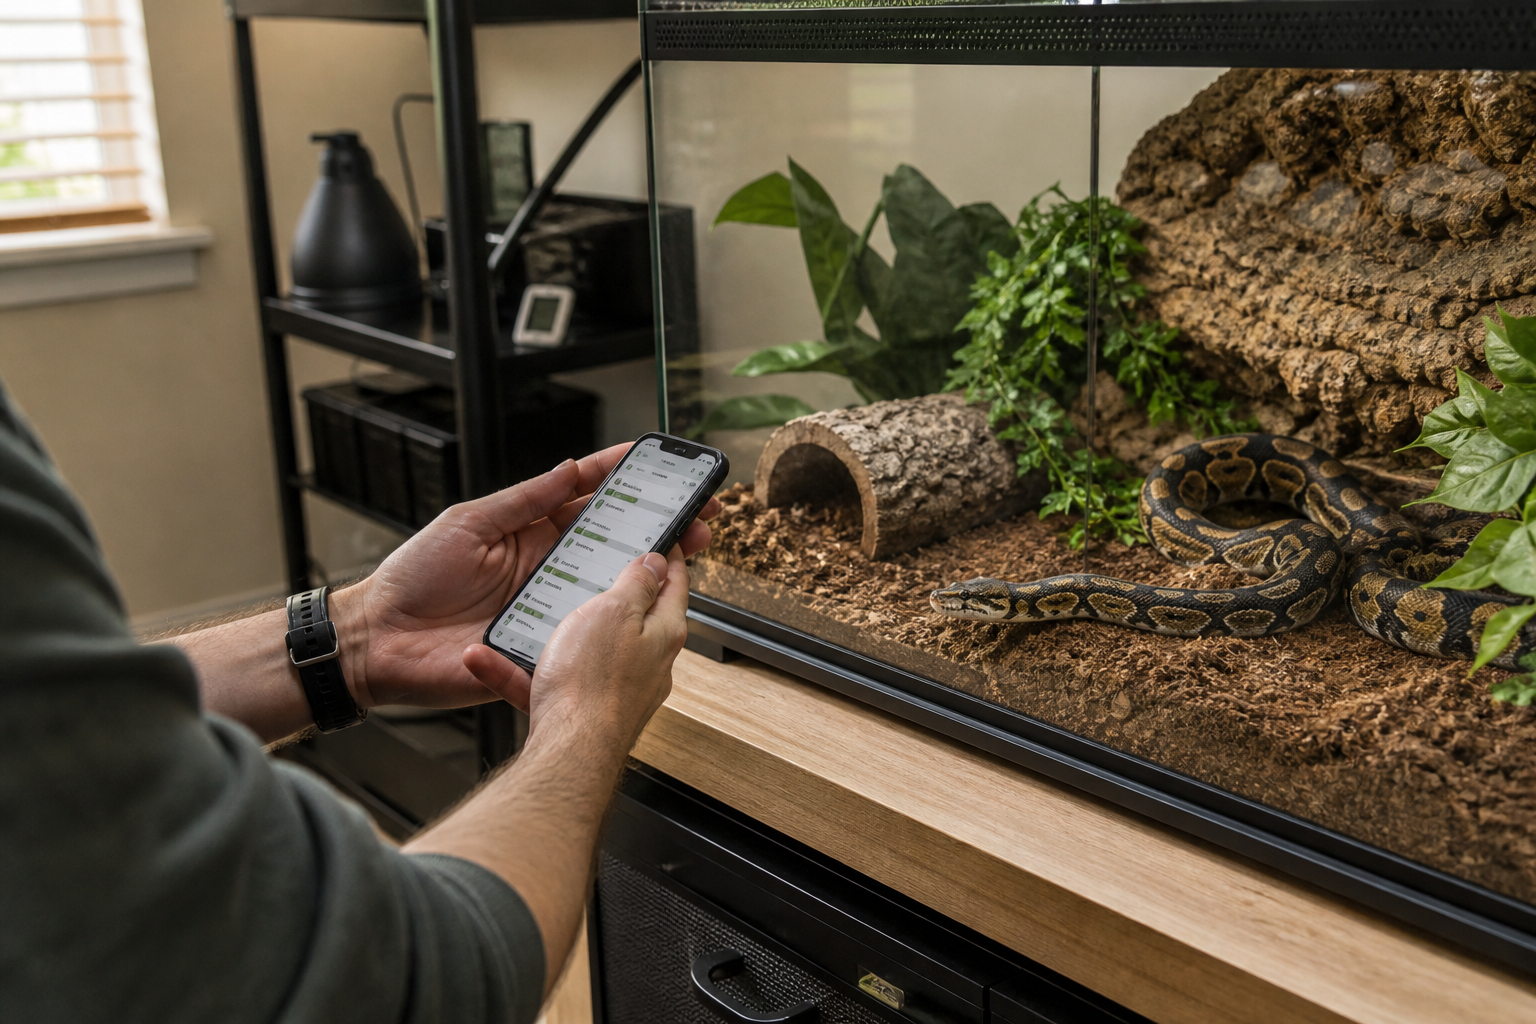
    Keeper checking a reptile tracking app beside a ball python enclosure

    How to compare the best reptile tracking apps

    Start with one ordinary week. Log a feeding, a refusal, a weight, a shed and a reminder. Then try to find each entry again. A polished dashboard is pleasant, but it cannot rescue a slow daily workflow.

    Multi-animal keepers should count taps. If switching from one animal to another takes too long, small records get skipped. Breeders also need filters, batch actions and reliable identity labels. Someone with one gecko may prefer a much simpler app.

    Reptile record keeping setup with phone notebook scale and handling tub

    Features worth testing

    • Feeding entries that include refusals and prey details
    • Weight history with dates and units
    • Shed, medication and observation notes
    • Reminders that can be edited or dismissed
    • CSV or another usable export format
    • Clear account deletion and privacy controls

    Export deserves a real test. Download a copy, open it on a computer and check whether animal names, dates and event types survive. A button labeled export is not enough if the file is incomplete or unreadable.

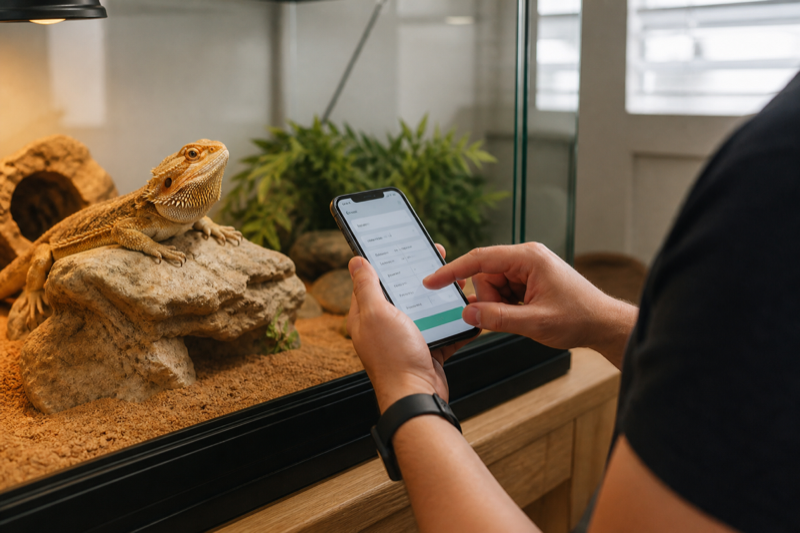
    Keeper recording a reptile feeding event on a phone

    Free plans and subscriptions

    A free plan can work well for one or two animals. Limits become more noticeable when you add photos, reminders or a larger collection. Before paying, check whether the subscription covers every device you use and whether you can leave without losing access to your records.

    Our picks by keeper type

    There is no single winner for every collection. Husbandry.Pro Next makes the most sense when you need breeder tools, multiple users or room to grow. Reptile Scan is the strongest fit for enclosure-side QR workflows and batch records. Reptile Rocket is easier to justify for a small personal collection, especially if spreadsheet export matters. Terrarium Tracker is worth a look when you want a lighter journal for mixed terrarium animals.

    Those labels are starting points, not a substitute for a trial. Add two sample animals first. Record a meal, a refusal, a weight, a shed and a health note. Set one reminder, correct one mistaken entry and export the result. A useful app should make all seven jobs obvious.

    What separates a good tracker from a feature list

    Speed matters because most records are created while you are holding a tub, prey tongs or a scale. Look for defaults that remember common prey, units that remain consistent and a timeline that does not bury refusals. Editing is just as important as entry. One wrong decimal point can ruin a weight chart if the correction is difficult to find.

    For multiple animals, test search and identity safeguards. Names alone are fragile when a collection includes siblings or repeated morphs. Stable IDs, enclosure locations and clear profile photos reduce mistakes. Breeders should also check clutch links, pairing history, inventory and whether helpers can work without sharing the owner password.

    How we would choose

    • One or two pets: favor fast logging and a low ongoing cost.
    • A growing collection: prioritize export, filters, batch actions and reliable IDs.
    • A breeding room: add clutch records, label printing, team access and auditability.
    • Mixed reptiles and invertebrates: confirm that custom event types do not force every animal into a snake-shaped workflow.

    Questions people ask before switching

    Is a free reptile app enough?

    Often, yes, for a small collection. The catch is usually an animal limit, monthly event cap, advertising or restricted export. Test the limit you are most likely to hit.

    Should temperature data live in the same app?

    It can be convenient, but care records and safety control are different jobs. A tracking app does not replace a thermostat, independent thermometers or an alarm plan.

    What should I export?

    At minimum: animal identifiers, dates, event types, notes, measurements and units. Photos and documents may need a separate download.

    Keep comparing: The breeder app guide looks at larger collections, while the feature index helps turn a long feature list into a practical shortlist.

  • Best free reptile apps: where the limits really show

    Verdict: The best free reptile apps cover basic records without trapping them behind a later paywall. Free is useful, but only when the animal limit, backup policy and export options match your plans.

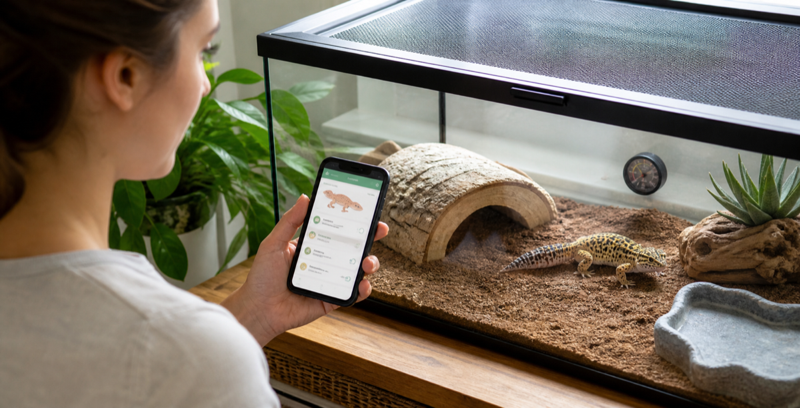
    Keeper using a free reptile app beside a leopard gecko enclosure

    What the best free reptile apps should include

    A workable free plan needs animal profiles, feeding records, weight entries and a simple history. Reminders are helpful, though a phone calendar can cover that job if the app limits them.

    Phone calendar and thermometer beside a reptile enclosure

    Limits that change the decision

    Animal count is the obvious limit. Photo storage, device sync and export are easier to miss. Some limits only appear after you have invested time in setup, so read the upgrade screen before entering months of history.

    Advertising also matters. A small banner is different from a full-screen interruption during routine logging. Privacy conscious keepers should check whether an account is required and what data the app collects.

    Keeper comparing a generic free and paid reptile app plan

    When paying makes sense

    A subscription may be reasonable for reliable sync, larger collections or responsive support. Calculate a full year, not the monthly headline. Then confirm that cancellation does not block access to existing records.

    Free plans worth comparing

    Husbandry.Pro Next currently lists a free Personal plan for up to five animals. Reptile Scan lists a free plan for up to ten reptiles, two clutches and 100 registrations per month. Reptile Rocket allows one animal without a subscription. These limits are different enough that “free” does not describe the same experience.

    A keeper with one snake may never care about a five-animal ceiling. Someone logging daily conditions can hit an event cap long before reaching ten animals. Count your normal entries for one month before choosing.

    The hidden cost of a free account

    Advertising is easy to see. Lock-in is not. Check whether export works on the free tier, whether photos can be downloaded in bulk and whether old records remain readable after a subscription ends. A free plan is much less attractive if leaving means copying years of notes by hand.

    Pay attention to reminders too. Some free trackers record history but reserve useful notifications, charts or cloud backup for paid plans. That can still be fair, provided the boundary is obvious before you invest time.

    When a spreadsheet is the better free tool

    Google Sheets or another spreadsheet remains a strong option if portability and custom fields matter more than quick entry. A simple form can send feeding, shed and weight entries into a table without exposing the whole sheet beside an enclosure. Spreadsheets become awkward when photos, recurring tasks, clutches and multiple helpers enter the picture.

    Free-plan checklist

    • Animal and monthly record limits
    • Export availability and file type
    • Cloud backup or local-only storage
    • Ads, notification limits and photo storage
    • What remains accessible after cancellation
    • Account deletion instructions

    FAQ

    Should I avoid subscriptions?

    No. Ongoing hosting and support cost money. The better question is whether the paid limit matches your collection and whether your data remains portable.

    Can I use two free apps?

    You can, but split records are harder to search and back up. One dependable system plus an independent export is usually cleaner.

    Before choosing a free plan: Check the limits in our reptile app pricing comparison and review the data export and privacy checklist before entering a full collection.